Painting - A to Z
Moderators: dnichols, GHQ, Mk 1
-
dougeagle
- E5
- Posts: 726
- Joined: Thu Mar 23, 2006 10:07 am
- Location: Northern Alberta
-
Ritter
- E5
- Posts: 528
- Joined: Tue Nov 23, 2004 10:59 am
- Location: BC, Canada
- Contact:
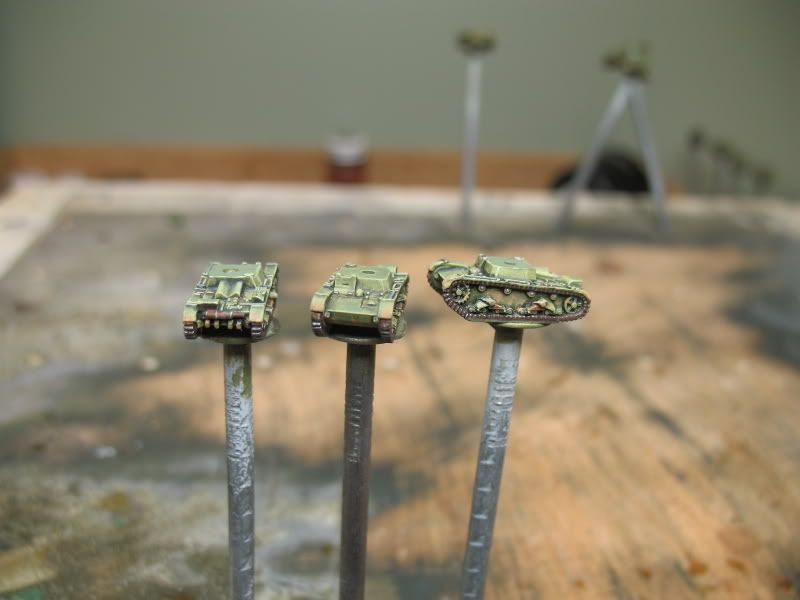
HIGHLIGHTING/DRYBRUSHING:
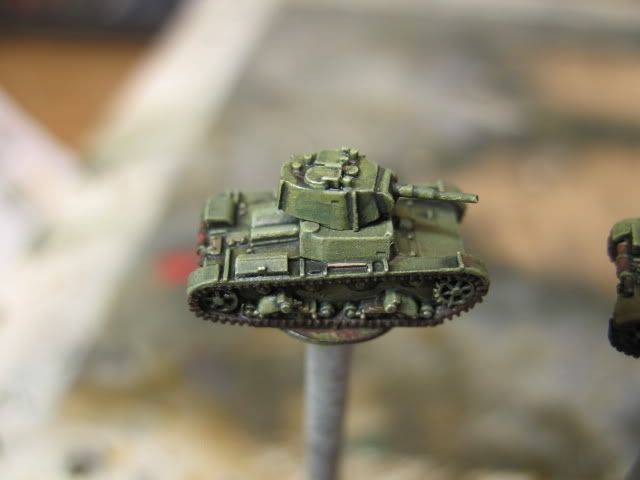
The next step on our tiptoe thru the turpentine is the highlighting. This is almost always overdone and tends to be a 'last resort' to save a crummy wash job. If your wash worked out ok, then all you really need to do is LIGHTLY drybrush a lightened base color over the raised detail. Without the Drybrushing, models will always look a tad dark and uninteresting on the game table. These pics almost make the minis look too light but trust me - they will look awesome when you are done. For the T-26s, I used Humbrol 150 mixed with a little white. This color mimicked the mixed base of Humbrol 105 and 117.

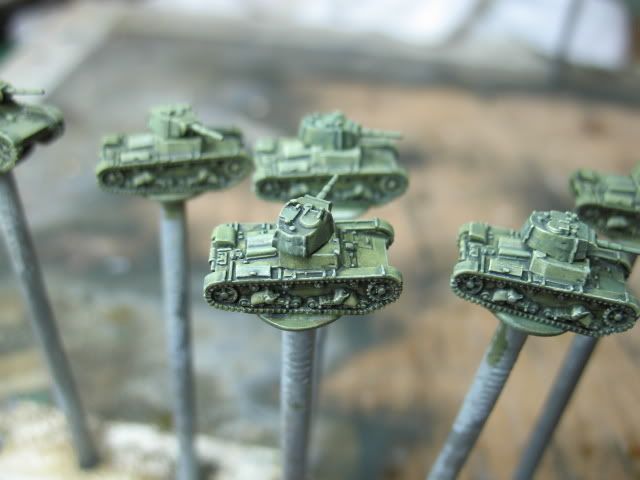
RUST:
These next steps take your model to ...'A ho... nutha... levow!'
Adding rust stains will give your model a look of realism. Start with a very thinned rust mixture and simply touch off a few areas where rust would accumulate. Dont overload your brush - just enough to flow easily.
Also, if you have a steady hand, you can add streaks to your sides and fenders. I use a 2/0 brush for this work.
Next: Final shadows and tracks!
The next step on our tiptoe thru the turpentine is the highlighting. This is almost always overdone and tends to be a 'last resort' to save a crummy wash job. If your wash worked out ok, then all you really need to do is LIGHTLY drybrush a lightened base color over the raised detail. Without the Drybrushing, models will always look a tad dark and uninteresting on the game table. These pics almost make the minis look too light but trust me - they will look awesome when you are done. For the T-26s, I used Humbrol 150 mixed with a little white. This color mimicked the mixed base of Humbrol 105 and 117.
RUST:
These next steps take your model to ...'A ho... nutha... levow!'
Adding rust stains will give your model a look of realism. Start with a very thinned rust mixture and simply touch off a few areas where rust would accumulate. Dont overload your brush - just enough to flow easily.
Also, if you have a steady hand, you can add streaks to your sides and fenders. I use a 2/0 brush for this work.
Next: Final shadows and tracks!
-
dougeagle
- E5
- Posts: 726
- Joined: Thu Mar 23, 2006 10:07 am
- Location: Northern Alberta
Cool Ritter, those look awesome.
Maybe somebody can help me here.
I just airbrushed my Shermans Vallejo Model Air #19- Camo. Dark Green, which is close too the Bronze Green color on the Model Color chart #897 (pos#98). I plan on doing the washing technique that Ritter has done, recessed areas, but trying to find the highlight color is the problem.
Would model color 890 Reflective Green work good?
Thanks guys,
Doug
A goal is not always meant to be reached, it often serves simply as something to aim at.
Bruce Lee
A goal is not always meant to be reached, it often serves simply as something to aim at.
Bruce Lee
-
Ritter
- E5
- Posts: 528
- Joined: Tue Nov 23, 2004 10:59 am
- Location: BC, Canada
- Contact:
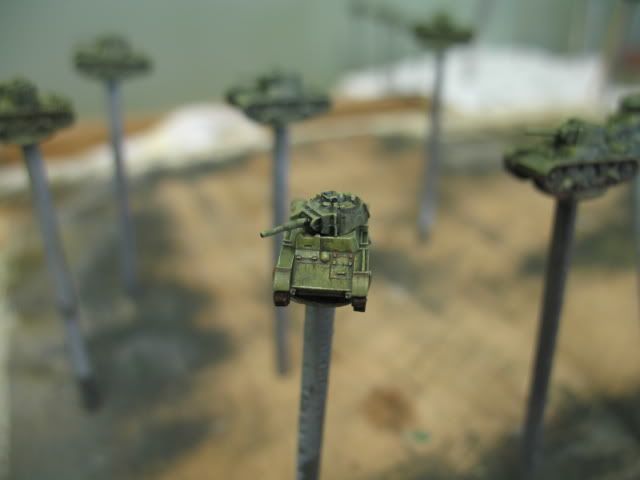
At this time look your model over and be critical. Re-darken any areas you think need a bit more contrast. Barrel sections and muzzle breaks are good areas to work on, using a darkened base color to not over - do the contrast. Outline any areas that should be in shadow or look like they should be dirty/greasy. Dont overdo this or it may look out of scale.
The tracks are painted next: x 20 ug...
ug...
I use Testors 1185 Rust mixed with Humbrol 33 Black (to give it the bite it needs!) and thin to a watery consistancy. Paint the tracks and add a rust stain to the leaf springs.
At the same time the muffler is painted, taking care to not paint the straps for contrast. I use a less black rust mixture over the first coat to make it pop out.
 [/b]
[/b]
Tools are painted next - wood - flesh, metal - black or dark grey.
Next: Extra Details...
The tracks are painted next: x 20
I use Testors 1185 Rust mixed with Humbrol 33 Black (to give it the bite it needs!) and thin to a watery consistancy. Paint the tracks and add a rust stain to the leaf springs.
At the same time the muffler is painted, taking care to not paint the straps for contrast. I use a less black rust mixture over the first coat to make it pop out.
[/b]Tools are painted next - wood - flesh, metal - black or dark grey.
Next: Extra Details...
-
Ritter
- E5
- Posts: 528
- Joined: Tue Nov 23, 2004 10:59 am
- Location: BC, Canada
- Contact:
-
Der Kommandeur
- E5
- Posts: 147
- Joined: Tue Dec 14, 2004 5:49 pm
- Location: UK
-
Ritter
- E5
- Posts: 528
- Joined: Tue Nov 23, 2004 10:59 am
- Location: BC, Canada
- Contact:
Re: Brushes
All the painting on this thread is by brush - a size 2/0. Ive moved on to cheap paintbrushes instead of red sable ($$$!) but have to replace them constantly. (although I get them at the dollar store for a buck!)"UlrichWW" Nice workshop, i really enjoy the tips. Will help to restart my paint job.
So, You do everything with a brush ?
Witch sizes do You use ???
That´s only, cause i´m too lasy to try all these basic foundations again by myself
After 10 years of pause some hints are more than usefull.
Keep on teaching
Troy
-
Ritter
- E5
- Posts: 528
- Joined: Tue Nov 23, 2004 10:59 am
- Location: BC, Canada
- Contact:
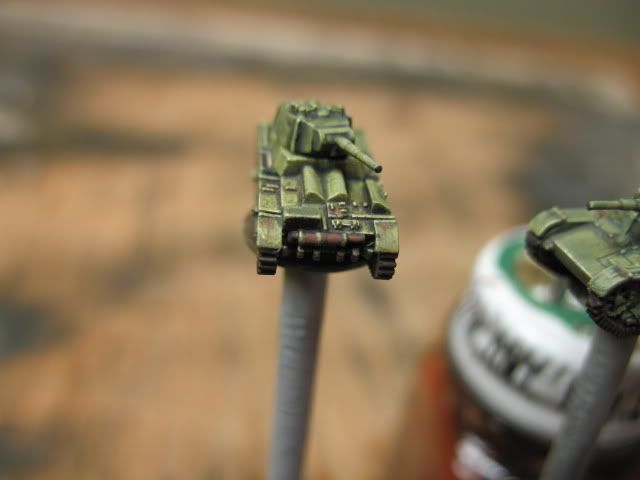
Radio Antenna
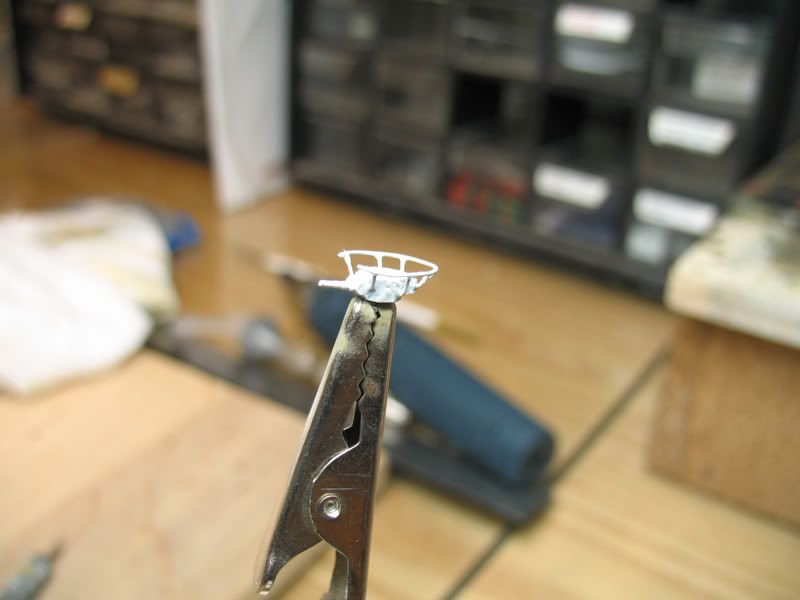
The circle radio antenna fond on early war Russian tanks is a fairly advanced conversion. I used the turret from the BT-7 kit as this more closely resembles the turret on the model 1933 T-26 with the frame antenna.The most robust are made of soldered brass wire shown here, but plastic rod can be used as well.
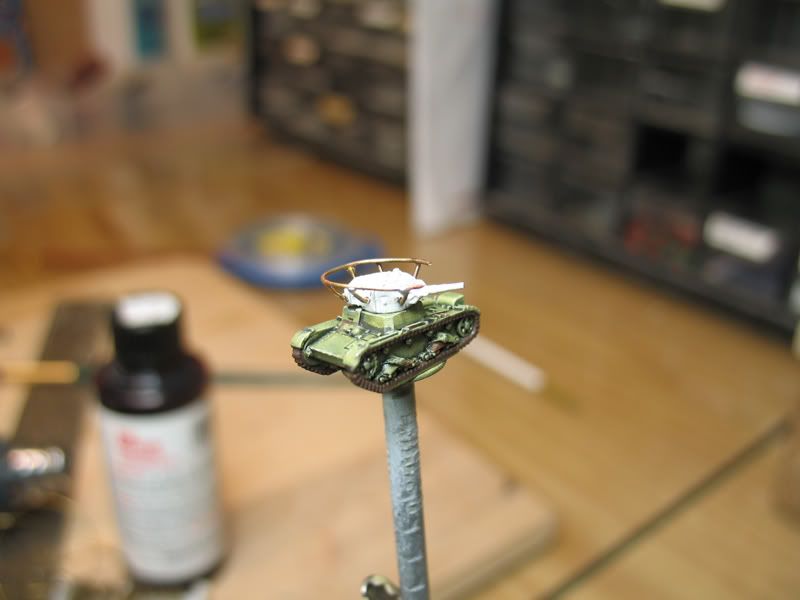
Primed:
Paul Bernardino did some fantastic, more to scale examples in the "Show Us yer Stuff" thread
On hindsight, I shouldve used thinner wire ...
...
Troy
The circle radio antenna fond on early war Russian tanks is a fairly advanced conversion. I used the turret from the BT-7 kit as this more closely resembles the turret on the model 1933 T-26 with the frame antenna.The most robust are made of soldered brass wire shown here, but plastic rod can be used as well.
Primed:
Paul Bernardino did some fantastic, more to scale examples in the "Show Us yer Stuff" thread
On hindsight, I shouldve used thinner wire
Troy
-
RoughRIder
- Posts: 57
- Joined: Sat Dec 31, 2005 8:49 pm
- Location: Indiana
-
Ritter
- E5
- Posts: 528
- Joined: Tue Nov 23, 2004 10:59 am
- Location: BC, Canada
- Contact:
10 vehicles can be done in a month. Considerably less when I dont have to take pictures"RoughRIder":shock: Amazing Ritter. And from start to finish how long does it take you to do up your vehiclesSay that is if you were doing 10 Vehicles. Just simply amazing.
Seriously, I can complete them in about 3 days or so. Sometimes if I have a whole day production can really accelerate!
Troy
-
cbovill
- E5
- Posts: 439
- Joined: Mon Dec 13, 2004 5:20 am
- Location: Las Vegas, NV
Ritter - you astound me! What kind of reception do you pick up on that radio antenna?
On a serious note, what kind of tool do you use to do the soldering with? I've been using super-glue for this kind of work but soldering is what I desire to do - just that the gun I have has a huge tip and I am not skilled at soldering in the first place.
Chris
On a serious note, what kind of tool do you use to do the soldering with? I've been using super-glue for this kind of work but soldering is what I desire to do - just that the gun I have has a huge tip and I am not skilled at soldering in the first place.
Chris
-
Ritter
- E5
- Posts: 528
- Joined: Tue Nov 23, 2004 10:59 am
- Location: BC, Canada
- Contact:
-
Ritter
- E5
- Posts: 528
- Joined: Tue Nov 23, 2004 10:59 am
- Location: BC, Canada
- Contact:
You Guys! 
Ok, lets finish these up.
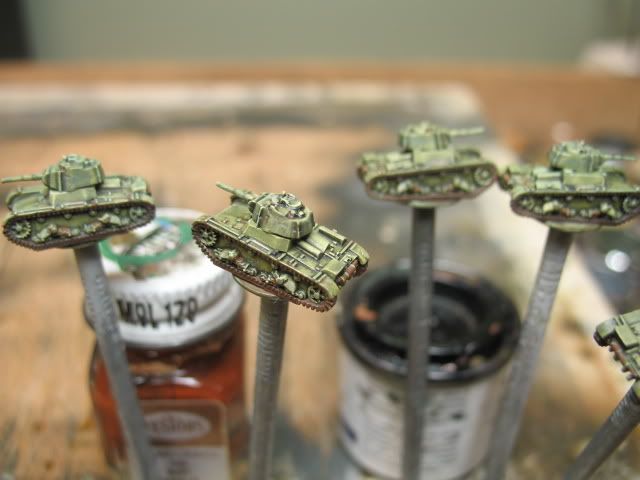
Dirt/dust: I go easy here. (I go easy everywhere ). Simply find a suitable mud color and add to the front, rear fenders and a bit on the undercarriage. Dont over-do it as this will cover all your earlier work. Just a taste of grime, the wash and rust will make the mini look used as well.
Decals:
Here is my method, easy and wargame tested.
1. Finish model eccept for mud and dirt if desired, before adding any dulcote.
2. Mix up a glue solution from either white glue and water or Modge-podge. This should be the consistancy of watery milk.
3. Cut decal from sheet as close as possible to colored portions. A new x-acto and mag-glasses helps. Moisten decal in warm water on a plate.
4. Put a drop of water/glue on model where you want decal.
5. Position decal with small paintbrush. Let dry.
6. Add a drop of decal-set solution such as decal-set or Micro-sol. Don't move decal! Let dry thoroughly.
7. Add a final drop of water/glue to top of decal. Let dry - COMPLETELY!!
8. Add mud and/or dirt.
9. Dulcote.
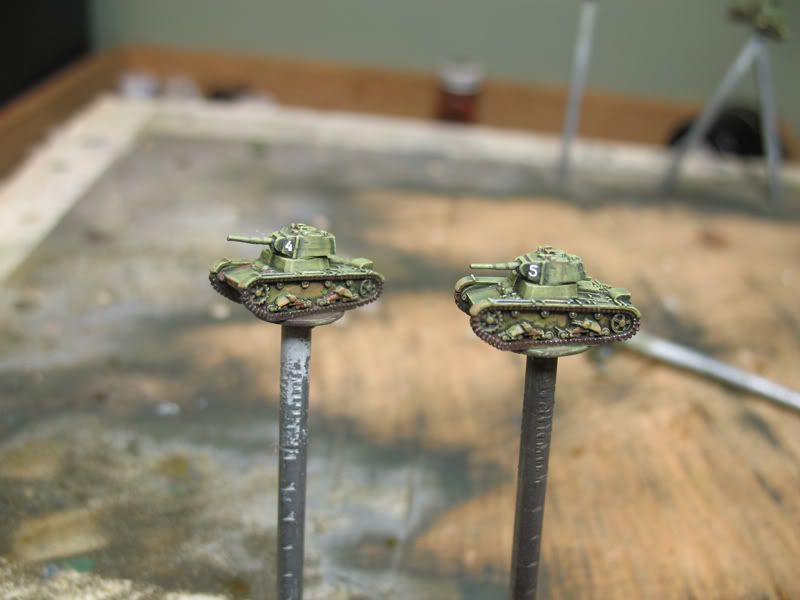
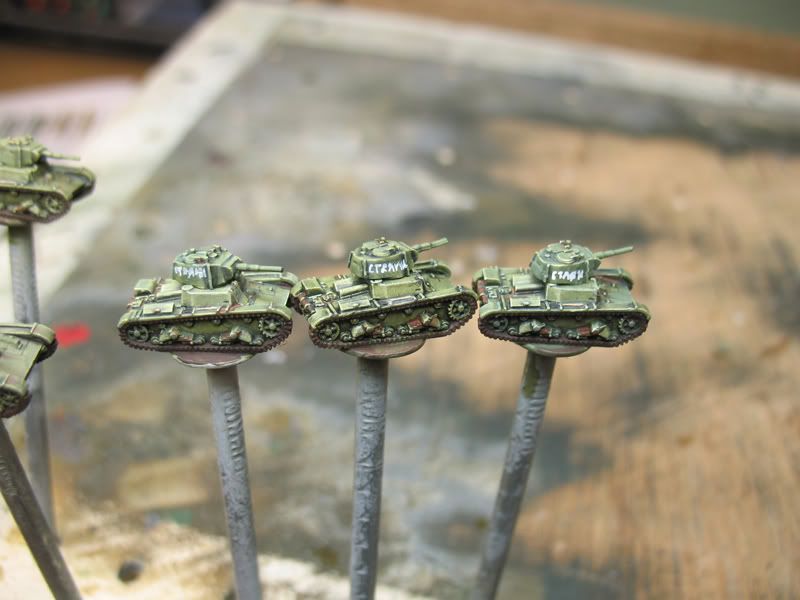
This method will produce a decal that is super resistant to rubbing or flaking off. Also the edges will blend in so that there is no raised edge or noticable seam-line. I used the excellent GHQ White Russian decals, cutting single numbers from 1 to 10 for this early war T-26 Infantry Tank Company.
Finish: After Dulcoting the mini, add silver highlight to the tracks and any hatch covers and tools. If you dulcote over silver, it loses its shine.
And thats it, take to the game table and get crushed by some Panzer I's and II's...oh the shame of it!

Ritter
Ok, lets finish these up.
Dirt/dust: I go easy here. (I go easy everywhere
Decals:
Here is my method, easy and wargame tested.
1. Finish model eccept for mud and dirt if desired, before adding any dulcote.
2. Mix up a glue solution from either white glue and water or Modge-podge. This should be the consistancy of watery milk.
3. Cut decal from sheet as close as possible to colored portions. A new x-acto and mag-glasses helps. Moisten decal in warm water on a plate.
4. Put a drop of water/glue on model where you want decal.
5. Position decal with small paintbrush. Let dry.
6. Add a drop of decal-set solution such as decal-set or Micro-sol. Don't move decal! Let dry thoroughly.
7. Add a final drop of water/glue to top of decal. Let dry - COMPLETELY!!
8. Add mud and/or dirt.
9. Dulcote.
This method will produce a decal that is super resistant to rubbing or flaking off. Also the edges will blend in so that there is no raised edge or noticable seam-line. I used the excellent GHQ White Russian decals, cutting single numbers from 1 to 10 for this early war T-26 Infantry Tank Company.
Finish: After Dulcoting the mini, add silver highlight to the tracks and any hatch covers and tools. If you dulcote over silver, it loses its shine.
And thats it, take to the game table and get crushed by some Panzer I's and II's...oh the shame of it!
Ritter