Rusty pondered:
... so what you do is take a can of white and a can of green spray the white, spray the green. Then take the same shade green as the spray add some white and drybrush?
Close.
More precisely:
1) Spray with a can of white primer. I look for primers, not just white spray paint. I have used just white colored paint in the past. Not a bad result. But I believe the primer gives better adhesion. The paint job, when you're done, will last longer.
Then I let it dry. As noted, if I can leave them out on a sunny day, about 2 hours. If I have to leave them indoors (in my garage), maybe 4-5 hours. I will often prime in the morning on a weekend day, then go off to do some activity, then base-coat in the afternoon or evening. But, as with the oven-baking that Ritter recommends, I find that the primer or paint dries a little nicer if baked in the sun.
2) Spray with a can of base-coat. For my Soviets, I use a medium green. For my US WW2 forces I use olive green.
Once more, allow it to dry. About 2 hrs in the sun, or more if not. If I prime on Saturday morning, and base-coat on Saturday afternoon, then I can spend my Saturday night doing the rest of the brush-work.
3) I wash the whole model with heavily diluted grimy black or oily black. These are actually names of Polly-S colors. Grimy black is actually a VERY dark brown, or a light black with hints of brown. Oily black is a VERY dark blue-grey, or a light black with hints of blue-grey.
When the wash has set a bit, to a sticky point, I beat it up with a sable brush. Call this an optional technique. Just a heavily diluted black wash will do even without the beating.
4) Then I dry-brush with lightened green. I could use the same medium green, lightened with some white, or some light tan, or some white and yellow. But in my case, I have found a ready-in-the-bottle shade that works well enough, so that I don't have to mix my own for dry-brushing. It is a Polly-S shade called Sahara Sand. It is a green-tinted beige.
I dip the brush, then squeeze it in my paint-rag. Then brush all over the model. It brings out the highlights.
5) Then the detailing. Tracks and MG barrels are a must for me, while grills, stowage, tools, headlights I consider to be optional ... however much I care to do on a particular model at a particular time.

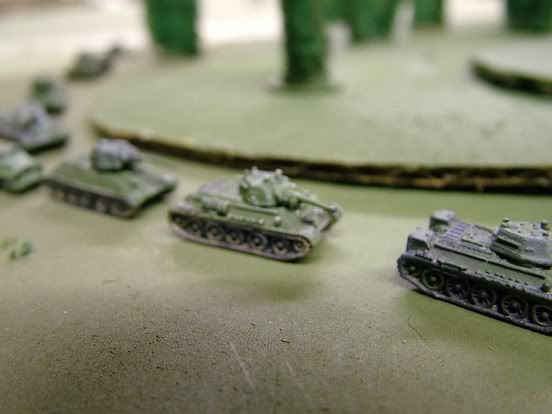
Here is an example of the result. As I mentioned, not at the level of artistry of some around here, but certainly at a level pleases MY eye when wargaming.
In this case it is a posed picture that I used as a prelude to a wargame.* I feel it shows the effects of the priming, washing and dry-brushing quite well.
The KV-1s in front have been painted exactly as I describe above. In particular, they had a white primer under the medium green. Lots of detailing, too.
The KV-2s that follow did NOT have white as their undercoat. They were a very dark color, which when I bought it was labelled as olive drab, but was more like black-green. These are OLD GHQ models -- I bought and painted them in the early 1970s, priming them with a beige, and then spraying them with the black-green. I have only recently re-painted them, starting with step 2 above (just spraying over their original very dark black-green).
Note the difference in base shade between the KV-1s and the KV-2s. The KV-1s come out lighter, which is the "scale effect" you want on models this small.
Most (if not all) of the older GHQ models were re-mastered in the 1990s. The older molds did not have anywhere near the wonderful detail of their "new molds". Add to this that my KV-2s have about 4 layers of spray paint on them by this point, so whatever detail there was has been subdued even more. But you can clearly see the impact of the dry-brushing bringing up a lot of the scant detail on these models.
Then look at the ZIS-6 fuel truck up at the top of the picture. This model is still in the state of my "prior art" -- how I painted before I learned the weathering and highlighting techniques we discuss here. It has been spray primed, and spray painted medium green, and detailed. But no washes or dry-brushing.
Notice the differences?
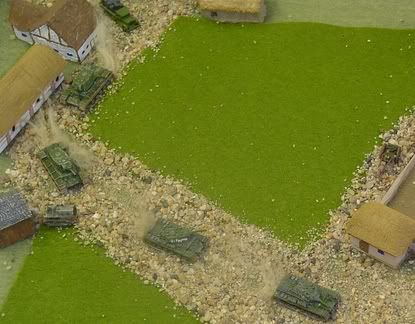
*Note: For my games I like it when neither side enters a game knowing what the the forces are on the other side, and I use paper chits to represent un-spotted units on the wargame table. Together, these simple techniques cut down significantly on the perfect "God's eye view" that plagues too many wargames. However, in one Barbarossa game I offered some "aerial recon photos" for the German players, to give them the advantage of aerial supremacy that the Germans actually had coming in to most early war battles. So my German commanders got to see some pictures of the Soviet forces on their approach march to the battlefield. This was one.

 ....................

