Painting advise needed
Moderators: dnichols, GHQ, Mk 1
-
Mk 1
- E5
- Posts: 2383
- Joined: Fri Dec 24, 2004 3:21 am
- Location: Silicon Valley, CA
I have double-posted this to two active threads on painting: "How to paint microarmor" and "Painting advice needed".
Here is a step-by-step of tonight's painting. Hope it is helpful, or at least interesting.
I bought some more WW2 Italians recently, just after posting my Italians on the "Show Us Yer Stuff" thread. I noted in that thread that I felt I should get some more AB41s and M13/40s, and that I was low on trucks. Then AB41s came on special, so I made my purchase.
Tonight I painted up my SPA35 medium trucks. I spray-primed all of my new Italians with Testor's Model Master White primer over the weekend. I wanted to paint up the AB41s and M13s, but I found I was out of Model Master's Afrika Mustard, which was the base-coat I was using on my Italian armor. I even when to my local hobby shop to pick some up, but the shop was closed. Owners taking a vacation or some such. The nerve of some people!
So ... since my trucks are all done in Italian Green Camo rather than Afrika Mustard, and since I HAVE Italian Green Camo (although only in a Polly-S bottle, not in a spray), I decided to paint up my 5 new trucks this evening.
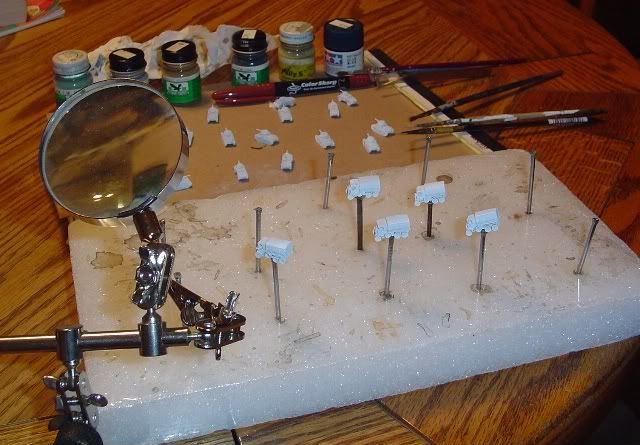
Here I have just set-up for my evening's painting.
I have fixed the SPA35 trucks to nails with super-glue. I have a block of styrofoam out of some box or other that I use as a peg-board holder for my painting nails.
I have a magnifying glass on a weighted stand with an articulated arm and clips to hold the nails. VERY handy for detailing, but a luxury that the new painter should not worry about (took me about 30 years to finally by mine. So don't rush.)
I have set out the paints I will be using: Polly-S Italian Camo Green, Sahara Sand, US Khaki, Old Concrete, Grimy Black, and Tamiya Acrylic Metallic Blue. (I also decided later to add touched of Polly-S German Uniform Grey and Flesh for the drivers, and Metallic Silver for the headlights.)
I have set out my brown Sharpie pen for some detailing work. I also have my favorite tweazers, great for pulling unexpected bits of flash out of little recesses in the models.
I have laid-out some brushes: very fine for the tires and detailing, medium-fine for most of the painting, large/round/bushy for the wash, and flat-headed red sable for beating.
I have the plastic off of a GHQ bubble-pack as my multi-chambered mixing pallette. And a small plastic cup (medicine doser-sized) for my water.
I'm ready to go!
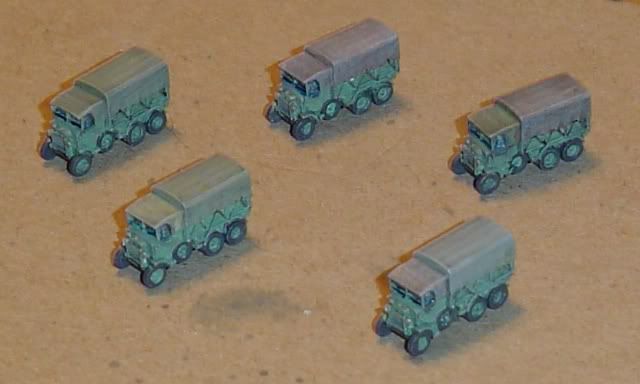
I've done my base-coating. The trucks are done in Italian Camo Green. The tarps are done in Sahara Sand or US Khaki. I like some individual character in my vehicles, so I don't paint all tarps identically. Note that I have even varied the shading in the Sahara Sand, by undercoating with the Camo Green in some cases, and painting directly onto the white primer in others. This is most noticeable on the truck on the far right, where the tarp on the cab is Sahara Sand on the white primer, while the tarp over the truck-bed is Sahara Sand over Camo Green.
At this stage there is a stark difference between the Sahara Sand tarps and the US Khaki tarps. That will diminish as I go on.
Here the trucks have been washed. Grimy Black, heavily diluted with water, and with just a touch of dishsoap in the mix as a surficant.
I am letting them dry just a bit, until they are not really wet, but just sticky.

Now they've been beaten. I use my flat-headed sable brush to beat them.
The technique is simple. Dry brush. Hold the model. Swish back-and-forth. Rotate the model a little. Swish again. Rotate again. Etc.
Here they are, dry-brushed with Old Concrete, and detailed. All done. Mostly.
Notice how the variations in shading on the tarps have become noticeably less pronounced. When I've seen canvas left out in the weather, this is the kind of fading and variation I have come to expect.
I used the brown Sharpie pen for the tie-down roaps. Quick and easy detailing.
I painted the entire underside of the trucks with Grimy Black. Not that I expect my trucks to be turned turtle on a wargaming board, but you never know! And, it helps ensure that I don't get a peak of an un-painted under-surface on some odd-angled photo.
Still think the tires are a little too black. Might hit the lower half with a dry-brushing of Polly-S "Dust"...
Needs to be sprayed with Testor's Dullcote. Then I'll hit the windshields with Polly-S clear gloss, and I really will be done.
Then into the ready box they go!
Here is a step-by-step of tonight's painting. Hope it is helpful, or at least interesting.
I bought some more WW2 Italians recently, just after posting my Italians on the "Show Us Yer Stuff" thread. I noted in that thread that I felt I should get some more AB41s and M13/40s, and that I was low on trucks. Then AB41s came on special, so I made my purchase.
Tonight I painted up my SPA35 medium trucks. I spray-primed all of my new Italians with Testor's Model Master White primer over the weekend. I wanted to paint up the AB41s and M13s, but I found I was out of Model Master's Afrika Mustard, which was the base-coat I was using on my Italian armor. I even when to my local hobby shop to pick some up, but the shop was closed. Owners taking a vacation or some such. The nerve of some people!
So ... since my trucks are all done in Italian Green Camo rather than Afrika Mustard, and since I HAVE Italian Green Camo (although only in a Polly-S bottle, not in a spray), I decided to paint up my 5 new trucks this evening.
Here I have just set-up for my evening's painting.
I have fixed the SPA35 trucks to nails with super-glue. I have a block of styrofoam out of some box or other that I use as a peg-board holder for my painting nails.
I have a magnifying glass on a weighted stand with an articulated arm and clips to hold the nails. VERY handy for detailing, but a luxury that the new painter should not worry about (took me about 30 years to finally by mine. So don't rush.)
I have set out the paints I will be using: Polly-S Italian Camo Green, Sahara Sand, US Khaki, Old Concrete, Grimy Black, and Tamiya Acrylic Metallic Blue. (I also decided later to add touched of Polly-S German Uniform Grey and Flesh for the drivers, and Metallic Silver for the headlights.)
I have set out my brown Sharpie pen for some detailing work. I also have my favorite tweazers, great for pulling unexpected bits of flash out of little recesses in the models.
I have laid-out some brushes: very fine for the tires and detailing, medium-fine for most of the painting, large/round/bushy for the wash, and flat-headed red sable for beating.
I have the plastic off of a GHQ bubble-pack as my multi-chambered mixing pallette. And a small plastic cup (medicine doser-sized) for my water.
I'm ready to go!
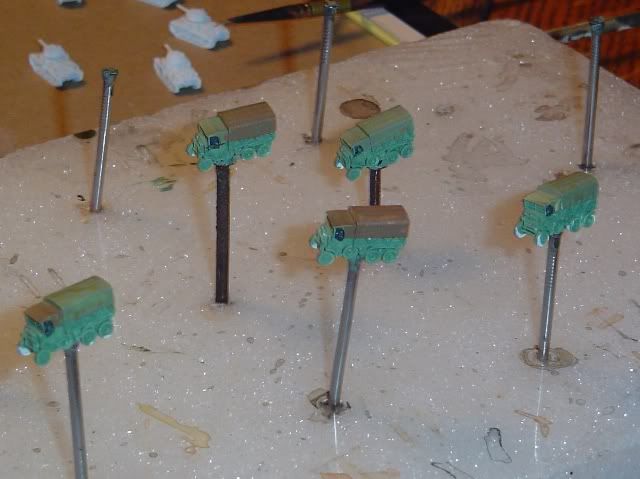
I've done my base-coating. The trucks are done in Italian Camo Green. The tarps are done in Sahara Sand or US Khaki. I like some individual character in my vehicles, so I don't paint all tarps identically. Note that I have even varied the shading in the Sahara Sand, by undercoating with the Camo Green in some cases, and painting directly onto the white primer in others. This is most noticeable on the truck on the far right, where the tarp on the cab is Sahara Sand on the white primer, while the tarp over the truck-bed is Sahara Sand over Camo Green.
At this stage there is a stark difference between the Sahara Sand tarps and the US Khaki tarps. That will diminish as I go on.
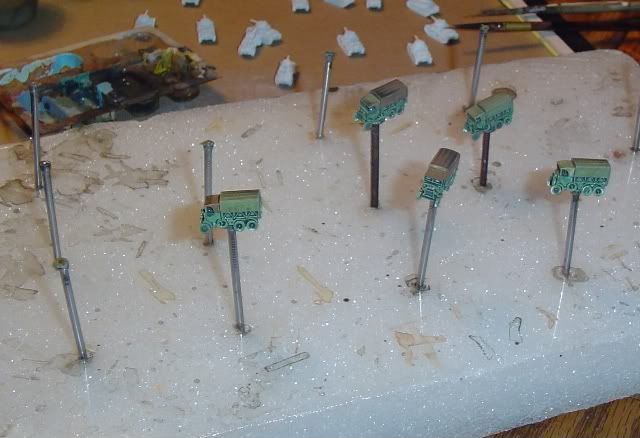
Here the trucks have been washed. Grimy Black, heavily diluted with water, and with just a touch of dishsoap in the mix as a surficant.
I am letting them dry just a bit, until they are not really wet, but just sticky.
Now they've been beaten. I use my flat-headed sable brush to beat them.
The technique is simple. Dry brush. Hold the model. Swish back-and-forth. Rotate the model a little. Swish again. Rotate again. Etc.
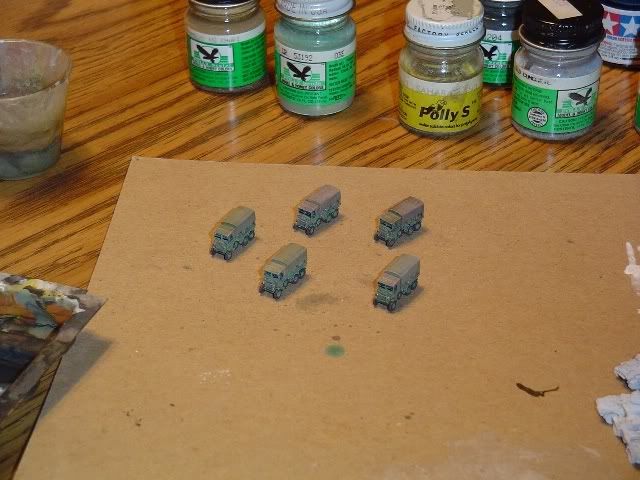
Here they are, dry-brushed with Old Concrete, and detailed. All done. Mostly.
Notice how the variations in shading on the tarps have become noticeably less pronounced. When I've seen canvas left out in the weather, this is the kind of fading and variation I have come to expect.
I used the brown Sharpie pen for the tie-down roaps. Quick and easy detailing.
I painted the entire underside of the trucks with Grimy Black. Not that I expect my trucks to be turned turtle on a wargaming board, but you never know! And, it helps ensure that I don't get a peak of an un-painted under-surface on some odd-angled photo.
Still think the tires are a little too black. Might hit the lower half with a dry-brushing of Polly-S "Dust"...
Needs to be sprayed with Testor's Dullcote. Then I'll hit the windshields with Polly-S clear gloss, and I really will be done.
Then into the ready box they go!
-Mark 1
Difficile est, saturam non scribere.
"It is hard NOT to write satire." - Decimus Iunius Juvenalis, 1st Century AD
Difficile est, saturam non scribere.
"It is hard NOT to write satire." - Decimus Iunius Juvenalis, 1st Century AD