Page 1 of 2
antanna and how to make them
Posted: Mon Sep 04, 2006 11:38 am
by militaryfanatik
I was wondering what size drill bit you need and where to get the nylon string to make the antenna and stuff?
Dusty
Posted: Mon Sep 04, 2006 2:15 pm
by fullmetaljacket
that is a easy step the way i was taught from the master JB was to take a fine thread needle, which you can buy like 50 per pack at walmart for $1 then you take the needle and place it in a pair of vice grips or whatever you wish to use to hold it. I highly recomed not your fingers. Once it is placed in teh vice grips you find out thru reference material where the antennea goes.
Then you proceed to work the needle like a drill it will take some pushing, but it will make a small hole in the model. Once you have a small hole you then cut the length of antennea via it fishing line or nylon string. I use 4Ib test line i think JB uses lighter. But any way you then cut the length of the line you need and dab one end of the line in the cement or glue. Once you get a decent amount on the end of the line you then place the line into the hole made by the needle, this works really great and drys fast and hard into place. Actually so hard that you can pick the model up by the line after it sets for a few minutes.
Now you will go thru some needles till you get the hang of it. but like i said you can buy like 50 to 100 sewing needles at walmart for like a dollar. Hopes this helps.
FMJ
Posted: Mon Sep 04, 2006 5:06 pm
by 1ComOpsCtr
The easiest way to make 1/285th scale antenna is to use an eyelash or an eyebrow hair that is not trimmed (has a blunt end).
Everyone sheds a couple of these a day. If you simply gently pull at your eyelashes once or twice a week and place the hairs that remain between your fingers into a small plastic box or white envelope you will have a reasonable beginning. Over a few months you can accumulate enough to make antenna for every vehicle you need. Having a sympathetic girlfriend or wife also helps.
Cut the hair to the desired length and use a fine drop of white glue to attach to the antenna mount, or create your own mount with a slightly larger drop of glue. If you want to drill a hole you can, but it isn't necessary as the hair is so flexible it will not be knocked off without really rough handling. The natural curve of many eyelashes lends itself to fast moving vehicles or antennas that have been restrained. I usually apply a little extra thinned white glue to the surface around the antenna base if that doesn't interfere with too much surface detail if I know the vehicles are going to be handled a lot.

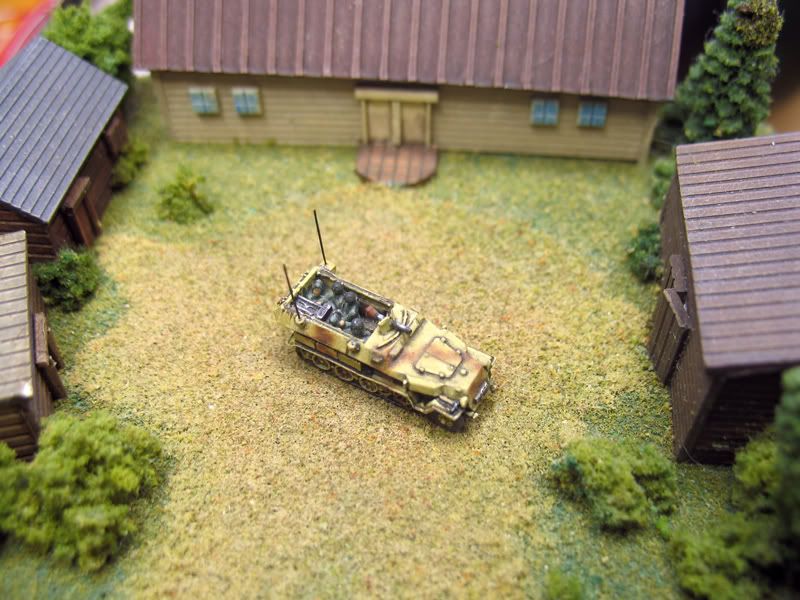
The upper antenna has been finished in this picture, the other two must be trimmed and the lower mast painted the same color as the tank.
The great part about using the eyelashes is that they are naturally tapered... and flexible.
Hope this helps...
Will
ComOpsCtr
Posted: Mon Sep 04, 2006 5:43 pm
by tstockton
Will,
My only concern about eyelash "antennae" -- or any other "natural" product (such as shed Yellow Labrador Retriever hair, of which I have access to thousands on a daily basis...

) -- is its longevity. I would guess that something like fishing line, nylon thread, or "synthetic" paint brush bristles would last a lot longer. Wouldn't an organic material, such as an eyelash, begin to "break down" or even decompose after a period of time -- and I have no idea on the time, but with my luck, it would be too soon!
Or am I working under a false assumption here? So far, I've not tried
any antennae, in any form... I'm still pretty darned slow
and tentative when it comes to painting armor, so I have no actual experience here, just theories and observations of other's works.
Regards,
Tom
Posted: Mon Sep 04, 2006 7:18 pm
by 1ComOpsCtr
Tom,
I have some micro armor from the 70's that still have my eyelash antennas attached, and that's after hundreds of battles, countless hours in the sun, and years of storage in a damp basement. The pictures I posted of some of the very first 37 mm Mk-3's GHQ made decades ago had antennas made from my wife's eyelashes. They are still holding up just fine.
Hair found in Napoleon's grave was tested to see if he was poisoned almost two hundred years after his death so I think it will last as long as you intend to use your micro armor. The white glue may not last as long, but if you use care, it should, and if you Dullcoat your tanks the eyelash will be protected even further.
Its a fairly free resource, remains flexible, and attaches without the need to drill holes if you are careful with your glue.
Will
ComOpsCtr
Posted: Mon Sep 04, 2006 8:12 pm
by av8rmongo
I just use the bristles from a tooth brush. I drill a tiny hole with a pin vise set up then insert the tooth brush bristle, color with a black sharpie magic marker and that's it.


Paul
Posted: Mon Sep 04, 2006 9:11 pm
by jb
...I use 4LB test fishing line. The one I use in paticular is called spiderwire. It is thin and very close to scale. One problem encountered with fishing line is that it has a tendancy to curl. This is all not that bad as long as you have the curl bending towards the rear. As for me I take a board about 20" long,pound some stout nails in either end. I then take the fishing line attach it to one nail securely. Now strech the line to the other nail, keeping it as taught as you can without breaking the line or bending the nail( the bigger the nail the better). I probably loop around these 2 nails about a dozen times. After this attach the end without losing tension,attach securely. Now take CA glue and place a drop on either end where all the line meets on the nail. Let cure,not dry,but cure. This will depend on your glue. Take your wife,girlfriends,or daughters hairdryer,and with the hottest setting run back and forth over the taught line,at least a good 5 minutes. Make sure that no part of it cools down while doing this. when this step is done,just cut one lenght at a time (20") for use as antenna. You should now have line that will act straight instead of curled. You can see the straight pieces for use after cutting the lengths from the nails.
As for attaching to vehicles I usually take a sewing needle held by vise grips and make a micro hole for where the antenna goes. Some vehicles have protruding antenna mounts,on these I can SOMETIMES put a needle hole in them. If not ,putting CA glue where the mount meets the vehicle,and then just placing the antenna there works too. In either case CA glue is used for attaching.
Another great thing about this spiderwire is that it paints up wonderful,and is pliable and very,very gaming friendly...
BTW CA glue and this line is almost like welding them together.
Posted: Mon Sep 04, 2006 10:26 pm
by militaryfanatik
heres a rookie question: What is CA glue?
And thanks for all the help so far.
Posted: Mon Sep 04, 2006 11:14 pm
by Ritter
I use black nylon paintbrush bristles - no need to paint and stay flexible for the rest of my wargaming life anyway

The pin idea works great but if you can find a pin vise (an x-acto blade holder will work too) and a set of micro drills, you can carefully drill into the soft metal and then CA (Cyanoacrylate or Crazy Glue) the antenna into place, it will be permanent. I have gamers pick-up vehicles by the antenna without a problem (so far!! Not my recommended method!)
Troy
Posted: Tue Sep 05, 2006 1:13 am
by jb
...I used to use paintbrush bristles too,but the ones I had kinked and were not as flexible as the fishing line.
As for the durability, Ja,you can pick them up by the anty,as a matter of fact it's hard to even pull them out intentionally...
BTW,beautiful job on the command track...
Posted: Tue Sep 05, 2006 6:43 am
by cbovill
First I use a pin to start the whole and then I use a .015" drill bit in a pin vise to drill the hole for the nylon thread. Love the nylon as it is indestructible and have never had one kink.
Chris
Posted: Wed Sep 06, 2006 6:47 am
by chrisswim
I have used several different techniques:
First the hole:
I have used the safety pin, pushing on it to make a hole. A few cases, I have glued the anntennea next to a stem or side of cabin(577 toc or tope of Bradley, Scorpin/Scimitar). The hole works better in most cases.
1. Black thread painted 'gunmetal' for some reflection and stiffness cut to size and inserted into a new hole.
2. Tooth brush bristle cut in half, use black ink marker to color it and dip into glue puddle and then insert into new hole.
3. Hair Brush bristle using same process, although already black. The hair brush( bought for $2 on the floor at KMart) has different length/thickness bristles and some color differences.
Probably using toothbrush is best for me so far. Better diameter and length consistency.
Posted: Thu Sep 07, 2006 10:48 pm
by militaryfanatik
Where do you get drill bits that small?
Dusty
Posted: Thu Sep 07, 2006 11:37 pm
by av8rmongo
I've had the best luck finding these small tools at my local model RR shop. You can also order online - try a google search for Pin Vise.
Paul
Posted: Fri Sep 08, 2006 1:37 am
by tstockton
Dusty,
A good model railroad shop will have the drill bits; you can also get them at many on-line hobby shops. The dirll bits themselves are most often available a set with bits sizes 61-80 (sorry, but I don't know the size of those bits; they are usually listed either as a "#80 bit" or 0.** CENSORED **" bit). Some of the larger on-line stores, such as MicroMark and Walthers, also sell each individual size, usually in a multiple-bit pack (5 or 6 bits of the same size).
There are also different sizes and "types" of pin vises; which one works best for you is an "individual preference" choice. I have three or four, but the one I used the most is an X-Acto pin vise I got in a small tool chest, a gift from my late father. It is a "double-ended" vise; on one end, there is a small cylindrical opening, better for holding "larger" bits. The other end can completely close down - best for those very small bits. By its design, there is no "pivot point" to rest my index finger (as there is on my other pin vises). But I seem to have better control over this one -- maybe it fits my hand better?
Two notes on using a pin vise: (1) the cutting "work" will be very slow, when compared to a standard drill. However, this fine "control" over the cutting speed will well prove itself to be a bonus when doing "small scale" work. And (2) you want to be very careful to keep the the bit perpendicular to the hole being drilled; those bits, due to thier small size, turn out to be rather fragile, and it is quite easy to break one off. I think that may be part of the reason that you "have to" buy individual sizes in multiple-bit packs!!
Hope this helps!
Regards,
Tom Stockton