Page 1 of 1
Micronauts, How to do carrier deck markings? decal? stencil?
Posted: Thu Apr 24, 2008 8:28 am
by intobattle
Hello All,
Does anyone know how people achieve such great looking markings on Micronauts, especially the carrier decks? One of these days I want to painting some of the micronauts I have hanging around... Are they decals? Airbrush stencils? Example:

Thanks!
Tanner
Posted: Thu Apr 24, 2008 7:20 pm
by av8rmongo
I would be willing to bet that the particular example you show is a decal. There was a company Sea Bat Decals that made a fairly extensive line of hull numbers and deck markings for both modern U.S and WWII U.S. and Japanese ships. Those decals have been out of production for close to 10 years I would say. If you can find them they're gold! I haven't seen any on ebay or anywhere else since 2003. I have some of the modern U.S. Hull numbers left from a ebay auction of about 15 assorted packages but I am out of carrier deck markings, actually I'm three short for completing my own fleet. All attempts to contact the copyright owner for these decals have failed.
Options: Create your own - there are any number of ink jet/laser printer decal papers available on the market today. Create your own design print it then apply as you would any other decal (there are more steps but thats the simplified version) the problem is standard printers don't print white. Answer buy an ALPS printer ($500 give or take for low end). If you can make that investment you can easily create what you see in the picture.
Options: Dry transfer decals - model railroaders have been using dry tranfer decals forever for pinstripping etc. If you're not familiar these are printed lines on special paper that allows you to hold the decal side of the paper against the model, rub the back with a burnishing tool and the pressure forces the decals to adhere to the model and separate from the paper. Problems: if you move the paper while you're burnishing it it totally screws up the alignment and additionally, with the exceptional detail of GHQ flight decks it is hard to get the decal into the deck grooves which makes the decal vulnerable to rubbing/flaking off (I've never tried decal solvents with these so I can't say if that would solve the problem)
Options: Pinstripe tape - these are sticker type decals that are available at craft stores. You can usually find appropriate sizes and colors easily enough. Problem: because they are actually stickers they have some depth or height if you will such that at scale they would be six or seven inches high on an actual flight deck. In my opinion not worth the effort.
Options: Hand paint - If you have the eyesight, talent and patience to mask off the lines this is by far the best approach. It is also by far the most time consuming and, for me at least, the easist way to totally screw up the model. This is truly professional level work.
Hope that helps.
Paul
Posted: Thu Apr 24, 2008 7:26 pm
by av8rmongo
One more thought on the ALPS printer:
Buy a printer come up with quality decals like you see in the picture and the printer will pay for itself. Because of the scarcity the last Sea Bat decal I saw on ebay went for $22 or there about. When I bought my first set retail I think I paid in the neighborhood of $6-$8. I'llbet you could sell 100 decals in 2-3 weeks between the guys on this forum and the questions that keep coming up on TMP.
GHQ - are you listening? Decals for deck markings would make a mint, if you ignore the idea that they should be included in the package like the modern carriers.
Paul
Posted: Fri Apr 25, 2008 1:07 am
by intobattle
Paul,
Thanks, this helps tremedously! I'm not sure which approach I'll take... none of them seem like an easy task

I'll mull over it a bit. As you said, it would be very nice if these were included in the WW2 carrier packs.
Again, much appreciated,
Tanner
Posted: Fri Apr 25, 2008 1:58 am
by cbovill
I have never understood why GHQ makes decals for most everything else they sell except the WWII carriers. I don't care if I have to pay extra, and I don't care if at this point I would have to repaint all the flight decks on my carriers in order to upgrade to a well done decal set, I would do it in a second!
GHQ, please, please make decal sets for WWII carriers available.
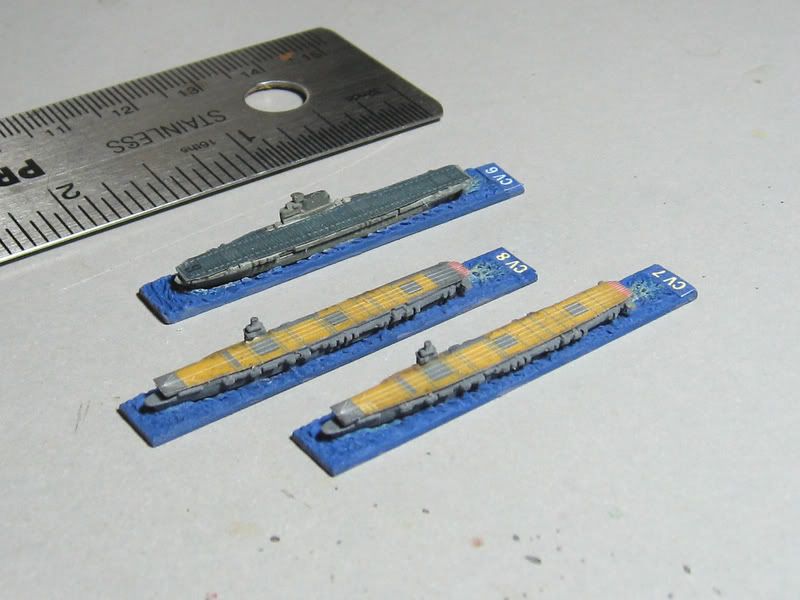
The example below was done by masking off the flight deck both longitudinally and laterally in order to create a dotted line running down the center with an air gun. Took forever.
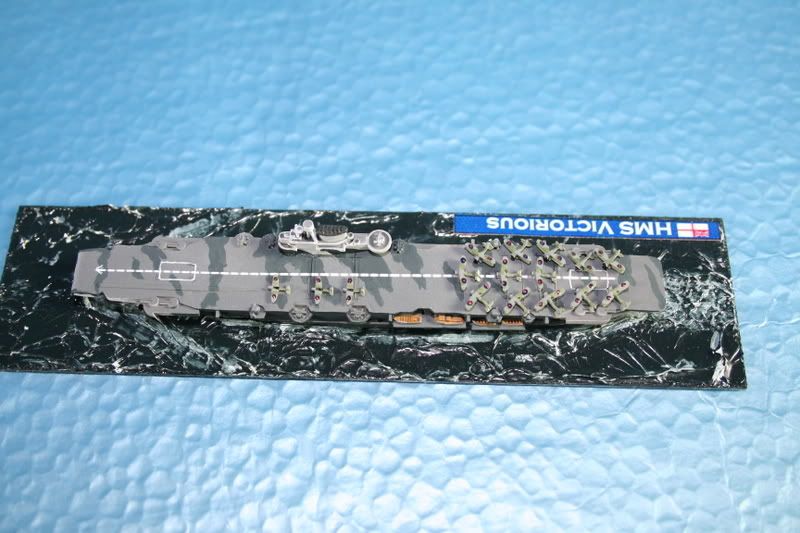
...but I'd gladly replace it with a more complete set of deck markings from a high quality decal set.
Chris
Posted: Fri Apr 25, 2008 7:51 am
by intobattle
Yeah that does look like it would take a long time to mask... very nice work though!
Tanner
Posted: Fri Apr 25, 2008 8:15 am
by dragon6
Here is another way that might work if you have an inkjet printer.
Layout the entire flight deck put on the stripes but also the flight deck colour itself. If you use white decal paper it would work. Of course it's relatively large decal but you don't need a special printer. You do need to cover the decal with an overspray as otherwise the ink will run when you put it in water to slide it. Also I think decal set to mold it better to the deck might be a good idea.
Of course with your inkjet printer the white stripes won't print, which is why you need the white decal paper instead of the normal clear decal paper.
Posted: Fri Apr 25, 2008 8:43 am
by tstockton
You can purchase either decal "stripes" in various widths, or purchase solid color sheets and cut your own stripes. Microscale (click
HERE to go to their home page) makes both; you can occasionally find what you're looking for at a well-stocked model railroad shop, or place an order there or at your favorite retailer on-line. Oh, one other note -- the solid-color sheets are called Trimfilm decals.
Another "trick" I've learned -- to decal a dashed line: decal a solid stripe, let dry... then paint the "in-between" areas in your flight deck color.
Hope this helps!
Regards,
Tom Stockton
Posted: Fri Apr 25, 2008 6:38 pm
by av8rmongo
Tom,
Excellent suggestion! I had forgotten about those decals, I just placed an order for a bunch of them so now maybe I can finish my USCG cutters.
Paul
Posted: Sat Apr 26, 2008 2:54 am
by cbovill
You know, that's not a bad idea - make the whole flight deck a decal in the appropriate colors and print out on the white decal paper. I am going to have to experiment with that.
Posted: Tue Apr 29, 2008 1:48 am
by 8ball
Here are some deck markings for 1:6000 ships that I created in Photoshop. I'm thinking about doing them for 1:2400 too.
Posted: Tue Apr 29, 2008 5:42 am
by av8rmongo
8ball,
I would love to get copies of those if you're wiling to share.
Paul
Posted: Wed Apr 30, 2008 8:15 am
by Leopold
I've had a lot of luck with Chartpak 1/64" Graphic Arts tape. It comes in a variety of colors, is dirt cheap, and is very easy to use. I second the previous suggestion for doing "broken" lines too.
Its not always easy to find; I have an Art Supply store that gets it for me. Good Luck whatever technique you pick!
[/img]
Posted: Mon May 12, 2008 6:28 pm
by 8ball
Hey av8r-
I'm about to startup a website where I will be posting a variety of game and hobby aides as downloadable pdfs. This will include 1/6000 carrier decks and perhaps 1/2400 too, and will likely be a couple/few dollars per ship.
8
Posted: Mon May 12, 2008 6:41 pm
by av8rmongo
8ball,
Awesome thanks!