Project: Refurbishing Old Micro Armor
Posted: Sat Oct 10, 2009 2:19 pm
Hmmm. Been too quiet around here lately. No one got any pictures to post? OK, I'll put up a few.
This is a project I did a couple weeks ago. At the most recent Con I brought a couple units onto the table that have been in my "Active Forces" box since the late 1970s. And frankly, they were none-too-impressive when they showed up on the board.
So I thought I would refurbish them to bring them a bit closer to my more recent stuff.
Here are my JS-2s and the refurb project.

Let's start the "before-and-after" with some "befores". Can you guess which two are my old models, vs. which one is from my newer JS-2s?
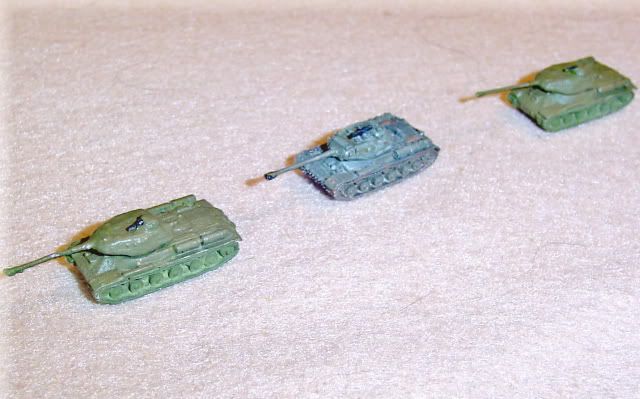
Oy, they is (was) some ugly ducklings! They were spray-painted Testor's Olive Green. And they were spray-painted WAY too much. Most of the detail, which was notably less with these "vintage GHQ" models, was covered over with the paint. Also my rudimentary efforts at adding something to look like AAMGs was rather embarrasing.

This is the product that discussions on this board have taught me to use to strip old micros: Simple Green. It is a household cleaner -- reasonably cheap, and claims to be organic and non-toxic. AND IT WORKS!
Oh, and I also use it for cleaning the kitchen appliances and washing the cars. Jolly good stuff to have around. (Just don't leave it on the appliances or the cars too long, or you will see what happens to the paint!)

So ... I put the models in some dixie cups with the Simple Green, set them all in an old cigar box in the garage, and went off to do other stuff.

Three hours later, and ... OOOPS! Looks like dixie cups were a bad idea. It ate/soaked right through the waxed cardboard, and half the garage was wet with the stuff by the time I got back to check it. Hmmph.

OK, let's try another container. If this tub will hold Casa Sanches Salso Roja, the Simple Green won't have a chance!

Now we're getting someplace. A few hours in the tub, and that paint is all ready to come off.

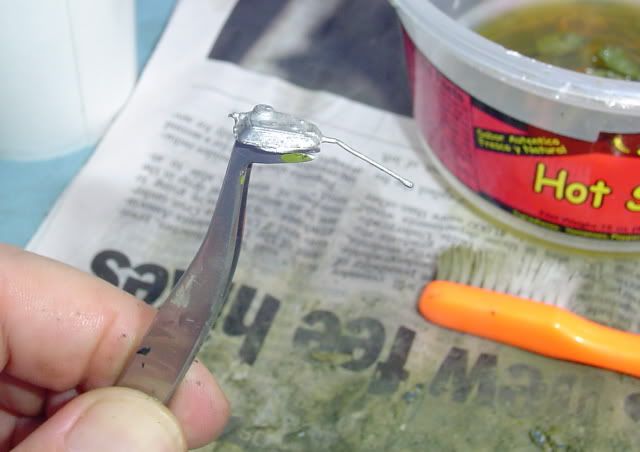
So, tweezers in hand, out they come, one-by-one.
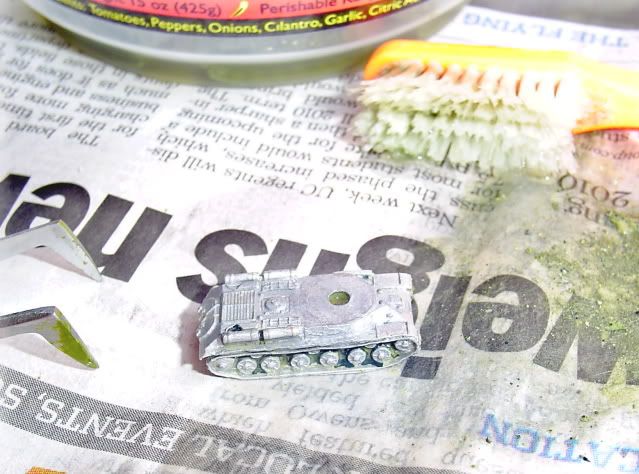
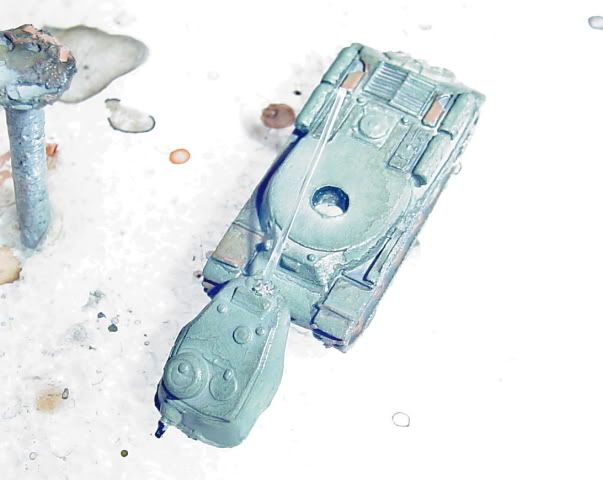
On to some newspaper, and swish-swish with an old toothbrush. There ya go, a stripped-bare JS-2 hull.
The turrets are a bit more difficult to handle, but they strip off well enough too. You really don't need to put any pressure on the brush, just rub it over the metal, and the paint comes right off.
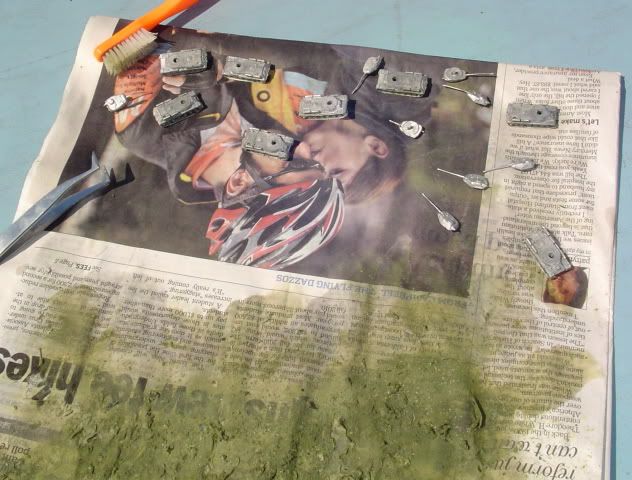
All done stripping. Only one barrel damage, and that was from my fumble-fingers in handling, rather than from brushing.
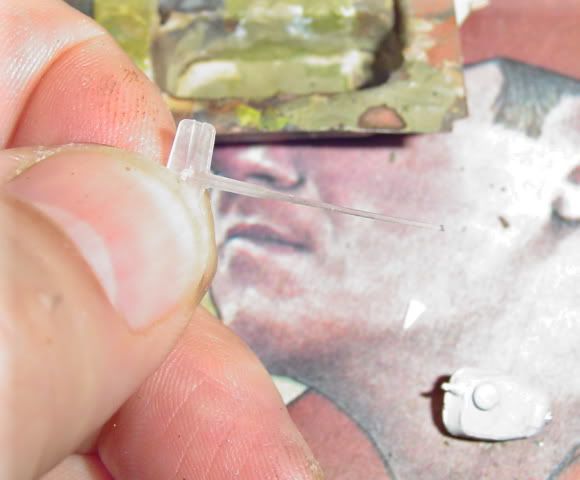
So here is what I use for replacing barrels. It is a plastic tag-holder off of a not-too-recent clothes purchase. I have about 20 of these things saved up now, in various sizes.
Snip snip, a bit of the thumb-drill, and the barrel is in place.
The models were primed, painted with Polly-S Soviet Green, and dark-washed two times. I took a fairly quick approach to detailing, hitting the engine grills with extra dark wash, and hitting the running gear with rust-colored wash. Then a run over them with a dry-brush using Polly-S Sahara Sand, and touch-ups to the gun muzzles and the turret-rear MGs with black.

So here they are, ready to role.
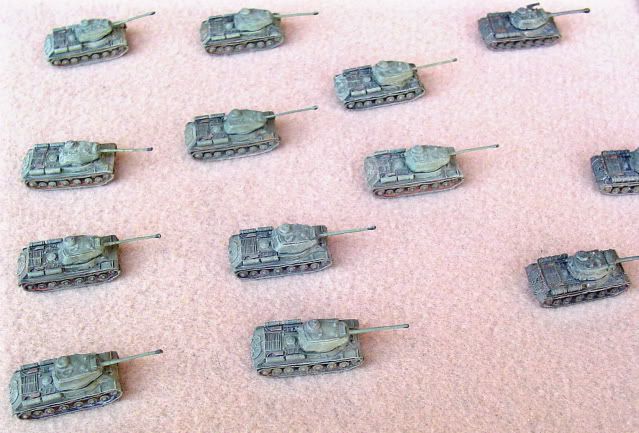
Not exactly my best work, but certainly respectable enough that I won't need to make excuses if I bring them out at the next con. Can you find the tank with the replacement barrel? Its on the left in the picture, second from the bottom.
That's my most recent project. Hope you enjoyed the show.
This is a project I did a couple weeks ago. At the most recent Con I brought a couple units onto the table that have been in my "Active Forces" box since the late 1970s. And frankly, they were none-too-impressive when they showed up on the board.
So I thought I would refurbish them to bring them a bit closer to my more recent stuff.
Here are my JS-2s and the refurb project.
Let's start the "before-and-after" with some "befores". Can you guess which two are my old models, vs. which one is from my newer JS-2s?
Oy, they is (was) some ugly ducklings! They were spray-painted Testor's Olive Green. And they were spray-painted WAY too much. Most of the detail, which was notably less with these "vintage GHQ" models, was covered over with the paint. Also my rudimentary efforts at adding something to look like AAMGs was rather embarrasing.
This is the product that discussions on this board have taught me to use to strip old micros: Simple Green. It is a household cleaner -- reasonably cheap, and claims to be organic and non-toxic. AND IT WORKS!
Oh, and I also use it for cleaning the kitchen appliances and washing the cars. Jolly good stuff to have around. (Just don't leave it on the appliances or the cars too long, or you will see what happens to the paint!)
So ... I put the models in some dixie cups with the Simple Green, set them all in an old cigar box in the garage, and went off to do other stuff.
Three hours later, and ... OOOPS! Looks like dixie cups were a bad idea. It ate/soaked right through the waxed cardboard, and half the garage was wet with the stuff by the time I got back to check it. Hmmph.
OK, let's try another container. If this tub will hold Casa Sanches Salso Roja, the Simple Green won't have a chance!
Now we're getting someplace. A few hours in the tub, and that paint is all ready to come off.
So, tweezers in hand, out they come, one-by-one.
On to some newspaper, and swish-swish with an old toothbrush. There ya go, a stripped-bare JS-2 hull.
The turrets are a bit more difficult to handle, but they strip off well enough too. You really don't need to put any pressure on the brush, just rub it over the metal, and the paint comes right off.
All done stripping. Only one barrel damage, and that was from my fumble-fingers in handling, rather than from brushing.
So here is what I use for replacing barrels. It is a plastic tag-holder off of a not-too-recent clothes purchase. I have about 20 of these things saved up now, in various sizes.
Snip snip, a bit of the thumb-drill, and the barrel is in place.
The models were primed, painted with Polly-S Soviet Green, and dark-washed two times. I took a fairly quick approach to detailing, hitting the engine grills with extra dark wash, and hitting the running gear with rust-colored wash. Then a run over them with a dry-brush using Polly-S Sahara Sand, and touch-ups to the gun muzzles and the turret-rear MGs with black.
So here they are, ready to role.
Not exactly my best work, but certainly respectable enough that I won't need to make excuses if I bring them out at the next con. Can you find the tank with the replacement barrel? Its on the left in the picture, second from the bottom.
That's my most recent project. Hope you enjoyed the show.