Page 1 of 2
Camo netting on modern tanks?
Posted: Mon Nov 09, 2009 8:19 am
by Rutgervanm
What are the different methods people use to put camo netting on their tanks?
I'm modelling some Dutch Leopard II's and though they are mostly shown in a very clean state, those are mostly training photos. In the real thing they would at least get some camo netting over the barrel and front of the turret and hull:
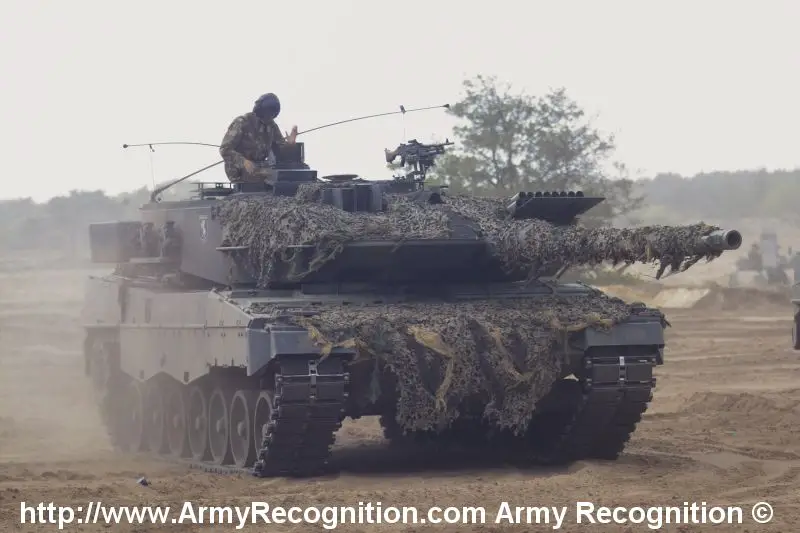
Any ideas to achieve this effect?
Posted: Mon Nov 09, 2009 7:27 pm
by Donald M. Scheef
I suggest facial tissue; torn to approximate size and shape, draped over the model, saturated in diluted white glue, allowed to dry, and painted in appropriate colors.
Don S.
Posted: Mon Nov 09, 2009 8:55 pm
by Rutgervanm
I think that could work, but then you wouldn't get the "foliage" effect I think.
Just yet I put some thin layers of green stuff on an unused M1 Abrams I had lying around. I put on a very small blob, smeared it out in the pattern of the net and then just hacked away at it with my sculpting tool to create the right structure. I think it worked remarkably well and I'm now applying it on my Leo's. It even looks good around the barrel since you can make the layer very very thin.
And of course its less painful than cutting of a piece of skin from my face.

Posted: Mon Nov 09, 2009 9:44 pm
by Hauptmann6
Try gauze while you are at it. will give you the open weave look.
Posted: Mon Nov 09, 2009 11:16 pm
by Mk 1
I use the foam padding that is often used in boxes at this scale. The GHQ Bunker Box comes with a supply of this foam, as do the hinged lid plastic boxes that the other US vendor uses to package their models.*
I snip the foam very thin. Then I apply some super-glue (any cyanocrylic glue should work). This glue sort of "melts" the foam, compacting it down a bit, making it form to the surface a bit, but then drying to hold it in place. A single small drop in one or two locations can even simulate tie-downs of a rolled net.
After the glue has dried I dry-brush the foam to the desired color(s).
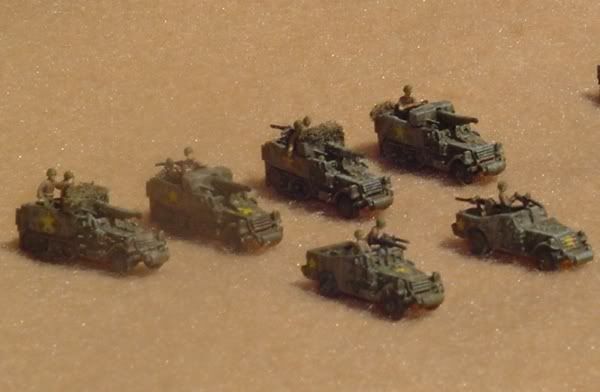
Here are some of my M3 TDs painted up for Tunisia. The official load-plan called for the camo nets to be stored on the back of the track, but crews often placed it on top of the gunshield so it could be more quickly draped over the front when taking up a hastey firing position.

Some of the crews have draped the net over the front of the gunshield and even over the top of the driving compartment. This approach provided some measure of camoflage from the front, but still allowed the track to be driven and the gun to be fired.
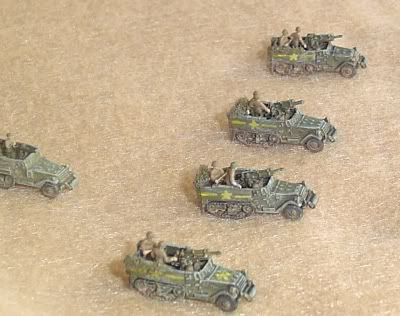
The crews of T19 SPGs often stored their camo nets on the sides of the hull, as have the no. 1 and 4 guns in this battery, to allow them to access the rear door of the track more easily to re-supply with ammo.
Works well enough for rolled and partially-deployed nets. I have not tried it for a fully deployed net.
Hope that helps.
*GHQ used to use these same boxes, and since I have been collecting for a loooonnnnngggg time I have a supply "built up" (ie: cluttering up my garage).
Posted: Tue Nov 10, 2009 1:56 am
by WargameHub
Havent tried it for 6mm yet but I use pantyhose for 15mm. Stretch it out on cardboard or cardstock and tape it down, then spray paint your base color. by stretching it it's see through.
Posted: Tue Nov 10, 2009 2:42 am
by opsctr
You might try using some of woodland scenics flocking material carefully applied using white glue as in this picture.
It isn't perfect, ...but it seems to work within the 12 inch rule.
A combination of dryer sheets and the same flocking should work even better.

Will
camo netting....
Posted: Tue Nov 10, 2009 7:59 am
by chrisswim
Camo netting,
Pantyhose has been highly recommended. Yet, I will not use it on the GHQ Leopard 2A6 MBTs, I may use it on a scotia/ros or someone else. To if you hide the attractive lines/design of the the GHQ, may as well buy low price point(lower quality figures in my opinion) for camo netting, as you cover up the GHQ scupting. So if you have some crappy figs from decades ago, put a camo net over them and you have top line figures.
Posted: Thu Nov 12, 2009 5:39 pm
by ferret701
I used foam from some GHQ packs (melted on with super glue) to add camo netting to these CinC minis. (sorry, I haven't defiled any GHQ minis this way). It adds a lot of life to the models.

foam thats glued....
Posted: Fri Nov 13, 2009 9:19 am
by chrisswim
Ferret,
Those Cheiftans, those are the ones with the form from a ghq pack glued 'melted' on the read of the turret? Are those GHQ cheiftans or someone else. BTW, nice job, look great.
What paint brand and colors did you use?
Posted: Fri Nov 13, 2009 5:30 pm
by ferret701
Hi Chris --
They're CinC, and lack the amount of detail of the GHQ models (except for the commander figure on some of them, a touch I like, though like most CinC figs, they are too weak). The models really needed something to make them look more lively.
I used (IIRC) PollyS British Brown Drab for the base and PollyS Scale Black for the camo, over a sprayed Testors olive drab base.
The netting is, in fact, melted foam from a GHQ aircraft or helo pack.
Pat Callahan
Posted: Sat Nov 14, 2009 5:33 am
by Rutgervanm
Just a quick shot of the finished tanks. I painted them as 11 Tank Battalion, Hussars of Sytzama, of the 13th Mechanised Brigade of the Royal Dutch Army. They will soon be accompanied by guys from 17 Mechanised Infantry Battalion, Prinses Irene Guards Regiment and 42 Reconcompany, Hussars of Boreel (buildings Dutch units kicks ** CENSORED **!):

And this is what it will look like from the perspective of the T80's they will be engaging (at least as soon as I get to building that battlefield periscope):

Better shots with daylight on sunday.
Posted: Sat Nov 14, 2009 11:15 pm
by chrisswim
Rutgervanm,
Those tanks look very nice. If you would let me/us know what colors you used and brand. It appears that a decal or paint of unit designation on turret side, where do you get that or paint? Then the camo netting, your process. What about the anntenas?
Thank you in advance for providing your info and the steps/sequence.
I will look forward to Sunday with more and better photos.
chris
Posted: Sat Nov 14, 2009 11:37 pm
by Rutgervanm
I use a mix of Vallejo and GW. Black undercoat, heavy drybrush with Catachan Green, camopattern with black and SS Camo Brown, very light drybrush with Russian uniform green.
Camo netting is thin layer of green stuff attacked with a sculpting tool.

I painted it Green Brown, washed with Badab Black and drybrushed with Green Brown mixed with lighter green. Not totally happy with the color, but it will have to do for now.
The unit sign is handpainted. It is a black, white edged shield, with a white goat on it:

In 6mm it is reduced to a couple of white blobs, but still.
Antennas are from a shoebrush. The brush shedded hairs like an old cat, so I have plenty now. Thin, flexible and easy to cut. Only problem is they bend easily.
Posted: Sat Jul 17, 2010 8:20 pm
by chrisswim
Ritervann,
Looking at this post again, very nice.
How happy are you with the netting now after several months, the pics look good!
What did you end up doing for the process? sequence?
Do you have individual close ups of the tanks from different angle, and perhaps of different tanks. I want you to show off[ then I will learn, look good]. The Dutch Leopard II look nice, I appreciate it in advance.