How do I paint these!?
Moderators: dnichols, GHQ, Mk 1
-
64mas
- Posts: 11
- Joined: Sun Mar 14, 2010 9:32 pm
How do I paint these!?
I'm trying to paint some of the ww2 winter germans (individual infantry and heavy weapons), and can't figure out how to do it. I end up with 6mm blobs of paint, instead of infantry... Any suggestions?
-
Mk 1
- E5
- Posts: 2383
- Joined: Fri Dec 24, 2004 3:21 am
- Location: Silicon Valley, CA
Have you painted infantry at this scale before? Is this a problem specific to the winter figures, or rather a question of how to paint micro infantry in general?
There are several guides to painting figures that can be found and considered. Troy Ritter's is among the best. Just google for the Ritterkrieg website.
A photo of some of my more recent work -- a platoon of my Romanian infantry.
Troy uses enamels. I prefer acrylics. But I use much of his technique. Just bend it a bit to make it fit my home environment (no noxious paint fumes allowed, and no toys in the oven, ever!).
Would be happy to chat more on painting figures if you can guide us a bit as to what you are looking for. General, or winter-figure specifics?
-Mark 1
Difficile est, saturam non scribere.
"It is hard NOT to write satire." - Decimus Iunius Juvenalis, 1st Century AD
Difficile est, saturam non scribere.
"It is hard NOT to write satire." - Decimus Iunius Juvenalis, 1st Century AD
-
HKurban
- E5
- Posts: 205
- Joined: Sun Nov 09, 2008 9:48 pm
- Location: Columbia, MD
Assuming you're using brushes like me, here's a couple suggestions based on my experiences.
-- Get the finest tipped brushes you can find. Sometimes this can make all the difference.
-- Plan your paint job out ahead of time. Draw out the specifics of what you want.
-- Practice what you want before you commit to it. Either use a single test model, or test it out on another medium such as a palate. The important thing to practice is if your brush and level of detail requires you to apply only the slightest pressure with your brush.
-- Be realistic on the level of detail you can achieve at this scale. You're probably not going to be able to paint detailed waffenfarbe on your Germans. For instance, with my moderns, I knew there was no way I was going to paint ACU pattern on my infantry, so instead I went with a solid coat of Feldgrau that looks pretty good from a distance. My Russians, on the other hand, had less intricate camouflage schemes, so I was actually able to paint on some splotches for my KLMK and Flora patterns. Be advised though, the more detailed you get, the longer its going to take to finish.
-- Also, contrast makes much more of a difference at this scale. Because of the size, the infantry will look to your players like infantry would at 300-500 meters out when viewed from standing height at a table. Because of this, your eyes will blend together colors that look "similar enough" and a lot of your detail won't be appreciated. If you want something to "pop", try to give it a bit of contrast compared to the rest of the colors, especially the base coat. For instance, I paint the skin parts of my infantry (caucasian ones at least), with Testors' cream color. In real life, very few men on the battlefield have the complexion of Porky Pig, but from a distance, the bright, light color, pops out at the players and tells their mind, "hey these aren't little green robots, these are people with faces and hands!" IMO that can make all the difference in bringing your figures to life at this scale.
-- Lastly, don't be afraid to go back over your work, painting up any errors you come across. I can't count the number of times I've had paint from a face bleed over onto a helmet or vice versa. Or sometimes I might have soldiers with giant mutated hands on their rifles. Sometimes I recognize these goofs as I am painting them "oops, nudged the hand too much while painting that guy," or I realize them afterwards in some sort of review. Taking photos might help at this stage, because a lot of the unintended details your unaided eye doesn't really pick up until viewed through a photo for some reason.
Some reference pictures (albeit a bit hazy. Still getting used to the camera) of my Russian Infantry. Notice the contrast of the flesh bits from the rest of the models. Same thing with the VDV berets, which are in real life, much more muted in color.
Its a sniper rifle, not a "sniper"! You don't call an assault rifle an "assault"!
First Command Master Gunnery Staff Sergeant Major First Class of the Army (1CMGSSMFCOTA, E-25)
First Command Master Gunnery Staff Sergeant Major First Class of the Army (1CMGSSMFCOTA, E-25)
-
Mk 1
- E5
- Posts: 2383
- Joined: Fri Dec 24, 2004 3:21 am
- Location: Silicon Valley, CA
OK. That gives us guidance on what we might suggest.64mas wrote:Yeah, this is my first try at 6mm.
HK is right about getting some small extra-fine tipped brushes. Other keys to success that I have found:
- Get a magnifier. I use a desk lamp + magnifier on an articulated arm. Others use magnifying headsets or even reading glasses.
- Mount the figs for painting. I mount mine on popsicle sticks and/or coffee house stirring sticks. About 10 figs per stick. Makes 'em easy to handle, and I can paint the same thing on a batch (one stick worth) before going on to painting the next thing. But other folks mount them on nail heads, and then stick the nails in a wood or styrofoam base. (I do this for vehicles, but not for infantry.)
The advice to do one or two first is very sound. It is not only good for developing / testing your painting scheme, but also for inspiring you. Seeing one finished soldier gets me much more fired-up than seeing a stick of 10 soldiers with only a base-coat and painted weapons.
Hmmm.I I think the big problem is I was just getting used to 28mm when I decided to try 6, and I'm still trying to do all the details.
I might suggest that you don't go for "all the details" on your first batch.
Or go ahead. Your call.
But it is rather remarkable how good you can make these little guys look with just some modest detailing. As HK suggested, at game-table distances your eye will start to respond to the "suggestion" in your painting as much as to what is actually painted. You'll loose the ability to see much of that detail that you might have spent much time on, while at the same time you'll imagine you see detail that you might not have painted at all.
My priorities for detailing are:
1) Paint the figures a different color than the base/ground they stand on.
("Well DUH" I hear you say. But no, really, if you do nothing but this, your figures will still look like painted infantry rather than little green blobs.)
2) Paint faces and hands. Makes all the difference in the world.
3) Paint weapons AND HEADGEAR. If you paint nothing but faces, hands, weapons and headgear, your figures will look good. Really. I promise. I have found painting the headgear (AFTER you have painted the face) to be particularly important in making the figs look nice. Really gives definition to the face itself, making it look like a face, rather than look like a fleshtone blob.
4) Do some washing and/or dry-brushing. Best done before you paint the faces, hands, weapons and headgear. Placed at 4 only due to priority, not to sequence of painting. Any dark wash will bring out lots of detail. And the dry-brushing will make the web gear and any packs/canteens, etc. pop out. Even if you don't detail them, they'll become visible.
5) Paint the boots.
6) Paint the web gear, packs, canteens, etc. Don't worry about getting them perfect. Better to under-paint than over-paint on the detailing. If the sides of the canteen are not painted all the way down to the tunic, no one will see. What they might see is that something on the belt (the canteen) is a different color than the tunic.
7) Paint the tunics a different color than the pants. Makes nice looking figs. But you should have some historical justification for this.
Here is an example of my Italians (in Continental uniforms):

This was the first infantry force I painted after joining this forum. My detailing consisted of faces, hands, headgear, boots and weapons. Even the weapons were scarcely detailed -- I painted black only (no wood tones). Only later did I go back and do a few web straps (often rifle straps on my "NCO" figures). Even painting the webbing on one out of five figures has the odd result of making folks imagine that they all have the webbing painted.

Here are some of my Soviets on the gaming table. These boys were painted in the first half of the 1990s. My painting skills were far more rudimentary then. This was the first infantry on which I painted hands and faces, and weapons. Again all the weapons were simply painted black.
A couple years back I did an upgrade. I painted the headgear (WOW did that make them look better!), washed and dry-brushed them, and flocked their bases.
They won't win any beauty contests among micro-armor enthusiasts, but I have gotten many compliments at game cons for them -- mostly from passers-by who are at some distance and never inspect them up-close.
Hope that helps.
-Mark 1
Difficile est, saturam non scribere.
"It is hard NOT to write satire." - Decimus Iunius Juvenalis, 1st Century AD
Difficile est, saturam non scribere.
"It is hard NOT to write satire." - Decimus Iunius Juvenalis, 1st Century AD
-
64mas
- Posts: 11
- Joined: Sun Mar 14, 2010 9:32 pm
Thanks for all the help guys. I'll post up some pics when I get a few done. (Hopefully today)
Edit: Forget the pics. I got three done, but my camera died... Also: fountain pen, plus tiny nib, plus black ink, equals straps and the like. (I didn't have a sharp brush to use. :-/ )
Edit: Forget the pics. I got three done, but my camera died... Also: fountain pen, plus tiny nib, plus black ink, equals straps and the like. (I didn't have a sharp brush to use. :-/ )
Last edited by 64mas on Mon Feb 14, 2011 6:20 am, edited 1 time in total.
-
voltigeur
- E5
- Posts: 814
- Joined: Mon Dec 13, 2004 3:26 am
- Location: Dallas Texas
I to find Ritter's site one of the best guieds out there. The only new things I can thing to mention on painting infantry is:
1) I like to spray paint a base coat that is the base color of the unitforms. I usually go a bit lighter than the color that was used historically. I do this because first the small figure size needs to be a bit lighter. and at this scale I find black washing is a better technique than dry brushing.
2) I do the flesh first. This breaks up the model and I can see details. The weapons are next. I do use some bright colors to give the figure depth. (example brushed aluminum on the M16 magazines or light yellow wood on the AK47's)
3) Web gear I do take a bit of artistic license. If the uniform is a light olive green I'll do the web gear in a medium green. Just a slight contrast.
4) For camo paterns I paint the base color using 30'0 brush for the next largest color. Then I take fine wire for the smallest color (like the sand of the woodlOands patern). On my woodlands patern I didn't put in the black because it darkened the color to much.
I pray for Peace on Earth Good will toward men. Till then one round HE fire for Effect!
-
Cav Dog
- E5
- Posts: 898
- Joined: Wed Dec 29, 2004 1:12 am
I think the secret to painting infantry is to just accept that they won't be as perfect as larger scales. Do the best job you can on the details. These guys look pretty good from gamer's eye view but under a microsope - pffft!

I've always painted infantry inside out once the basecoat is on. Start with the flesh, then boots, belts/straps, headgear and finally weapons. Then go back and clean it all up. As a general rule I don't blackwash or highlight infantry. I recall going back and forth re-doing the straps and tunics multiple times until they were passable. Bright lighting, a magnifying visor and 10/0 and 20/0 liner brushes are essential. I leave them on the sprue when painting. I think another key is to not try and paint too much in one setting. It gets very tedious painting 200 pairs of boots. Paint a couple of sprues start to finish and take plenty of breaks.
I've always painted infantry inside out once the basecoat is on. Start with the flesh, then boots, belts/straps, headgear and finally weapons. Then go back and clean it all up. As a general rule I don't blackwash or highlight infantry. I recall going back and forth re-doing the straps and tunics multiple times until they were passable. Bright lighting, a magnifying visor and 10/0 and 20/0 liner brushes are essential. I leave them on the sprue when painting. I think another key is to not try and paint too much in one setting. It gets very tedious painting 200 pairs of boots. Paint a couple of sprues start to finish and take plenty of breaks.
Tactics are the opinion of the senior officer present.
-
opsctr
- E5
- Posts: 147
- Joined: Sun Mar 09, 2008 11:20 am
- Location: St. Louis, MO
- Contact:
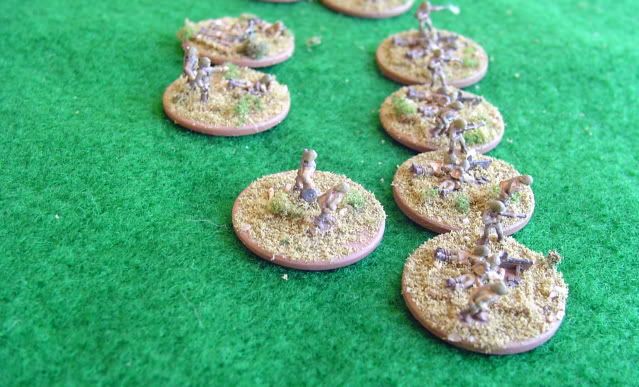
Painting infantry is about light and dark, ...and what you see on a real person at the distance they would be if they were 5mm tall. In real life you can't tell much about a person from that distance so you don't have to be exact.

Note the small touches of color that make the figures "appear" more detailed then they really are. The dabs of flesh, etc... add to the allusion and careful application of color can make they look pretty good.

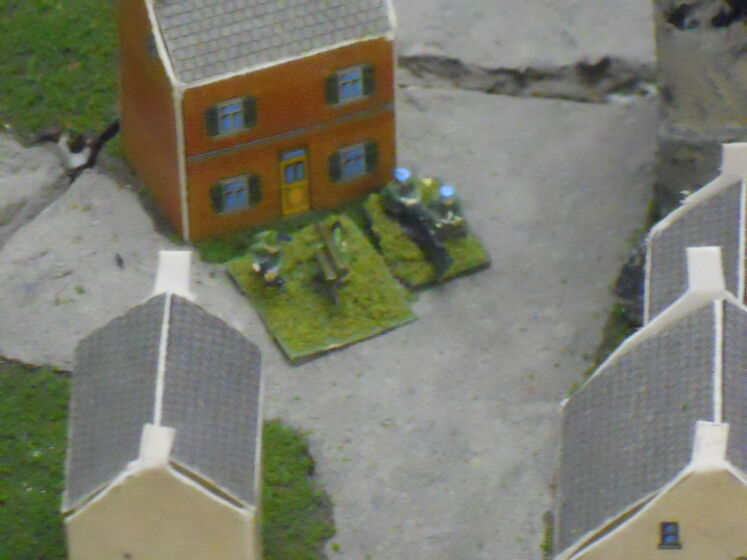
You can also get super detailed if you want as illustrated in this photograph but most often all that work is not seen by anyone but yourself, ...so if you want that level of detail go for it.

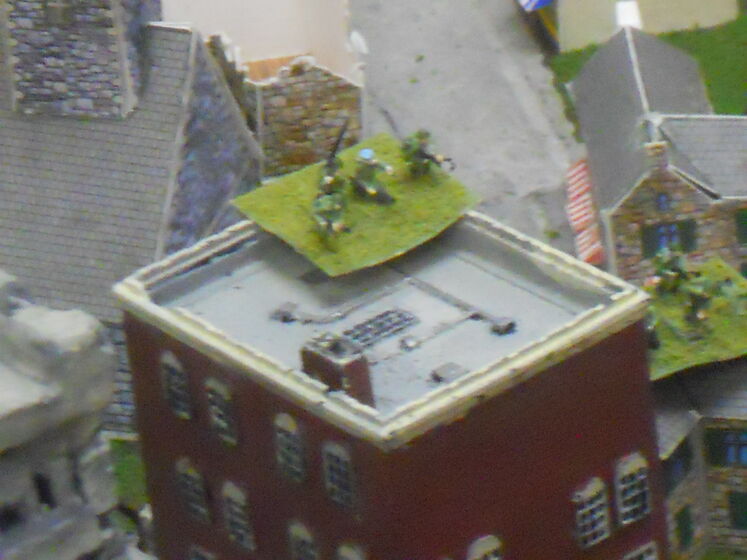
Sometimes the detail helps convey a message...

It just depends on what you like... Will
Note the small touches of color that make the figures "appear" more detailed then they really are. The dabs of flesh, etc... add to the allusion and careful application of color can make they look pretty good.
You can also get super detailed if you want as illustrated in this photograph but most often all that work is not seen by anyone but yourself, ...so if you want that level of detail go for it.
Sometimes the detail helps convey a message...
It just depends on what you like... Will
-
6mmwargaming
- E5
- Posts: 347
- Joined: Sun Mar 11, 2007 9:30 am
- Location: New Zealand
- Contact: