Page 1 of 2

Some European Terrain boards - updated 9/10/12

Posted: Thu Feb 02, 2012 9:33 am
by 6mmwargaming
Hi all

I've been working on some 6mm European terrain boards (and I think I posted a link to these a while back but I cant find it). Anyway I forgot to post about it here :cry: so here it is and the last couple of updates.

The short version

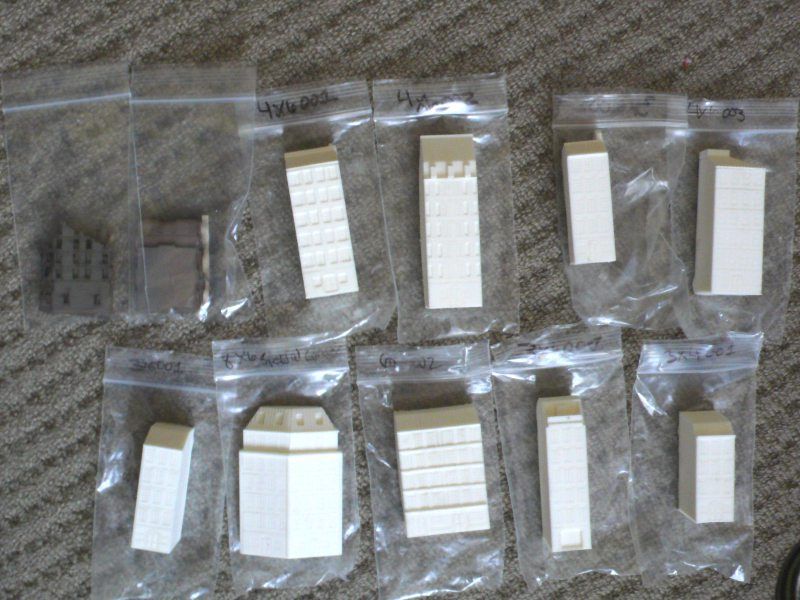
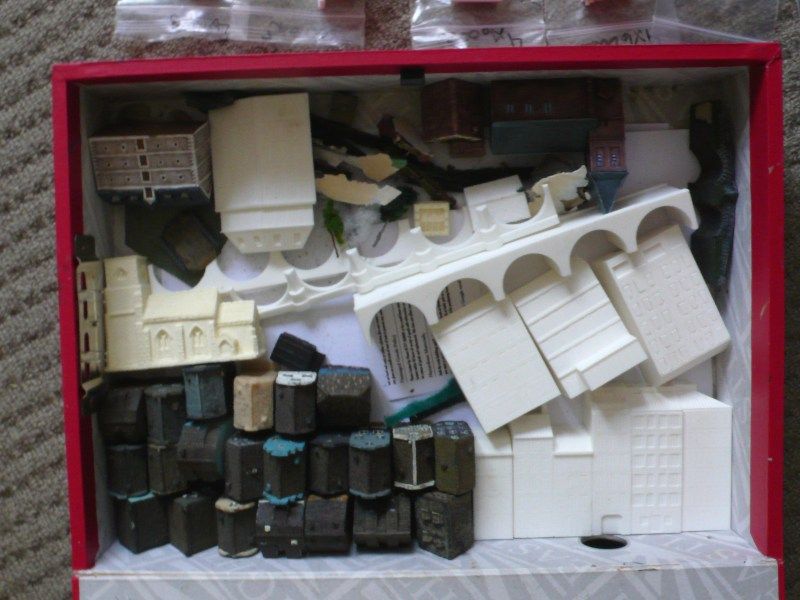
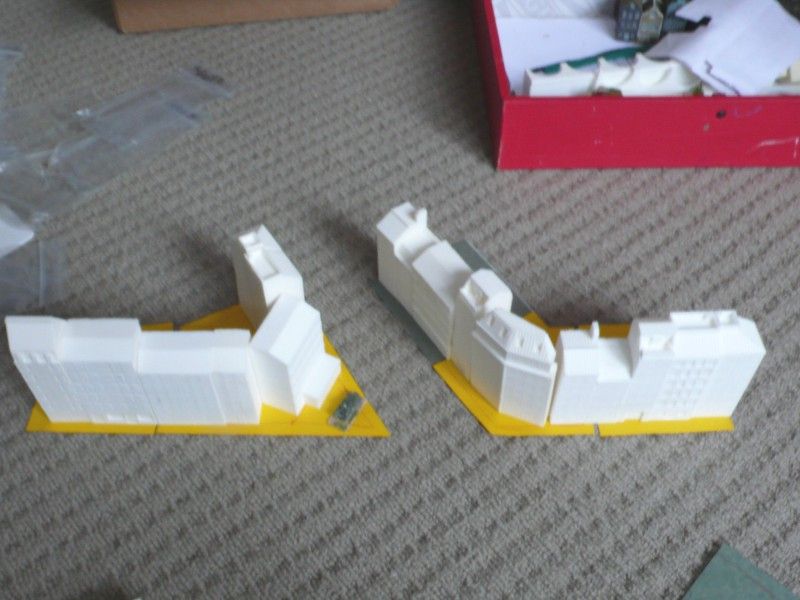
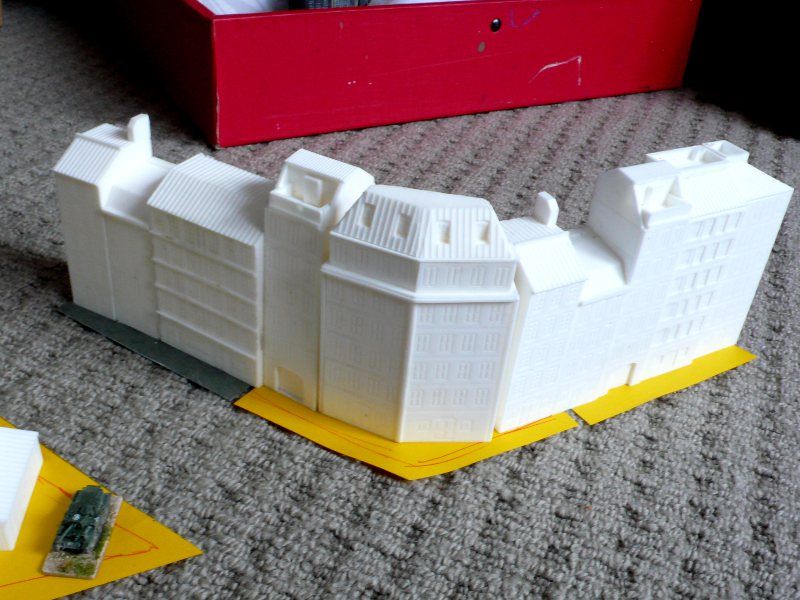
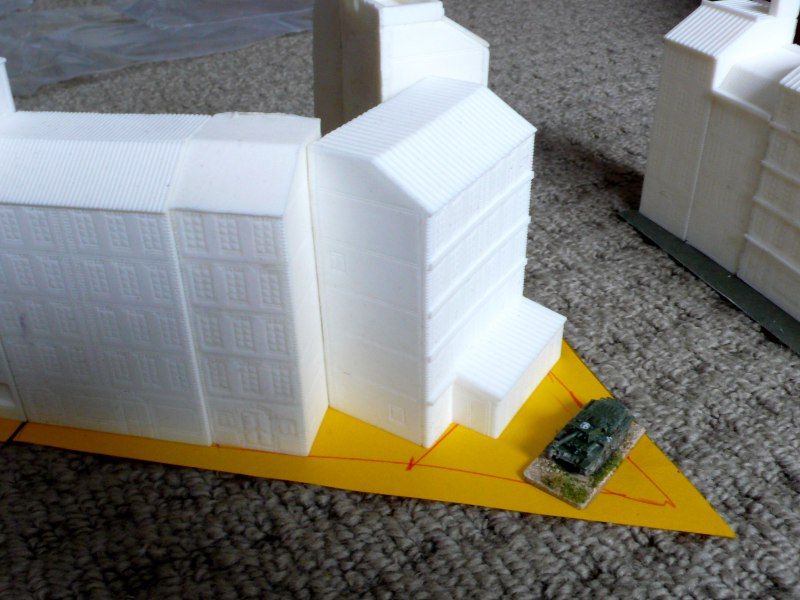
I'm making 6mm Terrain boards for Europe which I hope to use for 20th century gaming with the odd Napoleonic game. Most of the terrain will be removeable execpet rivers roads and some hills. I may make fixed towns and other pieces like coastlines later but I need to get them ready in time for a 6mm Moderns convention in Feburary.

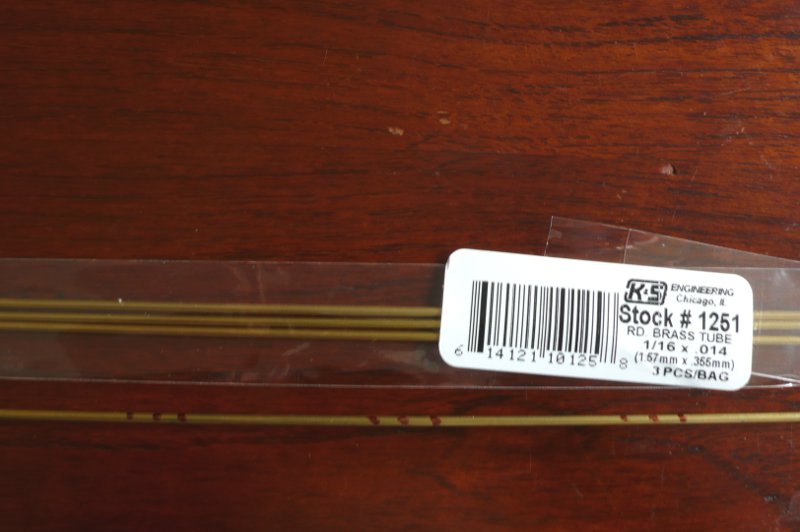
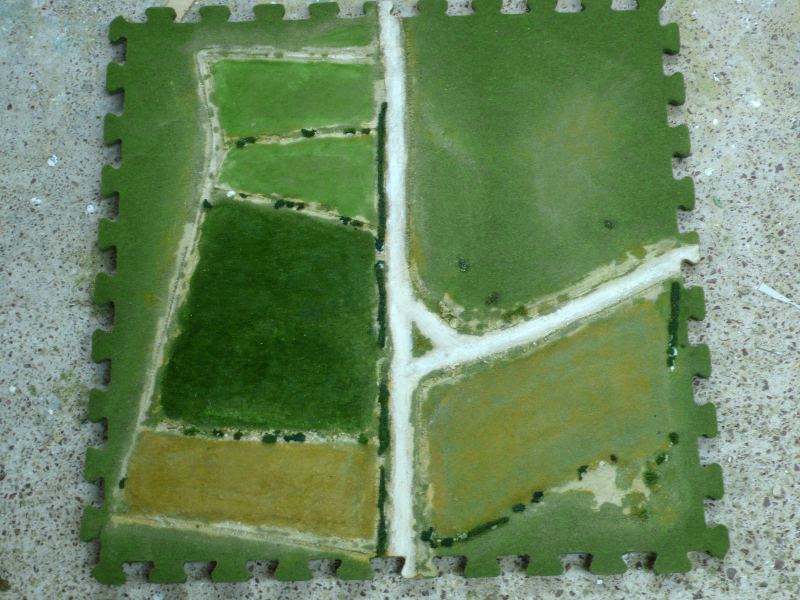
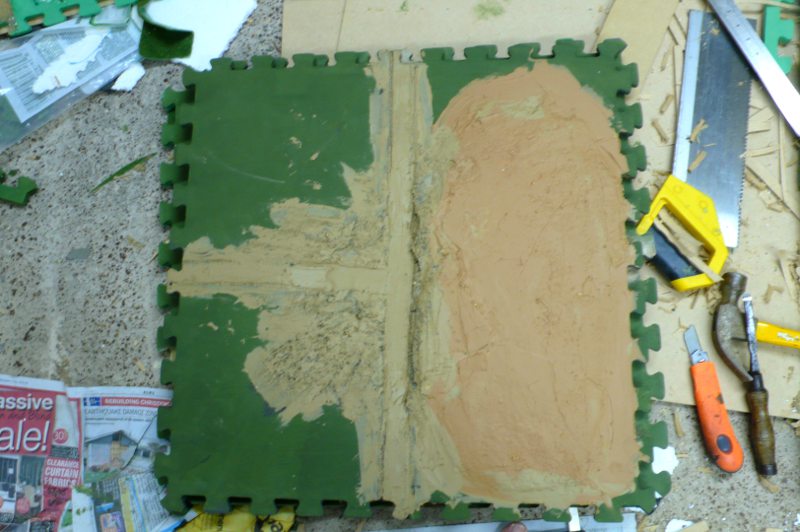
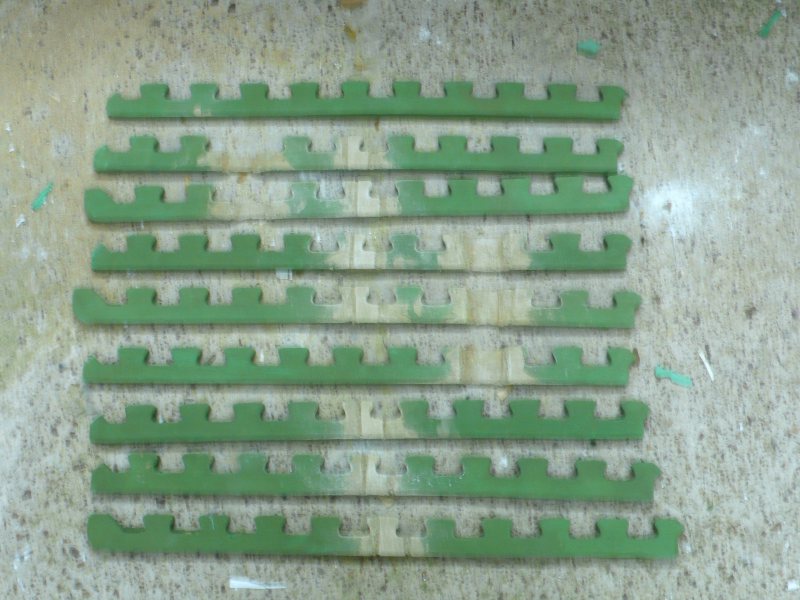
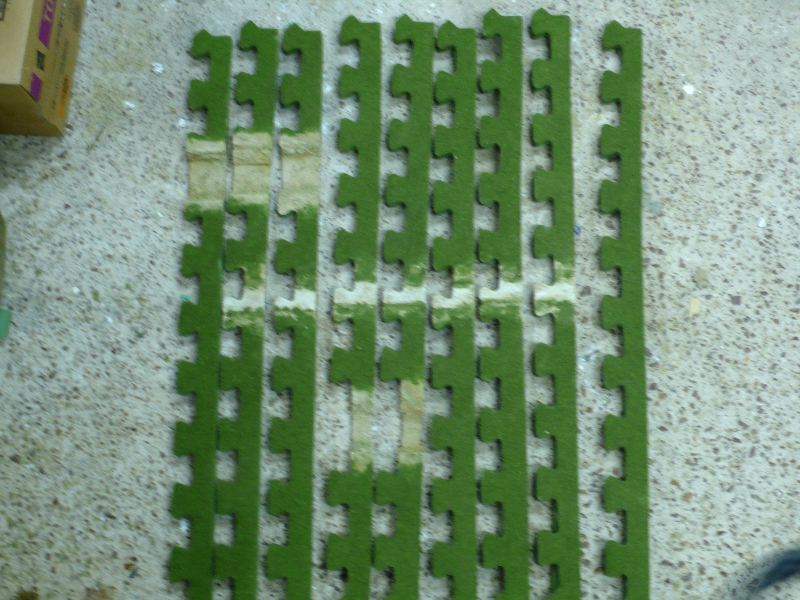
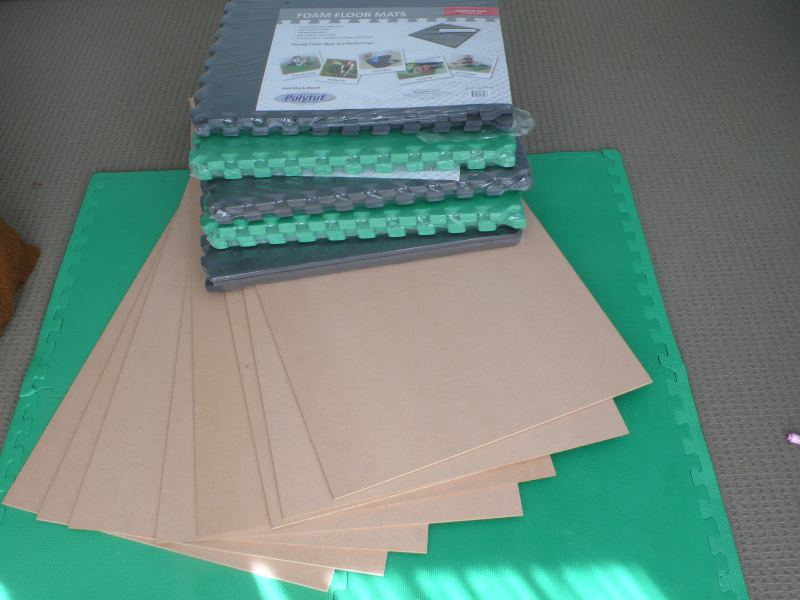
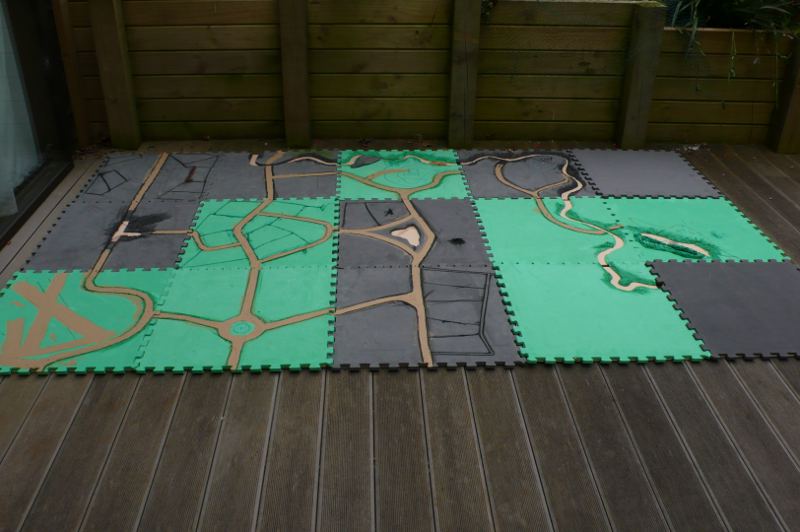
The materials (5mm MDF and interlocking foam mats)
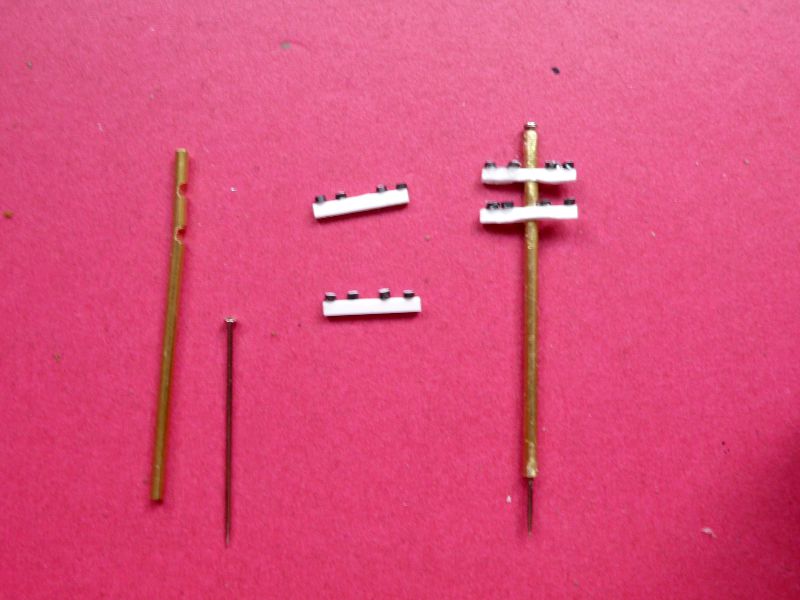
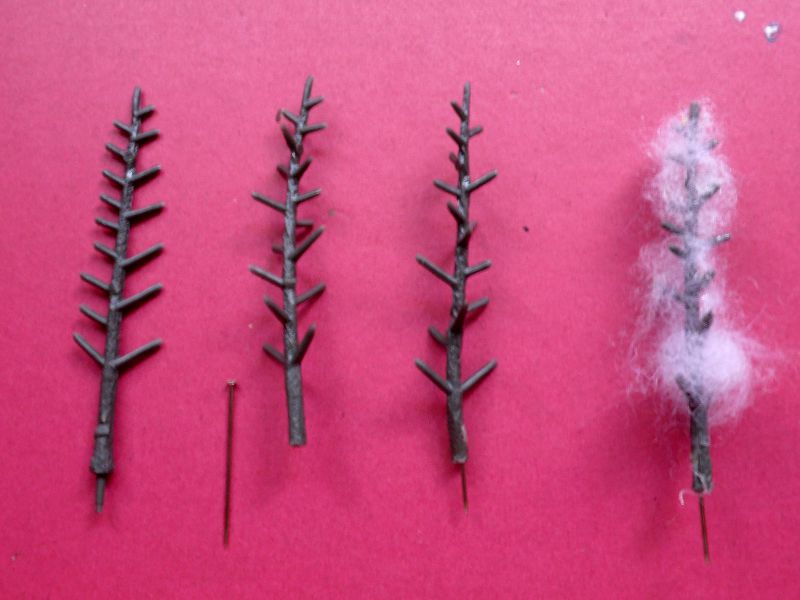
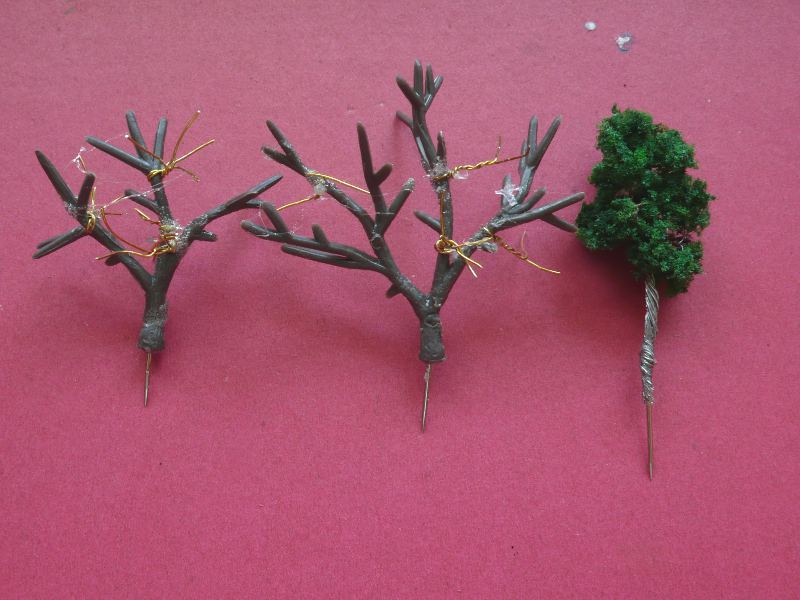
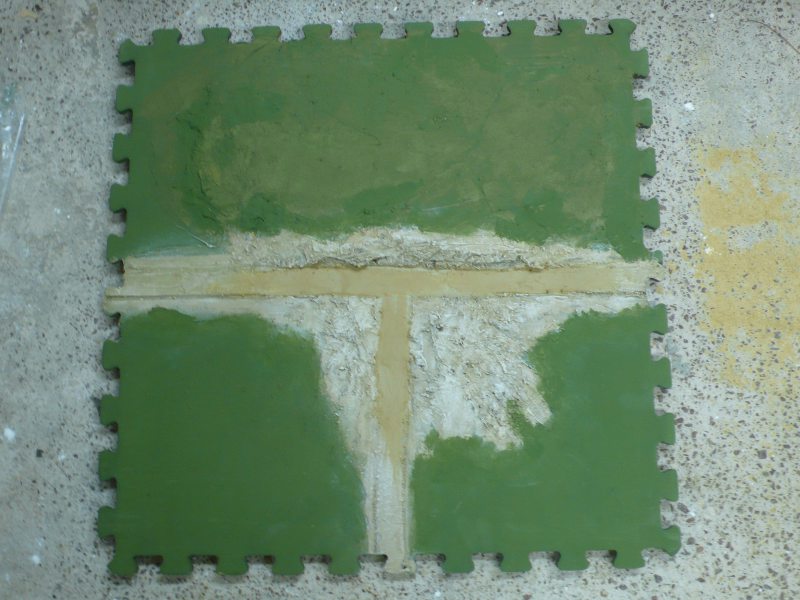
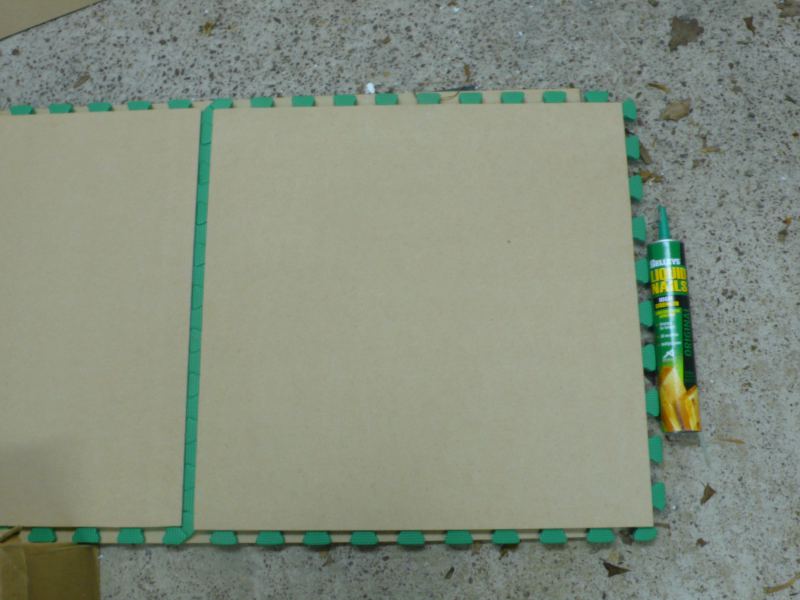
Image

Some WIP

Image

Image

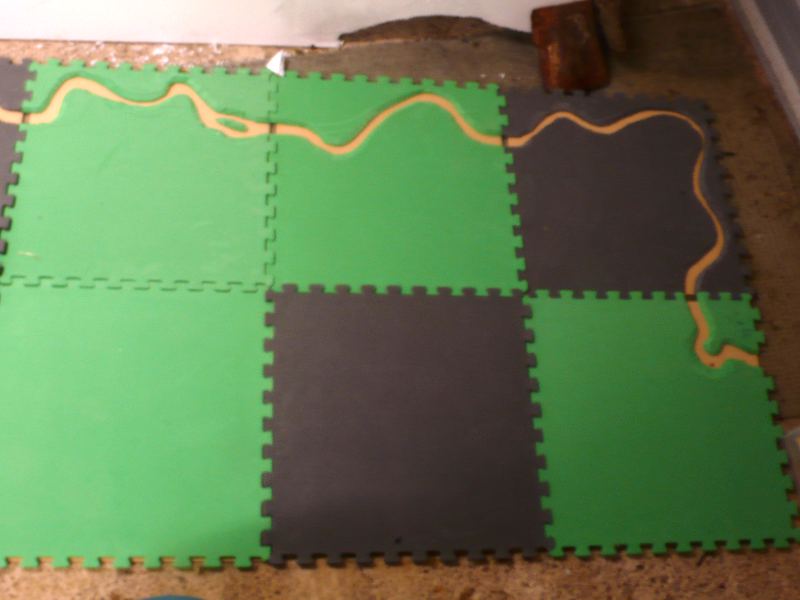
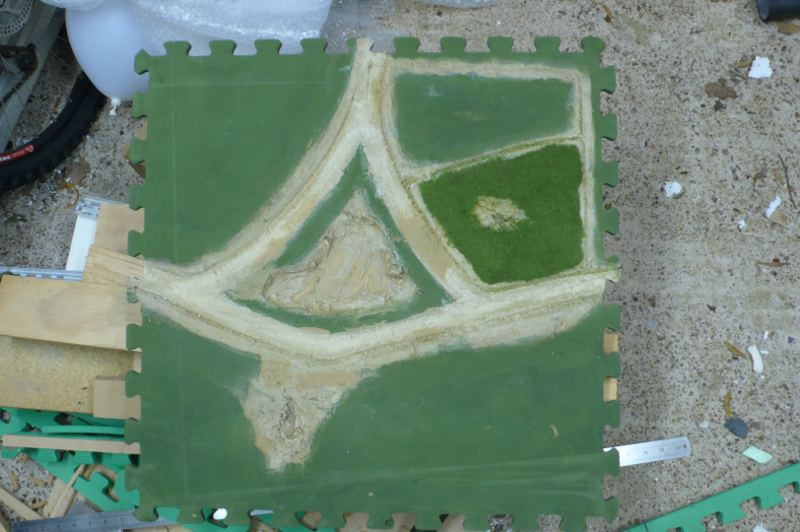
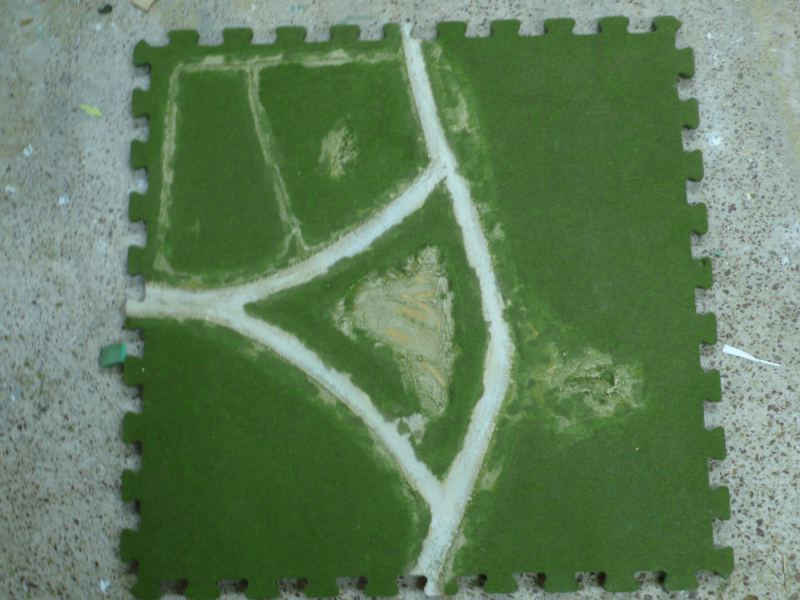
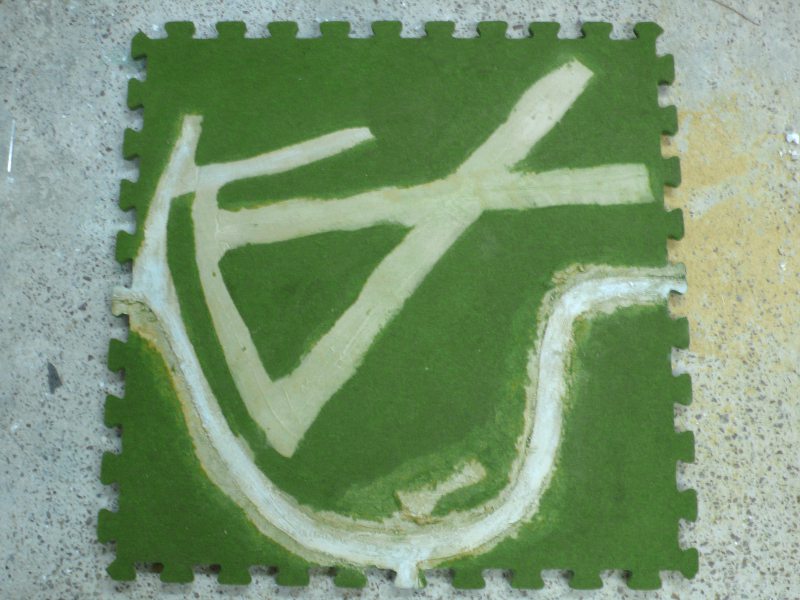
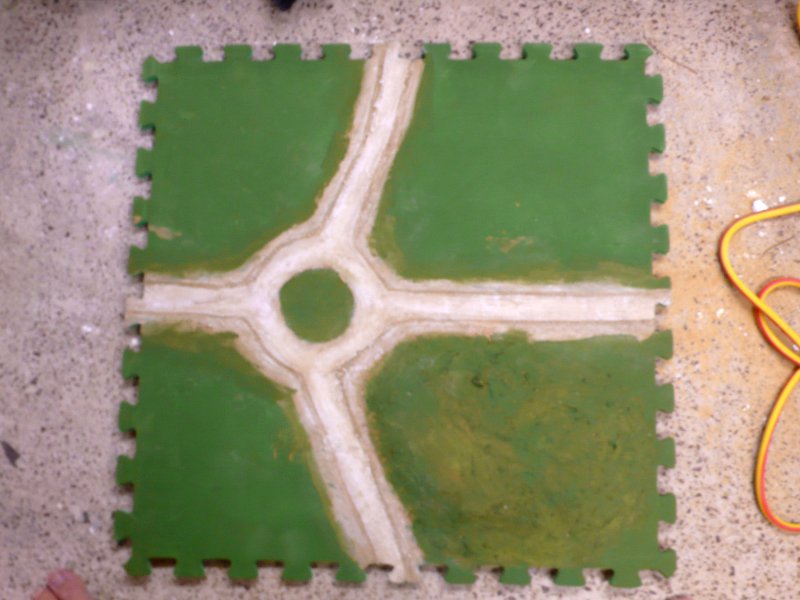
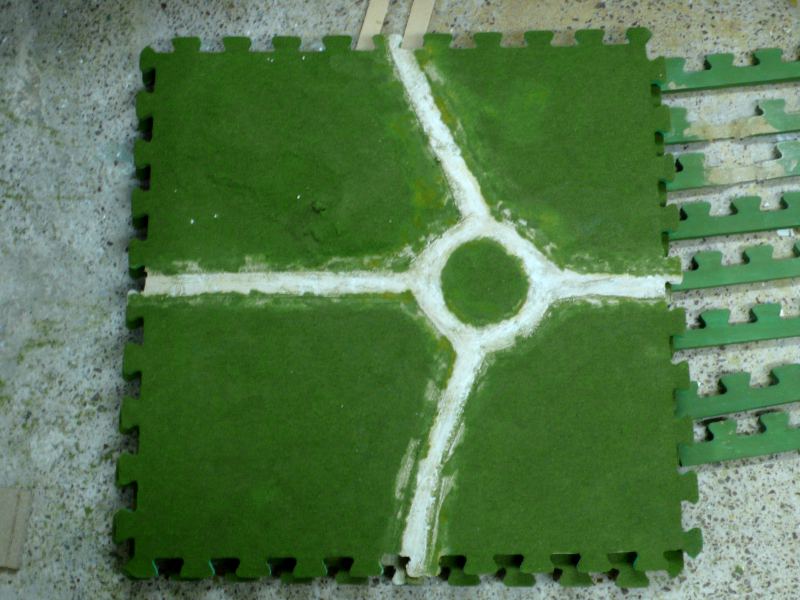
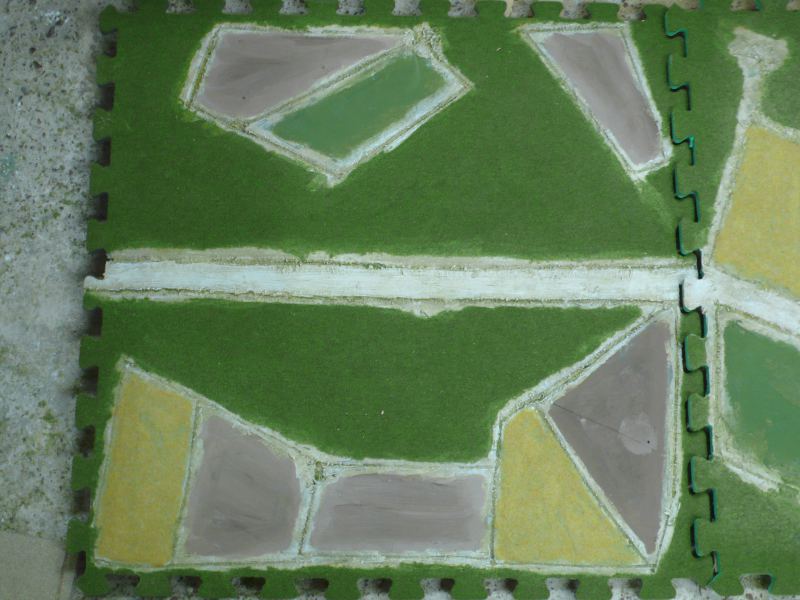
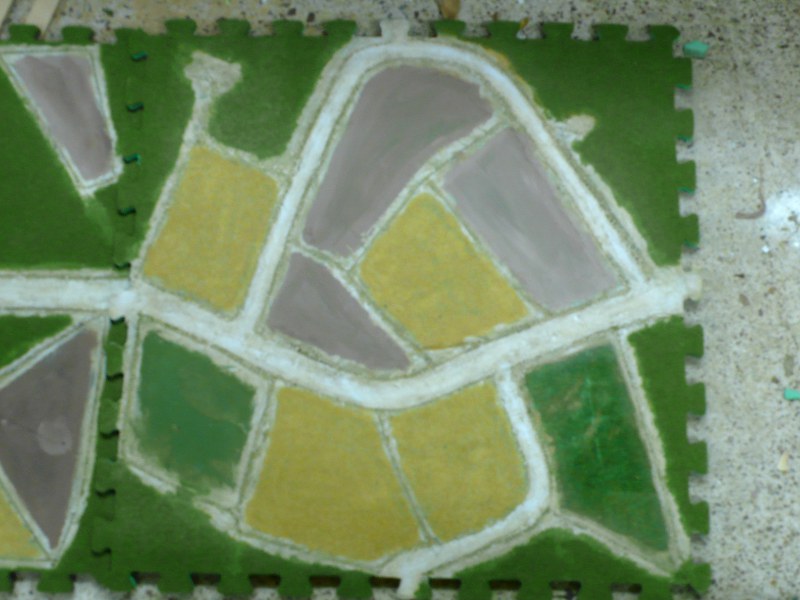
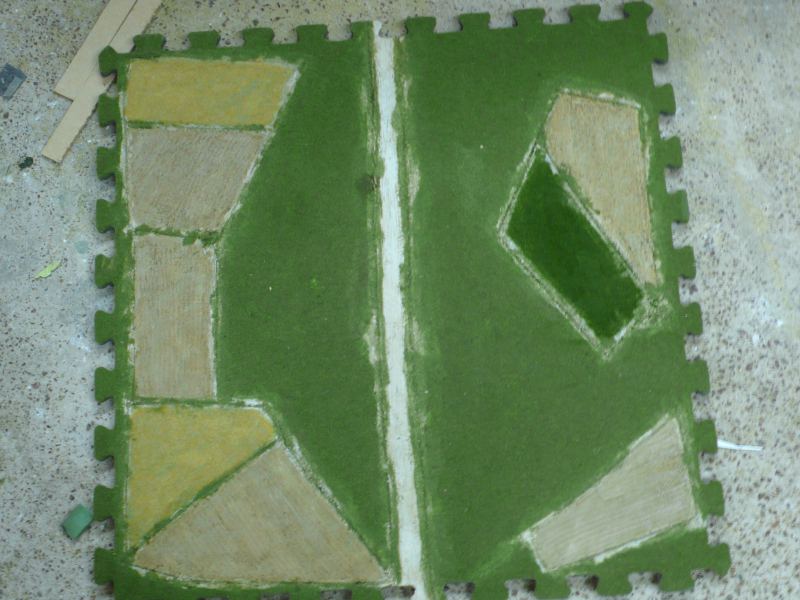
Roads and airfield added

Image

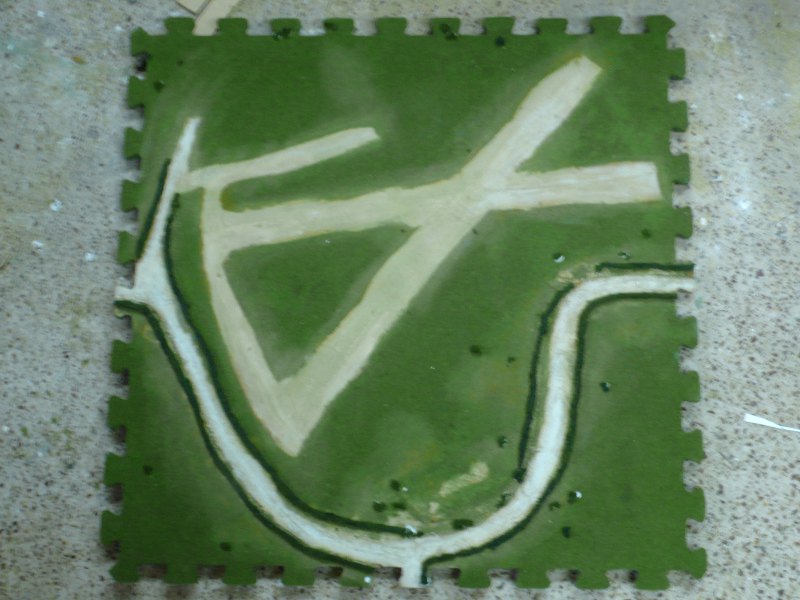
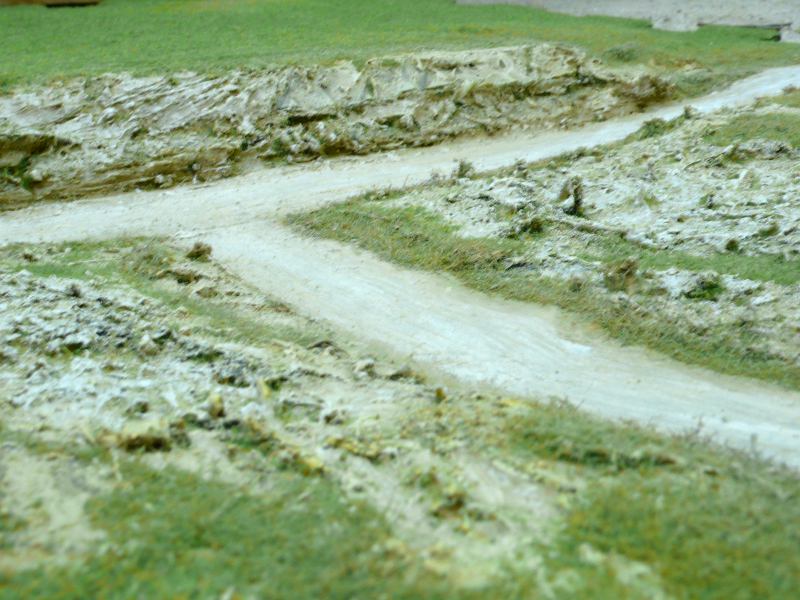
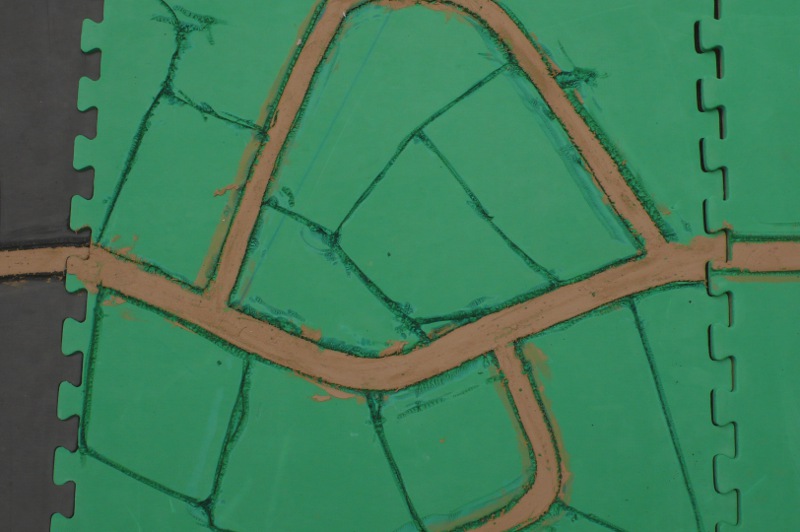
Details carved with a soldering Iron

Image

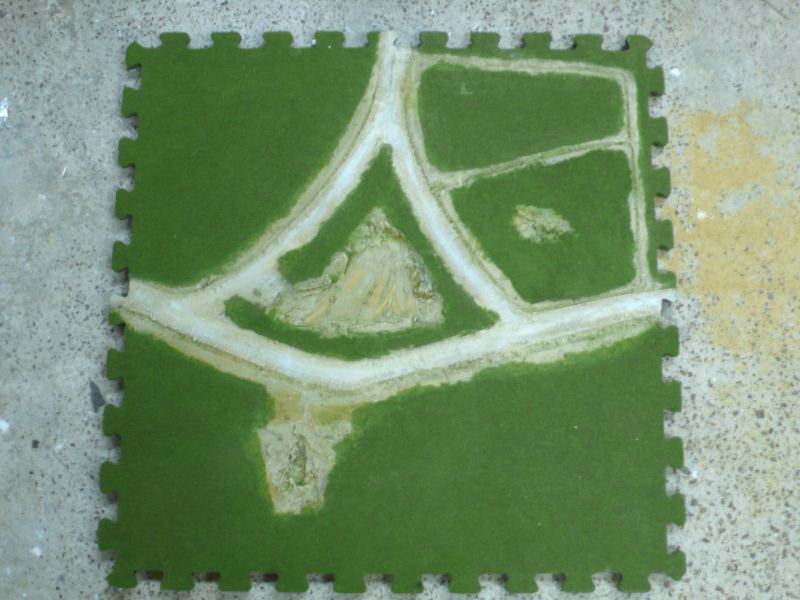
Pre Christmas progress

Image

The long version is here on my site (direct link only) with much more details

http://6mm.wargaming.info/page350.shtml

The last update was a few week ago so I've made a lot more progress and I'll post some newer pictures later. I had a few days over the holidays with the house to my self so I got stuck onto these.

Cheers
Kieran

Posted: Thu Feb 02, 2012 9:39 am
by 6mmwargaming
And here's all the subsquent updates merged into one

I'll mostly show updates on individual boards otherwise it may get confusing and i'm into the fine details now. Also because I'm working on 16 boards at once I don't finish the same thing on all boards at once, rather I'll do a few at a time.

Hills and gullly

First hill. I started to run out of caulk so I used some old stuff I had lying around. The colour difference doesnt matter as I will paint them anyway but if it show through I dont mind, because the ground doesnt have to be the same shade everywhere.
Image


On this hill I glued a piece of MDF big enough to fit a 40x40mm base. I have a few features to go on here depending on the period - stone circle with sacrificing druids, windmill or cell phone tower.
Image

To give the gully more depth I added a rocky hill on one side (green foam) and a larger gentle hill on the other. I'm not sure about this terrain mat as it is very ** CENSORED ** and I dont know how much I will use it.
Image

Fields mat
The first picture shows the layout with the ditches carved into it and the road layout. The second picture shows the ditches textured and drybrushed and I glued down a piece of field mat in one of the field sections. I also painted some brown but I dont know what flock I'll use there yet (maybe yellow?)
Image

Image

Small lake tile
. With a lake in the middle and I used some older dark AB flock for a field. A piece of the road is under repair. already :)

Image


First tile flocked! This came out very nice and the contrast between the road and grass looks good. There lots more to do including adding different coloured flock for dried grass, bushes, hedges and I'll probably dry brush some of it, but it looks good so far.

Image

And now onto some features for the terrain boards - removeable trees and power poles. The beauty of these is I can stick them anywhere I like eg. the sides of hills, river banks, as part of hedgrows, in my opponent if he's annoying, :shock: and then I can take them off for storage. I dont think they will damage the boards because the pins are pretty sharp.

Next I'll make some billboards and signposts. I have some square hollow lengths I'll use for the legs of the billboards.

Power poles
I got a couple packs of brass tubes (enough to make 30 + power poles) and marked the lengths and a pack of pins and chopped the pins up. I used the leftover pin head to fill to hole at the top of the pole, and the cross pieces are made from plastic card and rod. I'm making different styled ones with some have 1 cross piece and some 3 and a few with supporting brackets underneath.

Image

I cut the brass to length and then used a dremel tool to grind some grooves into the pole (hopefully this will make them more robust). Then I glued the crosspieces in and then the pin head and sharp bit. I already had some strips of plasticard and rod cut up so I used those although the strips are too wide for the grooves :roll: so i've been trimming them.

Image


Trees
I got a pack of 70 Woodland scenics pine style trees (2.5 -4" tall) from the local model shop. Some of the larger trees I have chopped in half to make 2 smaller trees so I should get about 100 trees from the pack. Normally I'm not a fan of their trees but I got them so because I knew I could insert pins into the trunks without too much effort. The white fluffy stuff is packaging from Copplestone and Perrys figures, which you get in the little boxes they put their figures in.

You can see the progress from left to right. Find a tree, cut to size, drill a hole and glue and insert the pin using pliers, cover with glue and fluffy stuff. I'll spray these brown and then flock them and I'll drybrush the trunks a lighter grey colour.

Image

Some more trees.
I had a couple of the wider Woodland scenic trees spare so I will give them the same treatment. I always find the WS trees dont have enough branches so I added some more from brass picture framing wire.

The last tree in the picture is a cheap chinese ebay tree. I untwisted the trunk piece of the wire and inserted a headless pin and twisted it back up again and then smeared some UHU glue on it.

Image

Excluding forest and terrain pieces, I figure I need at least 10 trees per 2x2 foot tile, x 12 tiles per table = 120 trees! :)

Cheers
Kieran

Posted: Thu Feb 02, 2012 9:52 am
by 6mmwargaming
My lastest update

Hopefully this isnt to much in one go for you all! However it is a few months of work to post. :D

I've only got 3 ½ weeks to go before my convention so the pressures on to finish 16 tiles :P . About 3-4 will be plain with just flock so I should knock them off quickly now the rest of my flocks arrived.

I'm now on to flocking and detailing the boards. First I flock most of the board with my mix of Woodland Scenics "Turf mix" and some Angels Barracks 2mm "Gamer grass", which I'm using on all the boards. Once that's dry, I glue some patches of Woodland Scenics "burnt grass" along the edges of the roads and fields, and where I want to create some dry patches. Then I airbrush some cheap straw-yellowish craft paint through my airbrush over some of the burnt grass patches to make it look like dry grass. Finally I drybrush those areas with an off white colour.

I've deliberately glued the burnt grass onto parts of the road as I thought the roads were too wide, and I'm much happy with the width of them now and you can see in some of the photos how the roads look much narrower.

After all that I'll add some hedges and bushes and maybe resin water into some of the ditches.

I thought I would show the progress of each board so you can see the progression

Cross roads
This board was my test piece for creating dry grass areas and that's why the drybrushing is a bit heavy. I thought drybrushing would be enough but it didn't look right, so that's why I started airbrushing the areas.

Image

I've started gluing on some bushes and hedges and it is starting to look very good (you can see the PVA glue as it hasn't dried yet). I tried to make the bushes more irregular than the airfield tile and it is working well so far. I'll finish it off and take some more pictures once its finished.


Small lake tile
Its a bit hard to see in the pictures but I've glued a bunch of burnt grass along the roads and surrounding the lake. Next I'll airbrush and drybrush the grass and then add bushes and hedges. I'll do the water last at the same time as the rivers.

Image


Airfield
This is the first tile I glued hedges onto and I'm not very happy with the results because they look too regular and some of them are too far away from the road (they moved while they were drying). I'm also not happy with the runways as it doesn't look very realistic to me so I'll add a green/brown/sand flock to them and then drybrush it. You can see the patchy areas where I created light grass but these have come out funny in the photo and look much better in real person.

Image

Image


Sunken road
I had my doubts about this tile but it is starting to turn out very nicely. The first 3 photos show the progress with a close up of the sunken part. If your wondering why the hill is a different colour, its some old caulk I was using up because I didn't like the colour.

Image

Image

Image


The last two photos show the tile after it was flocking and drybrushed and the closeup of the road shows the dried grass effect well, although its a bit yellower in real life.

Image

Image


Roundabout
A couple of WIP pictures of this tile showing before and after the flocking. In the second picture you can see patches created by the drybrushing but it looks a bit funny in this picture. I need to take a better one where the light is better.

Image

Image

Image


Next I'll post some pictures of a couple of tiles with fields on them and also a bunch of trees and hedges I've been working on. :grin:

Cheers
Kieran :D

Posted: Thu Feb 02, 2012 2:24 pm
by chrisswim
Kieran, very nice work, thank you for showing your work and progress and providing your how you did it. I like the telephone poles and the trees. Very nice work.
I will have to bring some of my stuff out there to New Zealand to play the Auckland Wargames Club.

Appreciate you sharing your how to....

Posted: Fri Feb 03, 2012 9:48 am
by 6mmwargaming
chrisswim wrote:Kieran, very nice work, thank you for showing your work and progress and providing your how you did it. I like the telephone poles and the trees. Very nice work.
I will have to bring some of my stuff out there to New Zealand to play the Auckland Wargames Club.
Thanks for the comments and your welcome to pop over for a game!

Cheers
Kieran

Posted: Tue Feb 07, 2012 5:20 am
by 6mmwargaming
Hi all

An update with more progress on fields, trees and hedges. While I've been working a lot on the boards I need to make sure the edge pieces and stick on terrain is ready as well.

A couple of field tiles

I marked out the fields to have different types of crops and the brown area is going to be plowed fields. The green field in the second picture with some brown in the middle is a failed first attempt to add some crops. So far I've only stuck down the corn fields and they look much better in real life than the pictures.
Image

Image

Here's the field with some green flock added to a few fields and some caulk used to make it look like a plowed field (more on the next update when I get some decent closeups). I also added some burnt grass around the road and field edges.
Image

Image

Edge pieces

If you were wondering what I was going to do with the board edges here is the pieces I will use. Each tile pack come with 4 pieces so there are plenty of these althought there is a couple of different shapes and I need to see how they will line up together and if I need to reshape any of the end parts. Excuse the blurry pictures, for some reason I couldn't get a clear picture of them.
Image

Image

Trees and hedges

The first few test trees and some in the background waiting to be flocked.
Image

A closeup of the trees. I'll make 4 different coloured trees and combine these with some cheap ebay ones.
Image

The first batch of 20 odd trees
Image

The different stages of the hedges. Cut the cleaning pads and then spray with brown paint (it doesnt look very brown in this picture) and then flock.
Image

Some finished hedges waiting to be glued down
Image

Next up some finished tiles!

Cheers
Kieran

Posted: Sat Mar 10, 2012 7:25 am
by 6mmwargaming
After a break from this (which I needed) i'm back working on these and I'll start on the next set of boards in a week or so. I've been buscleaning up all the pictures I got from various people at the convention we played at.

Anyway onto some gaming p0rn :D


British recce spotted in the distance

Image


Image

Image

Image


One of my favourite pictures. US armoured Cavalry advancing down the road.
Image


The one building I finished in time for the convention. A JR Miniatures Granary based on the on at Essling. A dog of a model with the bottom sanded unevenly and one end was about 4mm lower than the other! It took a lot of work to build it up again and fix up some of the other not so good parts.

Image


The table as I started to put the trees down (you can see them in the top left corner of the picture). Powerpost are already put down.

Image

Image

I'm just working on a proper webpage now with a battle report and then I need to go through the pictures of the last construction phases, especially the river boards.

Cheers
Kieran

Posted: Sat Mar 10, 2012 7:52 am
by chrisswim
6mmwargaming: Kieran,
Very nice looking set up. gotta play on it with my micro armor. Bring it over. Jax FL. USA.
Don't give me that line...not being in the area. Really like that highway system, overpass and the power transmission towers.
Much thanks and congratulations on great presentation.
chris

Posted: Sat Mar 10, 2012 2:59 pm
by Oriax
Very good looking table! Superb inspiration!

Posted: Sat Mar 10, 2012 11:16 pm
by dougeagle
Very cool indeed. 8)
I'm actually surprised that the flock stays on the foam, I would have thought that it would not be able to stay on it. Either way, nicely done.

Great work

Posted: Mon Mar 12, 2012 4:41 am
by bora_guy
Nice work

Posted: Mon Mar 12, 2012 7:20 am
by 6mmwargaming
Thanks all. I lot of work but worth it. If your every in NZ look me up

Chris
Some links to my site if you havent seen these before

Power lines
http://6mm.wargaming.info/page312.shtml

Motorway
http://6mm.wargaming.info/page32.shtml


Doug
The foam is I think what they call "closed cell" so it is quite absorbent and has a slightly rough texture. It takes PVA glue very well and I dont think I will bother sealing the flock as it glued on very good. I tried to scrap a couple of bits off and it took a lot of scraping.

Cheers
Kieran

Posted: Mon Mar 12, 2012 8:25 pm
by whoa Mohamed
Nice to see your Marienburg border crossing in action , always a fan of your stuff great job again K ......Mikey

Posted: Tue Apr 17, 2012 2:57 am
by DRPgeneral
Wow! 6mm thanks for the pics! You gave me a great idea!

Posted: Tue Oct 09, 2012 7:59 am
by 6mmwargaming
Hi all

Time to resuscitate this thread finally!!

I've starting planning some new Normandy town sections and my order from Gamecraft turned up today with the remainder of the buildings I need. I've got a bunch of old NZ Military Miniatures buildings (pre Battlefront days) which are a bit smaller and different in style but some will go together. I've also got some cardboard ruins I made a long time ago so I will hopefully have some replaceable runined sectors. Finally theres a couple of churches - one from Timecast and another from TBM.

The Gamecraft stuff is very nice but because the back of the building is the top of the casting, there is no details and a few air bubbles, so I will have to add details to the back of the buildings like stairs, windows, doors, cellar doors, sheds and gardens etc. Also the front of the buildings are generally flat with the details engraved so I want to add drainpipes, window flower boxes, lights, signs, bits above the doors etc.

I'm planning to used roughly 90mm square bases (as per Spearhead) and I will integrate the pavements into the bases but the roads will be separate. I want to create a town where all the streets are not at 90 degrees to each other so I will have some 60 degree turns as well (see pictures below). Part of th plan is to include a river edge hence the big bridge, but I dont know how I will do that yet.

Anyway onto some blurry and hurriedly taken pictures with a GHQ Cromwell for scale :P

The new stuff - a mix of 3-6 story buildings
Image

Some of my existing buildings and most need repainting
Image

Sample street layouts
Image

Image

Image

Cheers
Kieran