Page 1 of 1
6mm North Africa terrain,
Posted: Mon Dec 01, 2014 9:46 pm
by dougeagle
Just trying to get an idea about how to make a little bit of terrain for North Africa WWII. It wasn't totally flat, but there were some very gradual rises along the way, but how do this in 6mm has me baffled.
Maybe some plasticard glued in steps or mdf done the same way? I don't know.
Anyone have any suggestions?
Posted: Mon Dec 01, 2014 10:31 pm
by dougeagle
Thanks cama...appreciate it. That's a start too

Posted: Tue Dec 02, 2014 2:49 am
by piersyf
Mluther's method of pastels on cloth would work for this quite well. A sheet died a dusty brown, darker patches of pastel for lower areas (slight depressions hold moisture better) and pale patches for ridge lines that are maybe 1 or 2 metres above ground level (enough to extend sighting distances). Hull down very much depends on where the shooter and target are.
White could be used for obvious tracks/roads and maybe for any hard ridge lines you want to represent.
The more obvious hills and wadis would need doing with polystyrene or MDF. A few lines of bushes along dried water courses to complete the picture.
Posted: Tue Dec 02, 2014 5:27 am
by Mk 1
piersyf wrote:Mluther's method of pastels on cloth would work for this quite well.
I follow Mluther's approach as well, with a few subtle variations. My desert terrain is a tan canvas rather than a sheet. For elevations I use corrugated cardboard. Any extra boxes you have can easily be sliced with a sharp knife to whatever random shapes you choose. They stack well, and suffer only slightly from rough handling and storage. I glue some together into permanent elevations, while others are put together ad hoc with ticky-tack (sticky putty available at hobby or craft stores, and even in the school supplies section of most drug stores or supermarkets). I also use randomly placed bits of ticky-tack or double-stick tape to hold the canvas down on the table/elevations.
As with the Mluther model I use pastels to highlight the elevations and create roads and streams. Crops, plowed fields etc. are textured cloth added on top. I scatter a bit of loose lichen around as scrub brush.
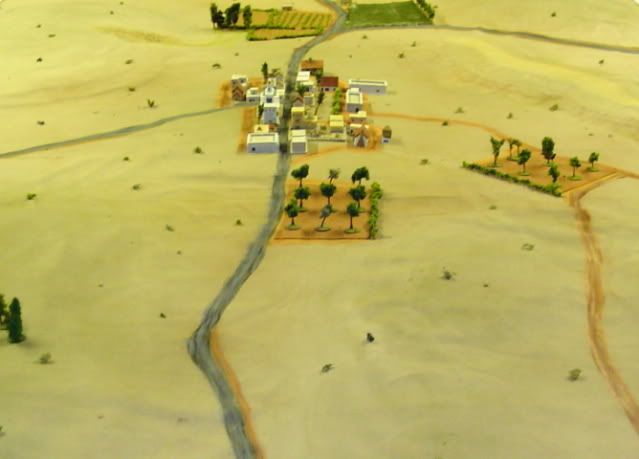
Here is a long view of the board I created for a 1943 French vs. Italians battle at Hir Moussa (a crossroads village in the Ousseltia Valley in Tunisia).

Here is a table-level view of the same game (from the opposite end), which gives you a closer look at how the corrugated cardboard works under the canvas.
In this pic the Italian gun is placed on a knoll that is 4 elevations up (I use each elevation as 3 meters (or 10 feet), so the gun is 12 meters (or about 40 feet) up. You can see another rise ... a ridge line with steeper sides (highlighted with pastels), between the gun and the left side of the board.
Hope that helps.
Posted: Tue Dec 02, 2014 6:59 am
by RedLeif
For a Kursk table I used a sheet of 1/8" Luan wood (used to make doors) many years ago. But cardboard and a cloth would have been lots easier.
Posted: Thu Dec 04, 2014 8:12 pm
by WargameHub
This is some terrain we did up a number of years ago.


To see all of it:
http://s191.photobucket.com/user/sarcha ... t=3&page=1
Posted: Sat Dec 06, 2014 3:51 am
by dougeagle
All good stuff...I appreciate it

