Pete's Place
Moderators: dnichols, GHQ, Mk 1
-
pmskaar
- E5
- Posts: 1921
- Joined: Sun Apr 17, 2005 5:45 am
Re: Pete's Place
Hi Burt! I did enjoy my Genessee beer when I had the occasions to drink it. It has probably been almost 20 years since I was in Upstate New York.
-
7.62
- E5
- Posts: 1787
- Joined: Tue Feb 10, 2009 10:52 am
Re: Pete's Place
Love that SM-79, one day, one day.
I missed the Russian Infantry just incredible work, thanks for the photos and keep them coming.
I missed the Russian Infantry just incredible work, thanks for the photos and keep them coming.
-
pmskaar
- E5
- Posts: 1921
- Joined: Sun Apr 17, 2005 5:45 am
Re: Pete's Place
Thank you very much, 7.62! I have been working on even more Russian infantry with the goal of basically having 2 companies worth with the basic stand as a squad. I have almost completed 1 company but need the HQ elements and 2 more squads to round it out.
The SM-79 is probably the aircraft that I have painted for the GHQ catalog of which I am the most proud of the way it turned out. Having said that, it took me about 20 hours of work to complete it with lots of little "problems" to try to solve to make it look right.
The SM-79 is probably the aircraft that I have painted for the GHQ catalog of which I am the most proud of the way it turned out. Having said that, it took me about 20 hours of work to complete it with lots of little "problems" to try to solve to make it look right.
-
Beagle
- E5
- Posts: 693
- Joined: Wed Mar 17, 2021 2:45 am
Re: Pete's Place
The little problems is what make all forms of model building worthwhile, if models just fell together, well, where would be the fun, mind expanding experience in that, lol.
-
pmskaar
- E5
- Posts: 1921
- Joined: Sun Apr 17, 2005 5:45 am
Re: Pete's Place
Hi Bill! Some of the things I have painted are pretty straight forward as to my knowledge of how to do it. Of course sometimes my knowledge is based on things I have learned in the past, both successful and not successful.
I did a lot of research on various color schemes for the SM-79 until I found something that I liked. There were other schemes that looked good as well but this one was unusual in that it had a three tone camo scheme plus the leading edges in a light gray color, the same as the underside of the aircraft. For some reason, this one grabbed me.
The SM-79 had several things that I had to figure out.
1. The white fuselage band. The fuselage shape is pretty complex where the band goes as these is a cupola underneath the aircraft plus several windows to consider. I opted to use some thin Microscale thin white railroad stripes to get the outline and then masked it off and sprayed the part in between trying to blend the paint into the decals so the decals would not be obvious.
2. The front cowling area. Apparently, the Italians liked to have copper colored metallic fronts to their cowlings, at least on the SM-79. The problem is how to paint this so it appears with a straight line. I admit, I am not always great at doing perfectly straight lines freehand so opted to use thin Microscale black railroad stripes to edge it. I hand painted the copper color on and used the stripe as my guide.
3. Decals. For the tail cross, I just used a thin white microscale railroad stripe cut to length and crossed one over the other. I have several sizes of these railroad stripes and have found them occasionally useful for other projects.
4. Camo. I had previous experience doing 2 and 3 color camo. The Ju-87B I had done earlier as well as several other vehicles using splotchs. This was not a big problem to solve per se but time consuming in execution. I painted the green areas first and then the brown. The camo is built up using several thin layers of paint, 3 or 4, until it looks right. The idea is to give it that sprayed on look at this scale. I have found over the years that this method works better for me as I have more control than I did with an airbrush.
5. Decals. The numbers and letters were applied one at a time as there are no known manufacturers that do full Italian aircraft codes in this scale. The numbers and letters are by I-94 and cut and individually placed. The national insignia was pretty straight forward except .... the white background was more translucent than perfectly opaque. My solution was to place a second decal over the first and get it aligned perfectly and it seemed to work. I have done this before on some other aircraft decals.
-
pmskaar
- E5
- Posts: 1921
- Joined: Sun Apr 17, 2005 5:45 am
Re: Pete's Place
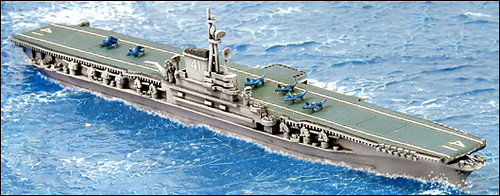
Here is the model of the USS Midway that I painted for the GHQ catalog several years ago. I painted this before the advent of Flight Deck Decals. The various markings are constructed from some various numbers I had around and the flight deck stripes are probably some thin Microscale Industries white railroad stripes I had around or else purchased for this project.
-
redleg
- E5
- Posts: 3438
- Joined: Fri Dec 17, 2004 11:02 am
- Location: Riverside, CA
-
pmskaar
- E5
- Posts: 1921
- Joined: Sun Apr 17, 2005 5:45 am
Re: Pete's Place
Thank you both very much, Redleg and Beagle!
-
BurtWolf
- E5
- Posts: 1062
- Joined: Sun Feb 03, 2013 11:48 pm
- Location: Rochester, NY
Re: Pete's Place
Another beauty peach, one day I’d like to see all the fleet ships together!
-
BurtWolf
- E5
- Posts: 1062
- Joined: Sun Feb 03, 2013 11:48 pm
- Location: Rochester, NY
Re: Pete's Place
Sorry, I know your name is Pete and not peach ha ha! my phone auto corrected…
-
nashorn88
- E5
- Posts: 610
- Joined: Sun Jun 22, 2008 1:15 am
Re: Pete's Place
Yes, amazing paint jobs. The the copper bands really look nice. I didn’t know the Italian planes were so colorful.
Midway has the perfect paint job.
Midway has the perfect paint job.
-
pmskaar
- E5
- Posts: 1921
- Joined: Sun Apr 17, 2005 5:45 am
Re: Pete's Place
Thank you very much, Burt and Nashorn!
-
pmskaar
- E5
- Posts: 1921
- Joined: Sun Apr 17, 2005 5:45 am
Re: Pete's Place
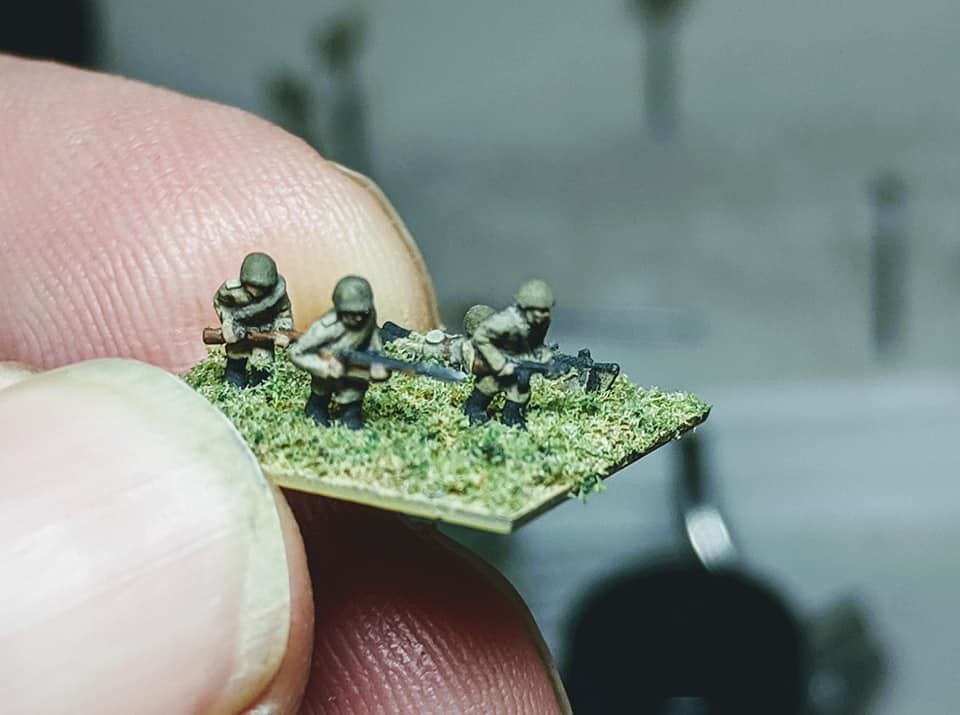
I have finished 1 company of WWII Russian infantry and started another one. I still have to do a proper company HQ stand but borrowed one from my Russian SMG company completed a few years ago. I still need to get some 82mm mortars and some Maxim MGs to round it out a bit.


-
Beagle
- E5
- Posts: 693
- Joined: Wed Mar 17, 2021 2:45 am
Re: Pete's Place
Those are fantastic looking!