by Michael Livingston
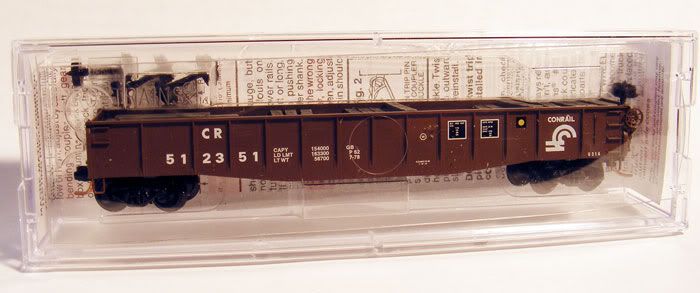
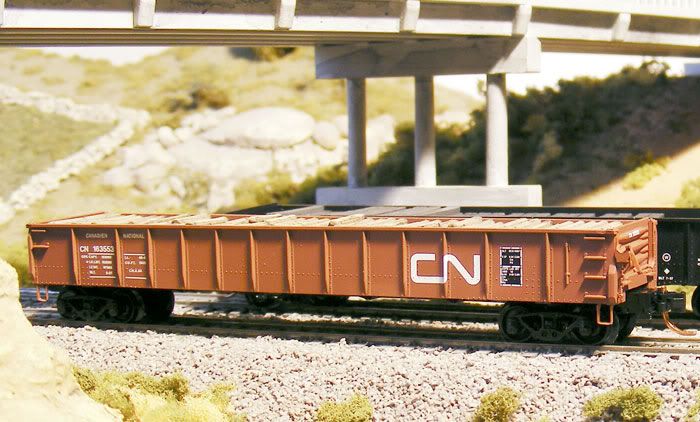
Now, if you are even looking at the articles on this Web site, then you probably have more than a passing interest in making your N-scale equipment more accurate. While in some cases that can involve extensive reworking of an existing model or even scratchbuilding, I have a simple customization technique that improves the look and accuracy of Micro-Trains 46000-series and 48000-series steel drop-end gondolas.
Canadian Pacific Color Guide by John Riddell, Morning Sun Books 1998
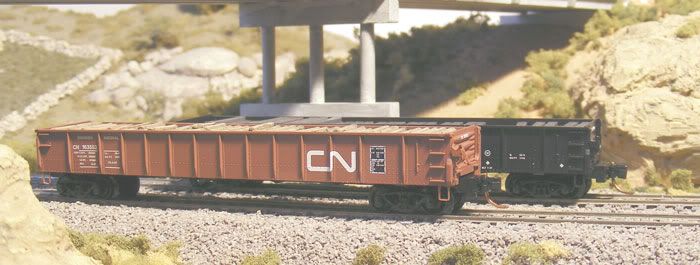
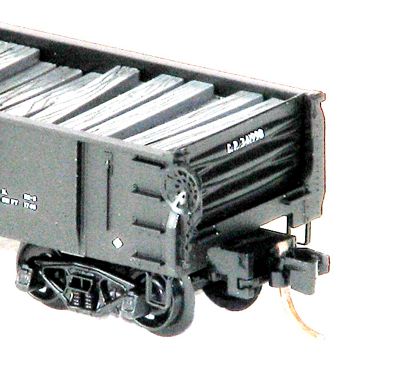
Introduced in the late 1930s, these all-steel fishbelly gondola car designs were built over a 20 year period and were designed to carry loose, oversized, and sometimes very heavy loads. The drop-ends allowed them to carry loads like structural steels shapes, castings, or telephone poles that exceeded the internal length of the car. If the load was much longer than the car, flat cars might be placed at each end of the gondola load to protect other cars from damage. It was rough work for a freight car, but even so, many of these cars remained in scrap, coal, automobile frame, lumber, and mill service into the 1990s.
Materials List
Here is what you'll need:
- rust/brown or (more or less) matching paint to the car end or brake mechanism
- a pin and (optionally) a small paint brush
- an Exacto knife with a new blade (#11 blade or similar)
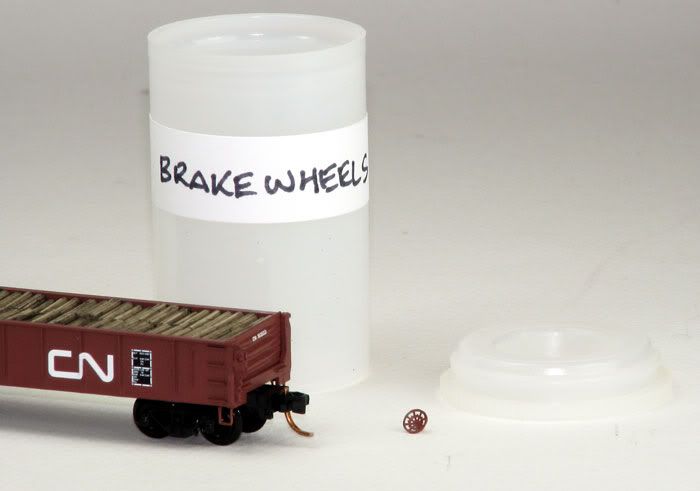
- a small, sealable container (a 35 mm film canister or prescription bottle)
- Thick CA type glue
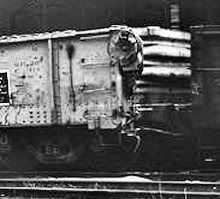
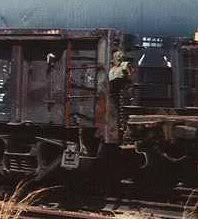
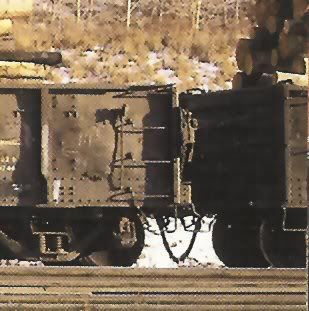
Step 1: Check your prototype for pictures.
Why?
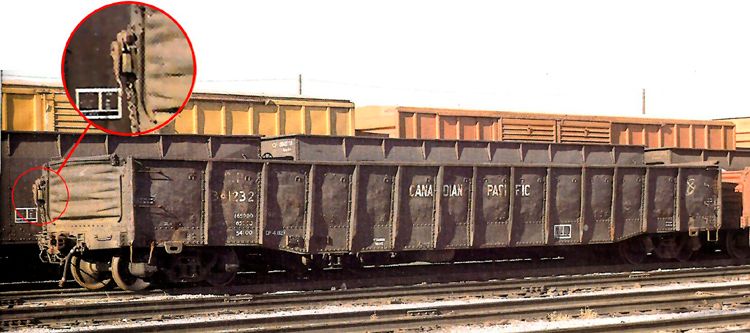
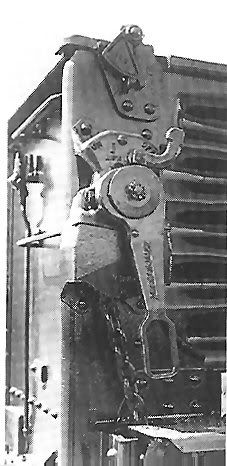
Many, many railroads selected ratchet-type handles rather than brakewheels for use with drop-end gondolas. But why would they use ratchet brakes instead of brakewheels?
One of the reasons was clearance. When the drop end is down, there is usually a load in the car, extending out of the car, or being loaded or unloaded from the car. A brakewheel could get in the way or get damaged by a load. Even turned sideways, so it is parallel to the car side (as it is on some prototypes and the Micro-Trains gondola) it could still pose access problems.
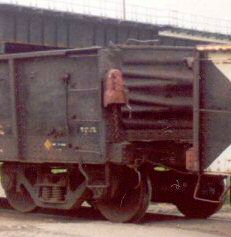
So, to solve the problem, several manufacturers offered ratchet handles for brakes in addition to brake wheel designs. A quick peruse through the 1953 Car Builders’ Cyclopedia shows several manufacturers offering ratchet handles including Equipco, Peacock, Klasing, Miner; some of the big names in the business of brakewheel design.
Flipping back about 700 pages to the Gondola Manufacturers section shows me that about half of the confirmable drop-end gondola photos had ratchet brakes including CNR, CPR, SP, CNW, C&O, NYC, PM, and PRR. Notable exceptions are LV, ATSF, WP, and CB&Q, but that doesn't mean all the drop-end gondolas on a RR used only one type of brake. Again, refer to Step 1: Check your prototype for pictures.
Okay, if I have convinced you, or if a prototype photo shows that your Micro-Trains gondola is incorrect, proceed to step 2. If you already cut up a Micro-Trains car before, or have taken a mild sedative so you don't care about modifying decorated cars, proceed to step 3.
Step 2: Open the Case and Pop the Factory Air
It's not as bad as it sounds. Really.
Micro-Trains cars are great, but they are not investment stocks. Have fun. Take a deep breath. Open the box. You may hear a whooshing sound. Take out the car.
That's it.
You'll be kit bashing brass locomotives in no time! And remember, when you are done, the car will be more accurate, uniquely yours, and "custom".
Step 3: Remove the Brakewheel and Start a "Parts Box"
One of the good things about this project is that while you may lose the "factory air" on the model, you gain a brakewheel that you can use on another project and start a parts box if you don't have one already. Parts boxes make future projects a lot more interesting. That is what the film canister or prescription bottle is for. Label it "brakewheels" or "freight car parts".
While holding the brakewheel, use the pin head to push the brakewheel out from the back.
Drop the brakewheel into your parts box and close the lid before it drops on the carpet, is eaten by your cat, or lands under your foot just before you step on it. You may laugh, but I have had all three of these experiences, and nothing dampens the mood to complete a project more than searching for a part on the floor for five minutes while it’s stuck in the tread of your shoe. Hence the parts box.
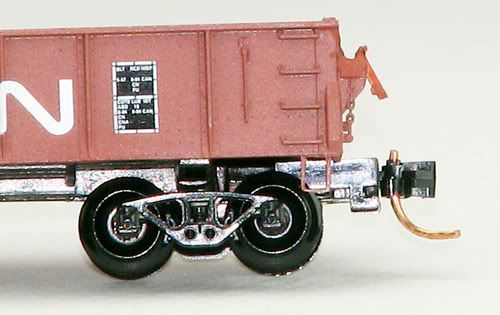
Step 4: Cut and Reshape the Brake Mechanism
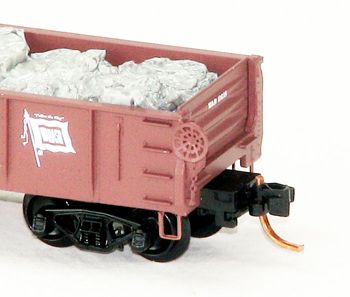
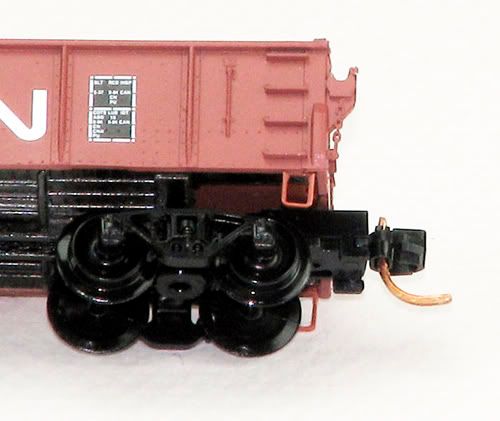
Micro-Trains really did a beautiful job on the detail of this car, and particularly the drop-end detail and brake mechanism.
With the brakewheel removed, the car takes on a better symmetry, but there is a big hole where the brakewheel sat. What you want to do is carve away the top edge of the hole, then use the scrap to form a ratchet handle (you can also use a piece of wire).
Use a new blade. I repeat, use a new blade.
Did I say use a new blade? (If you don't, you can't say I didn't warn you.)
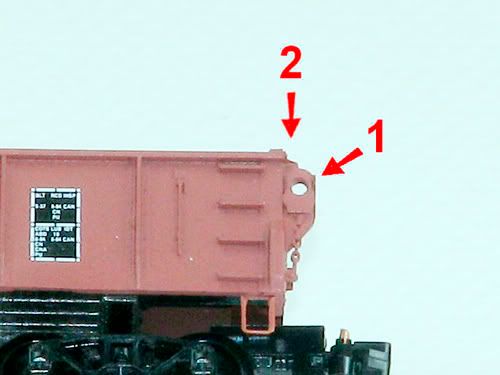
Make your first cut as a smooth, diagonal stroke towards the car end. With a new blade, this will feel like a knife passing through hard butter.
The second cut is vertical and near the car side. Don't make this cut too close to the car or you might have to fix it. Better to make two or three thin, slicing cuts and shave the plastic to be removed. Once the top is removed, the overall shape should be pretty close to how it should look when it is done. Looking at the car end, you can use the blade to gently scrape the lower edges of the hole, removing the sharp edges and rounding the top of the new brake mechanism.
Step 5: Add the Ratchet Brake Handle
As I stated earlier, most of the major brakewheel manufacturers offered ratchet brake handles, and like the brakewheels there were variations in design. Because the ratchet handle is so small, you can use a piece we shaved off of the brake mechanism, or a bit of wire to form the handle.
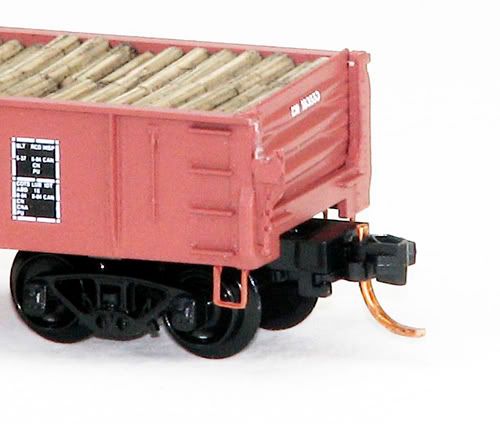
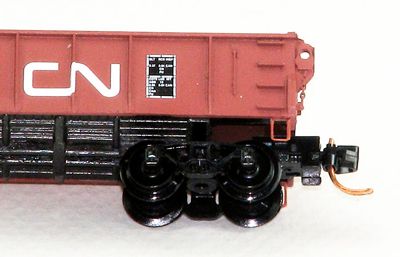
Even without an added handle, the finished result doesn’t look too bad. To add the handle, use the pin to apply a tiny bead of glue to the back (not the side) of the brake mechanism, then attach the handle (in most cases it should be pointing down). Then wait for the glue to dry.
Step 6: Paint (and Weather) to Match the Car End
Before you paint the brake mechanism, take a close look at your modification. Are there any areas that need to be smoothed before painting? Does it look more or less like it should? Does it even need paint?
When I listed the materials for this project, I said "rust/brown or (more or less) matching paint" rather than an exact match, because the brake mechanisms aren't always exactly the same color as the gondola. They weather differently, are made by other manufacturers than the car, or are replaced or repaired after damage.

If you're just using the rust or brown color, use the pin to apply a little paint to the top edges of the brake mechanism as surface rust or dirt. Or you can paint the whole brake mechanism a slightly different color as a newer repair. Done.
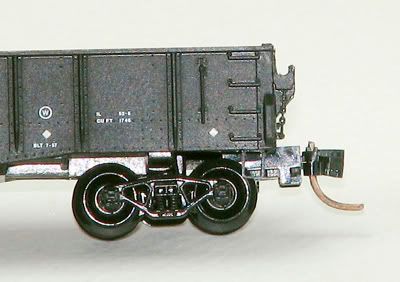
Looks much better than, this and it is more accurate too.

Even better, these cars could use a little weathering, some paint on the trucks, new wheelsets, and voila!
Now you have a unique, modified and customized Micro-Trains gondola that you made more accurate, and started your parts box with a free brakewheel for use on another project.
Thanks for looking