Thank you very much, Chris!
The texture on the GHQ buildings is actually molded on so I really didn't have to do anything there. The only things I had to do was paint and do some weathering. I actually like the GHQ buildings and would like them to do more original buildings and not just recycle the same buildings for different areas.
I have a lot of different buildings from different manufacturers acquired over the years. Back in the early days, I was buying almost all the buildings I could lay my hands on. Lately, I have become much more selective in my purchases but am looking to get some of the Total Battle Miniatures Normandy buildings. I would love that company to make some 6mm Russian Front buildings as their other scales for that region look fabulous.
Pete's Place
Moderators: dnichols, GHQ, Mk 1
-
pmskaar
- E5
- Posts: 1953
- Joined: Sun Apr 17, 2005 5:45 am
Re: Pete's Place
I have been working on some more Terrain Maker pieces for my European terrain. This time, I am working on some paved roads for France and NW Europe.
I had made some paved roads at 1" wide several years ago but was not completely satisfied with how they looked. After making my desert roads a few months ago using 600 grit sandpaper glued to .020 styrene, I decided to use the same method for my paved WWII European Roads. I narrowed the roads down just a bit from 1" wide to 7/8" wide. While not an Autobahn, these will depict some main country thoroughfares.
The pictures start with the original road and show the progression as I get to the finished result in the last few pictures.
. The original hex
. Added tan paint
. New road added
. Two road hexes together. I check the alignment to be sure they line up.
. My junction hexes.
 A completed road section.
 A completed section with road junction.
 Another junction section.
The dirt roads pictured were started over 25 years ago with more pieces added. These are painted in tan house paint, specifically Sherwin Williams Ligonier Tan. They were then hit with some really thinned down dark brown paint to accentuate the ruts and make the roads look more dirty and not so clean.
My next major terrain project will be to add some bridges over streams and rivers and also some narrower paved roads as well.
I had made some paved roads at 1" wide several years ago but was not completely satisfied with how they looked. After making my desert roads a few months ago using 600 grit sandpaper glued to .020 styrene, I decided to use the same method for my paved WWII European Roads. I narrowed the roads down just a bit from 1" wide to 7/8" wide. While not an Autobahn, these will depict some main country thoroughfares.
The pictures start with the original road and show the progression as I get to the finished result in the last few pictures.
.
The original hex.
Added tan paint .
New road added.
Two road hexes together. I check the alignment to be sure they line up..
My junction hexes. A completed road section. A completed section with road junction. Another junction section.The dirt roads pictured were started over 25 years ago with more pieces added. These are painted in tan house paint, specifically Sherwin Williams Ligonier Tan. They were then hit with some really thinned down dark brown paint to accentuate the ruts and make the roads look more dirty and not so clean.
My next major terrain project will be to add some bridges over streams and rivers and also some narrower paved roads as well.
-
redleg
- E5
- Posts: 3468
- Joined: Fri Dec 17, 2004 11:02 am
- Location: Riverside, CA
Re: Pete's Place
Pete, your terrain is just as fantastic as your micro armor! Still following your work on FaceBook as well! Awesome job on the roads!
Redleg's Website: micropope.webstarts.com
-
pmskaar
- E5
- Posts: 1953
- Joined: Sun Apr 17, 2005 5:45 am
Re: Pete's Place
Thank you very much, Redleg! I try to make the terrain as good as I can. Speaking of terrain, I have not seen any postings from Polish GI lately and his lovely Vietnam terrain.
-
BurtWolf
- E5
- Posts: 1073
- Joined: Sun Feb 03, 2013 11:48 pm
- Location: Rochester, NY
Re: Pete's Place
Good looking hexes Pete.
Going to add trees to some of them?
Going to add trees to some of them?
-
pmskaar
- E5
- Posts: 1953
- Joined: Sun Apr 17, 2005 5:45 am
Re: Pete's Place
Thank you very much, Burt! I will add some trees to some of these at some point and maybe a few other details as well. I wanted to get the basic hexes done and then at some point I will go back and "pimp them up" a bit.
-
BurtWolf
- E5
- Posts: 1073
- Joined: Sun Feb 03, 2013 11:48 pm
- Location: Rochester, NY
Re: Pete's Place
I tried, with little success, to use the quarter inch hexes to create dips in some of the road surfaces I was making. I was thinking of roads that would go below grade for a moment and come back up and maybe block a line of sight etc.
-
pmskaar
- E5
- Posts: 1953
- Joined: Sun Apr 17, 2005 5:45 am
Re: Pete's Place
Hi Burt! GHQ had a modeling technique for doing sunken roads a long time ago. This may still be available somewhere in an old Tac News from the 1990s.
I think a simple way to create a sunken road would be to use the 1/4" hexes and use the same basic technique as for a stream hex but making the bank cuts much straighter. The transition hexes would be done basically the same way with a gentle slope down into the sunken road and back up again. I don't think that this was the way GHQ did it.
I think a simple way to create a sunken road would be to use the 1/4" hexes and use the same basic technique as for a stream hex but making the bank cuts much straighter. The transition hexes would be done basically the same way with a gentle slope down into the sunken road and back up again. I don't think that this was the way GHQ did it.
-
pmskaar
- E5
- Posts: 1953
- Joined: Sun Apr 17, 2005 5:45 am
Re: Pete's Place
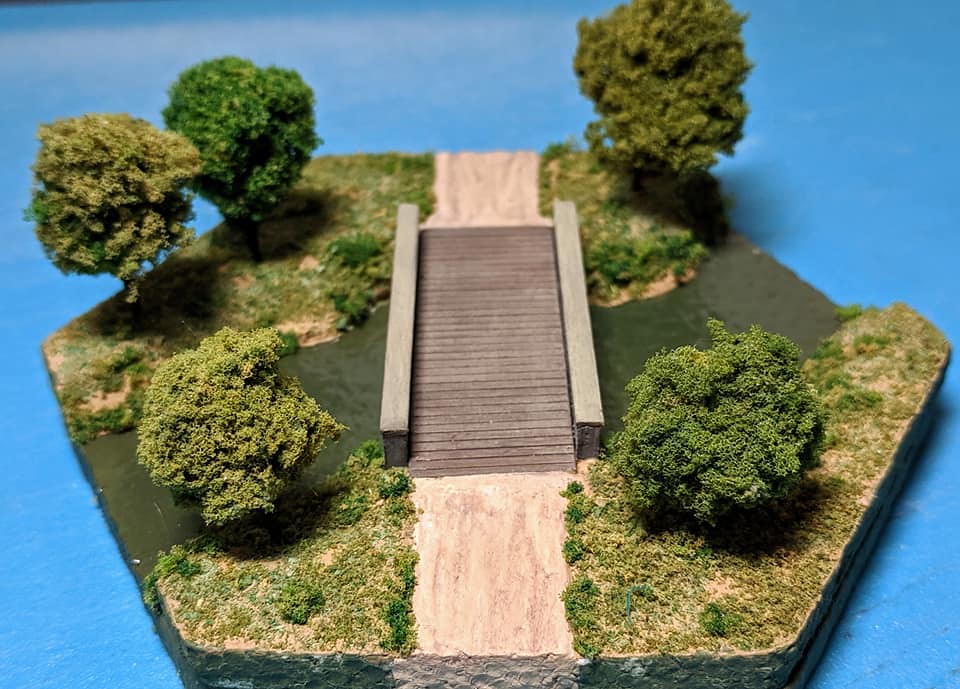
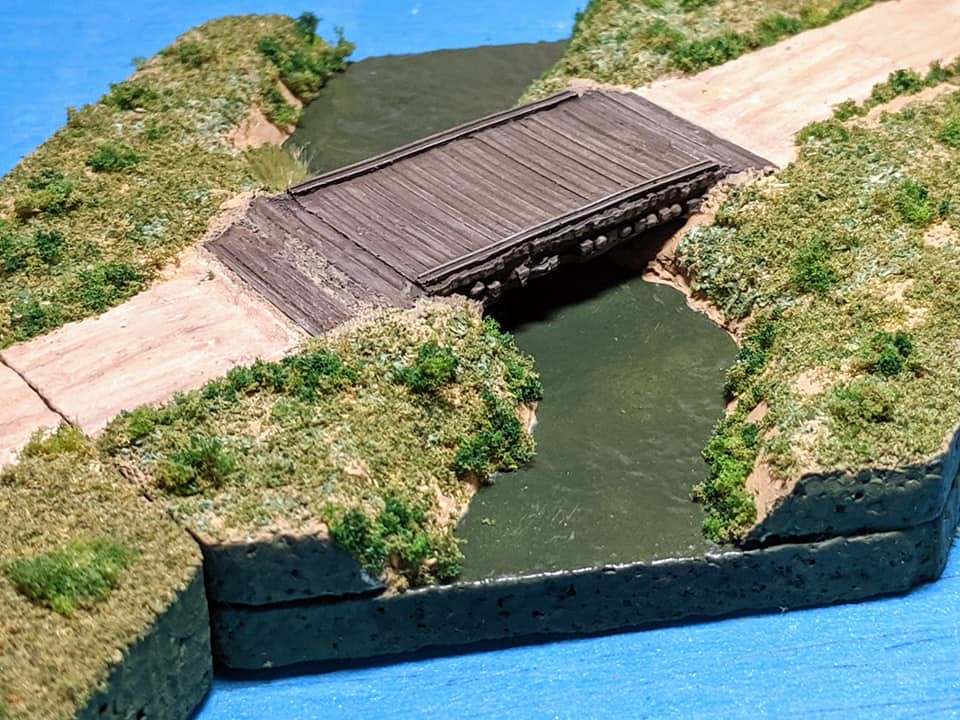
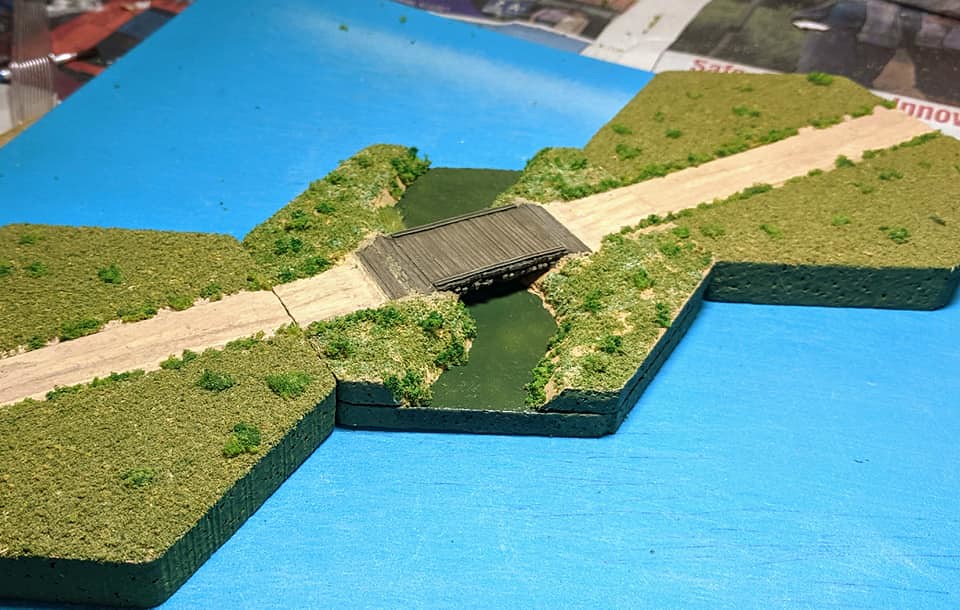
It has been a while since I posted last. I am still working on more Terrain Maker pieces and needed some bridges over my stream hexes. Here is the first bridge, a somewhat crude and simple wooden bridge by Les Batiments made of resin.


-
Begemot
- E5
- Posts: 222
- Joined: Fri Aug 19, 2011 12:11 am
Re: Pete's Place
Pete - Most excellent. Great paint job on the bridge, but also a fine job in placing it into the terrain hex. Give yourself a pat on the back.
Begemot
Begemot
The summer grasses.
For many brave warriors
The aftermath of dreams.
--- Basho
Please visit my website "Lair of the Begemot": (https://lairbegemot.blogspot.com)
For many brave warriors
The aftermath of dreams.
--- Basho
Please visit my website "Lair of the Begemot": (https://lairbegemot.blogspot.com)
-
redleg
- E5
- Posts: 3468
- Joined: Fri Dec 17, 2004 11:02 am
- Location: Riverside, CA
Re: Pete's Place
Fantastic terrain Pete! And those tanks too! ow do you make the water? It's looks awesome!
Redleg's Website: micropope.webstarts.com
-
BurtWolf
- E5
- Posts: 1073
- Joined: Sun Feb 03, 2013 11:48 pm
- Location: Rochester, NY
Re: Pete's Place
Achtung Ivan!! Awesome work!
-
chrisswim
- E5
- Posts: 6658
- Joined: Wed Dec 15, 2004 11:22 pm
- Location: Jacksonville, FL
-
pmskaar
- E5
- Posts: 1953
- Joined: Sun Apr 17, 2005 5:45 am
Re: Pete's Place
Begemot, Redleg, Burt, and Chris, thank you all very much. I have a couple more bridges I will be posting here soon.
-
pmskaar
- E5
- Posts: 1953
- Joined: Sun Apr 17, 2005 5:45 am
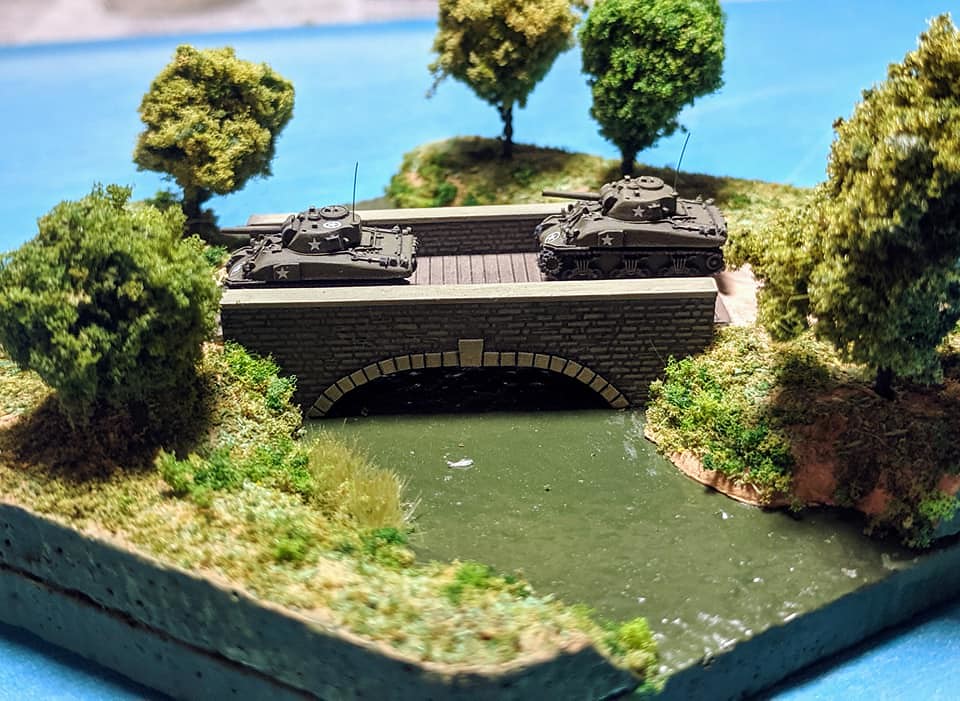
Re: Pete's Place
Here is my GHQ stone bridge. I joined the two halves together with a flat metal base from Wargames Accessories. The base was 2"x3/4". I added a piece of scribed plastic sheeting from Evergreen to provide the wooden planks. To make them look a bit more like wood, I used some fine sandpaper to rough it up and give it a bit of a wood grain look.