Infantry Tutorial

This is a general forum for all types of posts related to Military models.

Moderators: dnichols, GHQ, Mk 1

Ritter
E5
Posts: 528
Joined: Tue Nov 23, 2004 10:59 am
Location: BC, Canada
Contact:

Post by Ritter »

Yes, I do use it as a temp base for the models - normally I use Bondo to base infantry figures in - but sculpy, like Fimo can also be used to model sandbags and dugouts and is very durable once baked. Check package for instructions. All the following are made from Fimo:
Image
Image
Image
Image
And the following from sand and a jar of nickles :lol:
Image
Troy

Peter_Fitz
Posts: 49
Joined: Tue Dec 14, 2004 3:19 am
Location: Christchurch, New Zealand
Contact:

Post by Peter_Fitz »

Boy, those guys are just asking for trouble leaning live rounds against the trail of a PaK43 :)

Ritter
E5
Posts: 528
Joined: Tue Nov 23, 2004 10:59 am
Location: BC, Canada
Contact:

Post by Ritter »

Darn erastz gun crews ! Always leaving stuff around! :D

Busy weekend, I will be adding the rest of the unpainted figures pics to this section after work and move on to mounting and priming (or is it priming and then mounting?!? :wink: ).

Troy

Mk 1
E5
Posts: 2383
Joined: Fri Dec 24, 2004 3:21 am
Location: Silicon Valley, CA

Post by Mk 1 »

And now, as a public service, I offer this:

Image
(The missing pic from Ritter's posting two spaces up.)

There, I can now truthfully say I have helped Troy in the latest works he has shown on the forum! 8) See, I too can be counted among the masters. Or at least, the masters' apprentices. Or help-mates. Maybe editor? Or some such.
-Mark 1
Difficile est, saturam non scribere.
"It is hard NOT to write satire." - Decimus Iunius Juvenalis, 1st Century AD

Ritter
E5
Posts: 528
Joined: Tue Nov 23, 2004 10:59 am
Location: BC, Canada
Contact:

Post by Ritter »

Thanks Mark-uno!

Finally some time to post!

The attachments are fairly straightforward; I will be using the Schwere MG-34 and observers in G-145 Individual Heavy Weapons pack as well as the ammo carriers from the G525.

The Panzerfaust teams will come from G511, but the mortars are a bit tougher. The best mortar around is the 3" one from the UK N. Africa individual weapons in any of the following kits: UK-71, UK-74 or UK-76. Remove the 'Tommy' and add various German crew figures, I use the loader from the Panzerbüchse, the Panzerschreck and the standing rifleman from G525.

Priming

Image

I always prime in white using the paint pictured above. Its available at Canadian Tire but any white enamel spray paint that is not an imperfection-covering or filling type is fine. Normally, I do not use an actual 'Primer' as most of these are too thick of pigment and are designed to be sanded. I find darker colors are just too dark and make your minis look bland.

I normally begin by choosing a specific pose and paint all of them at the same time. This helps when trying to complete a large project. For this section, I will concentrate on the prone LMG. I trim any extra base material and remove any casting lines and injection ports left from the casting process with nail-clippers and an x-acto.

I then mount the minis on the standard 2 or 3 inch roofing nail with crazy-glue. These are help in a cardboard bow for painting. Find a spot with no wind outside. I use a VERY light, misting coat, being very careful not to put it on too thick. Better two coats than one. Let this air dry outside for about 20 minutes outside.

Image

I then move the minis to a wooden cutting board or a spare piece of plywood. I put them into the oven for 20 minutes 150-170 Fahrenheit for 20 minutes so that I can move onto the next step without having to wait for the primer to cure.

Troy
Last edited by Ritter on Mon Mar 24, 2008 1:31 am, edited 1 time in total.

Ritter
E5
Posts: 528
Joined: Tue Nov 23, 2004 10:59 am
Location: BC, Canada
Contact:

Post by Ritter »

Basecoating

Moving on with the painting - finally - I now mix up my chosen color Humbrol 111 with Humbrol 90 added for scale. I wet the paint out with ample thinner (varsol or Turpintine) to get a slightly watery mixture. It should be thin enough to flow but not too thin to cover. I use a number 2 brush to apply the paint, drawing off any large accumulations.
Image

I cover the entire mini with a thin coating, even the flesh parts. The idea is to have a very thin base coat when dry. The reason I stay with Humbrol enamels is that they have very fine pigment size, good coverage when thinned, are dead-flat and are PERMANENT when dry. Other enamels (read Testors) won't stand up to the wash procedure and do not thin as well due to the larger pigment size.
Image

Once done all the minis, they should look something like this:
Image

Into the oven or wait 2 days to cure!

Troy

Ritter
E5
Posts: 528
Joined: Tue Nov 23, 2004 10:59 am
Location: BC, Canada
Contact:

Post by Ritter »

WASH

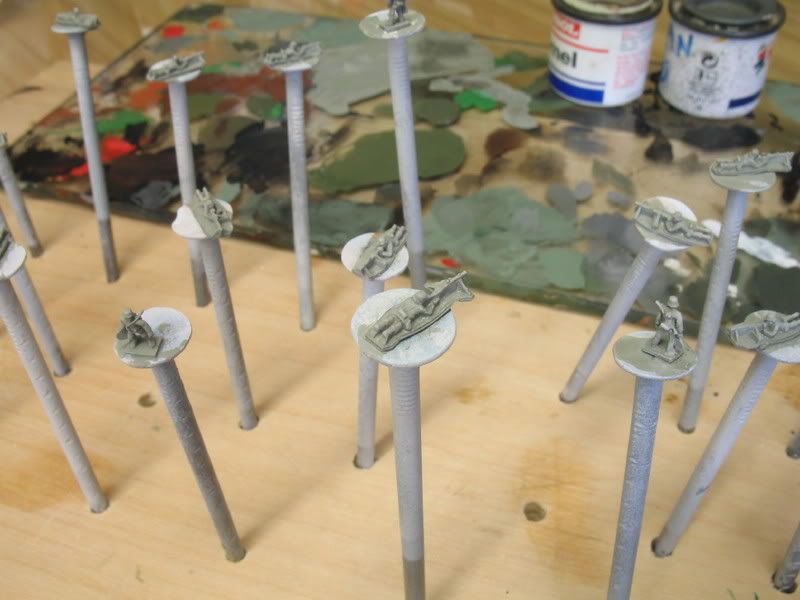
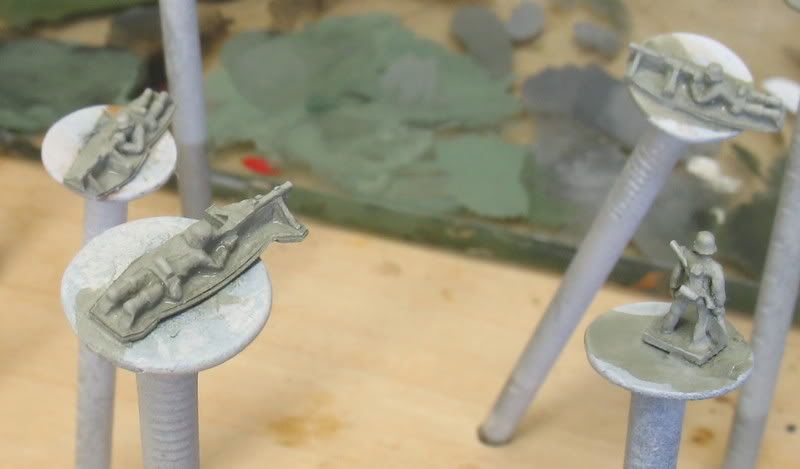
The next step is to shade and shadow the minis. I work with a group of no more than 6 figures at a time as this step tends to work best when the wash does not have too much time to dry.

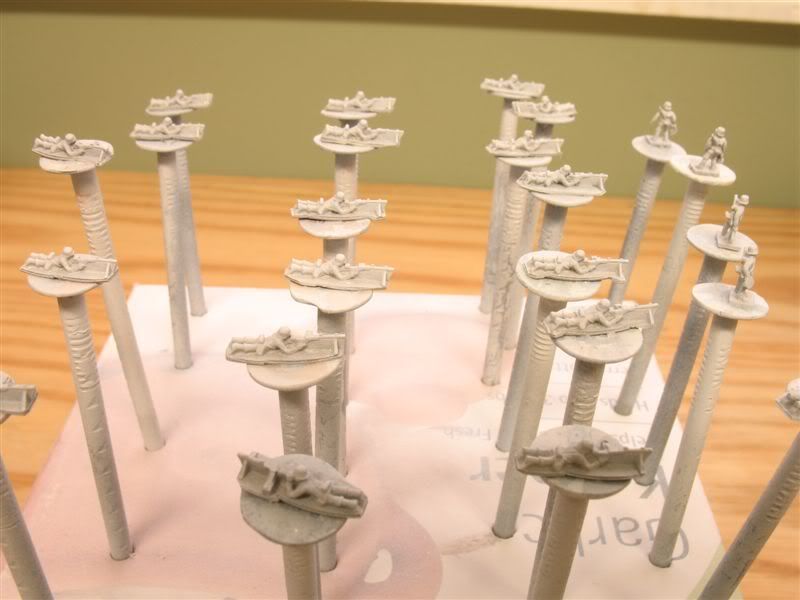
One point I would like to mention, is that if your figures are on the sprue and you don't want to modify them in any way, you can paint them on the sprue without any issues instead of mounting on nails. In fact, if you are painting an army of them, its far more efficient.

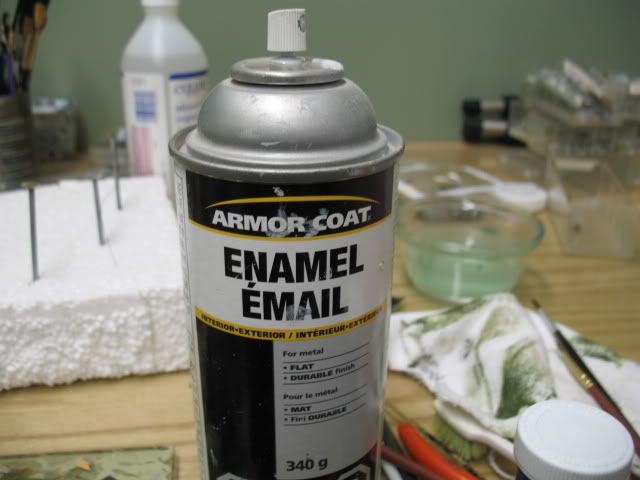
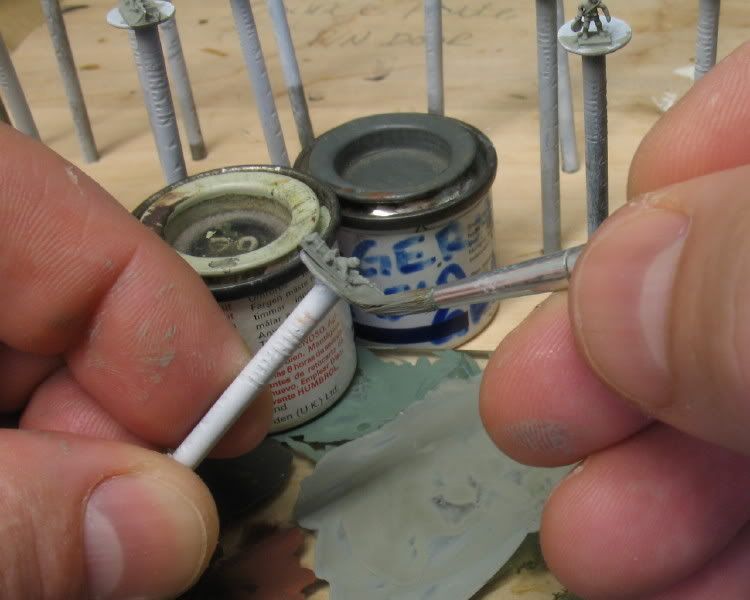
Begin by mixing up a wash of black paint and thinner. It should be watery but not too diluted to show the separated pigment. One of the best paints I have found is the cheap small glass bottle Testors type as they don't have much of a 'bite' and wear easily (something you want with this step!). Also, they are reasonably flat.

Image
I use a small cheap round brush, covering the entire mini. Draw off any excess and set aside to dry a bit. Move on to the next figure and keep them in order, this allows them to dry the same amount of time.

Image
Once you have completed 6 or so figures give the minis about 2 minutes or so to dry.

Image
Get out some clean thinner, a rag, and a 1/2" square-cut soft brush. DIp the brush in the thinner and wipe of most of it on the rag. Have a look at your first figure. If it has lost most of the wet look (the thinner has evaporated) it is ready for the next step.

Image
Begin by sweeping the brush across the figure in a flicking-type random motion. Done right, it should take most of the wash off the raised areas and leave it in the shadows. It also blends and feathers the wash at its edges. If your brush is too wet, or the wash isn't dry enough, this will take off all the wash. Do not overwork the figure as it will eventually remove the underlying basecoat! Practice makes perfect!

Image
Clean and dry the brush every 2 figures. Complete the group and set aside to dry. Finish the rest of your figures in groups of 6 or so.

Image
Next, final Shadows.

Troy

pmskaar
E5
Posts: 2174
Joined: Sun Apr 17, 2005 5:45 am

Infantry Tutoral

Post by pmskaar »

Hi Troy

A really great tutoral that illustrates how you do your fantastic work. Like you, I also use Humbrols for my minis as well. I find that they have excellent adherance and coverage so that when I do my turpentine blackwash the paint doesn't come off - most of the time at least.
One question I have: Do you do the detail work such as flesh tones, boots, equipment etc. prior to the blackwash? From the pictures it is difficult to see this clearly and I may have overlooked the fact that you did the detail work. Thanks for sharing your fine technigues with us.

Pete - Binpicker, Out!

Ritter
E5
Posts: 528
Joined: Tue Nov 23, 2004 10:59 am
Location: BC, Canada
Contact:

Post by Ritter »

Hey Pete,

Only the basecoat has been done up to this stage - I pick out the details after the wash (including the flesh areas).

Troy

Ritter
E5
Posts: 528
Joined: Tue Nov 23, 2004 10:59 am
Location: BC, Canada
Contact:

Post by Ritter »

Final Shadows

After completing all of the figures with your wash, there may be some ares that you wish to darken. When doing the wash right, it will leave more of a haze than a dark, shadowed area. These areas may have lost some of the shading when you used the blending with the 1/2 inch brush or may be areas that just need to be darker.

For the LMG, this would include the separation between the tunic and pants, the underside of the MG34, the shadow on the straps etc. I also shade the base of prone figures.

Begin by taking your flat black and mixing in enough thinner to get a watery mix. I use a 3/0 brush for this work. Add shadow with the brush to the areas that need it and blend any areas that are too wide or mistakenly painted with a bit of clean thinner and a 1/0 brush.
Image

Take care not to overdo the amout of paint. In the picture, you can see that I have done the boots and gun with the same mixture. I do this because I do not want the layers to obscure the detail. ALL of my painting uses the same thinned down paint.

You can also see the extreme minute detailed highlights that appear without any drybrushing with this technique (circled in red on the picture below).
Image

Next, Flesh.

Troy

pmskaar
E5
Posts: 2174
Joined: Sun Apr 17, 2005 5:45 am

Tutorial

Post by pmskaar »

Hey Troy

Thanks for the update. I wanted to be sure I didn't miss anything. It does look like you painted some boots and MG's during the final shading process.

Pete - Binpicker, Out!

Ritter
E5
Posts: 528
Joined: Tue Nov 23, 2004 10:59 am
Location: BC, Canada
Contact:

Post by Ritter »

Boots, Belts, Straps

If you have the patience and magnification, you can paint the straps and belts. This step isn't always necessary for gaming figures but really does set them off. Some of the web gear detail is missing on the earlier German Infantry casts and the German LMG is one of these as is the German Grenadier. These can be painted in by using reference photos to locate them on the figures. Again I use the 3/0 brush and thinned black. I also pick out the boots, belts, and metal weapons, priming them black for the later drybrush.

Flesh

I now mix up a lightened flesh color (add white to any flesh color). I pick out the hands and fingers if possible. Sometimes there is a hint of a finger around a handle or trigger.

Image
Keep the paint somewhat thicker here as you don't want to get it all over your earlier work. Just load up your brush and lightly touch off where you want it to go.

Image
Faces deserve special attention. I load up a size 1 brush and wipe most of the paint off on a rag. Earlier, I covered the entire figure in the base coat. Now this helps to shade the face when you drybrush (the green/grey is not a recomended face shadow color but it works!)

I drybrush the face, toward the helmet, keeping the shading adound the eyes, nose, and edge of the helmet. Any flesh colored paint can be touched-up with Feldgrau later.
Image

Next, gas mask, strap water bottle and Helmet.

Troy

intobattle
E5
Posts: 183
Joined: Thu Apr 26, 2007 1:11 am
Contact:

Post by intobattle »

I appreciate all your work on this thread Troy! Infantry is something I don't paint very often because it never seems to turn out very good. I will definitely be using your tips and techniques here soon and I look forward to your next steps.

I do have a question for you... have you ever tried basing your infantry and then priming and painting? I've never tried it, but I know others have. If you have tried it, I'm curious to see how it worked for you.

Thanks again!
Tanner

Ritter
E5
Posts: 528
Joined: Tue Nov 23, 2004 10:59 am
Location: BC, Canada
Contact:

Post by Ritter »

I have tried basing before painting but I find the detail painting is more difficult.

DETAILS

Now is the time to finish up the smaller details.

For the Helmet, I use Humbrol 91 mixed with black as a basecoat. Once this is dry, I paint the top of the helmet untinted Humbrol 91. Gasmask and mess kit are also painted untinted Humbrol 91. The Gasmask can strap is Humbrol 83, the ammo cans and mines are Humbrol 79. Water bottle is untinted Testors rust. Rifle is either Humbrol 100 or Testors Rust with a bit of black .
Image

Image

Image

Image

Minis are then Dulcoted with Testors brand.

Troy

Post Reply