painting infantry
Moderators: dnichols, GHQ, Mk 1
-
rangerguy
- Posts: 12
- Joined: Sat Sep 02, 2006 6:52 am
- Location: USA
painting infantry
I've seen a ton of beautiful work done on painting vehicles on this forum but i have a couple of boxes of infantry to paint and i was just wondering what everyone thinks is the best way to paint infantry. Do you base first, paint on the sprues, primer? Thanks in advance!! 
"All right, they're on our left, they're on our right, they're in front of us, they're behind us...they can't get away this time." - Lieutenant General Chesty Puller
-
Ritter
- E5
- Posts: 528
- Joined: Tue Nov 23, 2004 10:59 am
- Location: BC, Canada
- Contact:
-
CountRingworm
- Posts: 58
- Joined: Sat Jul 01, 2006 7:54 am
- Location: Des Moines, IA
- Contact:
-
vicvolta
- Posts: 39
- Joined: Fri Sep 01, 2006 5:19 am
- Location: Lund, Sweden
- Contact:
If its GHQ the weapons are amazing in detail, or you need glasses, my friend. I use cheap "reading glasses" bought at the local gas station for a couple of dollars. They work perfectly as magnifying glass.
*Bout the infantry it's of great concern that small scale models look good from a distance. The greater the scale (for instance 1/72- 10mm) the more detail and "darker" the models can be. But in 6mm I prefer that the models look good from "playing distance" hence about a yard or so.
I prime them using black the paint in uniform color, keeping the nuance pretty light (a little lighter than normal...) then a pretty watered out shade of either black ink or brown wether its a warm uniform color or a cold. Green= warm, grey=cold. Then I add detail; boots, flesh, weapons etc.
That's my opinion on how to paint infantry. There's as much techniques as there are stars in the sky. Good luck!
-
CountRingworm
- Posts: 58
- Joined: Sat Jul 01, 2006 7:54 am
- Location: Des Moines, IA
- Contact:
well, i can't argue either point - i'm using GHQ infantry and i probably could use the reading glasses (but it was hinted strongly by my wife that our friend's kids are getting me one of those clamp-on desk magnifying lens things for my birthday ).
my main shock and awe is how that detail was painted so well. i tried doing a soldier's webbing and ended up looking like he threw up all over himself.
my main shock and awe is how that detail was painted so well. i tried doing a soldier's webbing and ended up looking like he threw up all over himself.
-
Thomaso827
- E5
- Posts: 187
- Joined: Tue Jul 18, 2006 8:26 pm
- Location: Dayton, OH
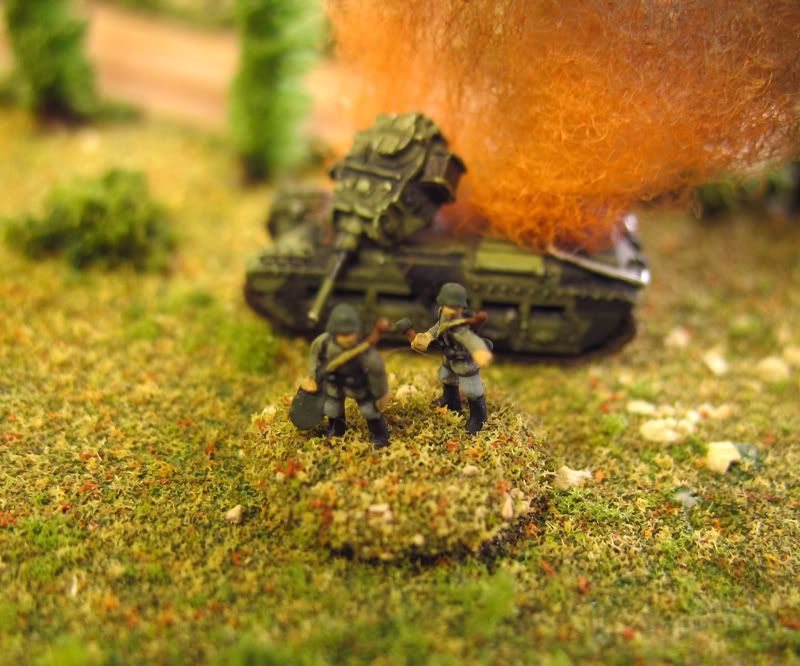
I'm working on the US, NVA and VC right now, and the details are remarkable. The difference between an AK-47 and an M-16 is very obvious on these guys, and the US RTOs are absolutely the best detailed figures I have seen, down to the row of smoke grenades strapped accross the back of the PRC-6 radios.
Recently, I found a paintbrush at Michaels Crafts that has performed much better than the more expensive hobby brushes I have been using. The new brush tapers from the small brush part to a handle as thick as a pencil, which, at least for me, makes it much easier to hold and work with. The 10/0 "liner" brushes have held their points now for about 6 weeks of fairly heavy use on belts, webbing and stuff for the GHQ troops and a bunch of 15mm figures I'm painting for a friend. For the life of me, I cant remember the name of the company making them, but if you have a Michaels nearby, take a look at their paint brushes. If I make time tonight, I'll get back on the list and post the maker.
Recently, I found a paintbrush at Michaels Crafts that has performed much better than the more expensive hobby brushes I have been using. The new brush tapers from the small brush part to a handle as thick as a pencil, which, at least for me, makes it much easier to hold and work with. The 10/0 "liner" brushes have held their points now for about 6 weeks of fairly heavy use on belts, webbing and stuff for the GHQ troops and a bunch of 15mm figures I'm painting for a friend. For the life of me, I cant remember the name of the company making them, but if you have a Michaels nearby, take a look at their paint brushes. If I make time tonight, I'll get back on the list and post the maker.
Tom Oxley, OD Green Old Fart
-
Thomaso827
- E5
- Posts: 187
- Joined: Tue Jul 18, 2006 8:26 pm
- Location: Dayton, OH
-
Mk 1
- E5
- Posts: 2383
- Joined: Fri Dec 24, 2004 3:21 am
- Location: Silicon Valley, CA
Be careful that you don't convince yourself that you must compete with Ritter to paint micros, my friend.CountRingworm observed:
my main shock and awe is how that detail was painted so well. i tried doing a soldier's webbing and ended up looking like he threw up all over himself.
Those who can paint at the Rittermeister's level are few and far between.
Look. Read. Learn. Wonder. Be inspired. But don't try to match or compete with what you see. That would surely lead only to discouragement and despair. It is the road to the dark side.
http://www.iandrea.co.uk/wargames/6mm/6mmf/6mmf.html
IanH has an excellent step-by-step guide to his technique for painting infantry. If you get the dry-brushing down well enough, you find that much of the detail ... webbing, packs and the like, take care of themselves.


Here are some of my Italians, which I recently posted on the "Show us Yer Stuff" thread. They are GHQ (except for a few of the LMG crew, which are sorely under represented in the GHQ packs).
I used IanH's approach, with Polly-S paints. It worked well for me.
I am very satisfied with the way they came out. Fortunately for my honor here on the forum, my camera isn't much better than my own eyesight. So you can't see my guys nearly so closely as others who post hereabout.
But that works for me, because I can't even SEE if I've managed to get fleshtone paint on their little faces when I'm doing my infantry. I just dab the paintbrush into the paint, and push the tip around a bit where I think the figure's face ought to be, and hope for the best. I am heavily reliant on the texture of the figures to guide my paint where it should be. Painting helmets a seperate color from the basecoat was a real breakthrough for me, as prior to learning that simple step my infantry had faces that ran all the way up to the crowns of their heads.
Me paint webbing? Sheesh, I have enough trouble with the boots and guns! Well, OK, I have painted the rifle slings on about four figures out of the last three dozen. I think three of them survived the experience, while the fourth had to go all the way back to base-coating.
But hey, to my eyes they are beautiful. And I get lots of nice compliments when my infantry is on the table at conventions, and at wargames in my home.* And I had lots of fun painting them up. And that's about as much as I have ever asked from this hobby.
*Note: Of course I supply the beer for wargames at my home, so if you want one, you had better bloody well compliment my infantry!
-Mark 1
Difficile est, saturam non scribere.
"It is hard NOT to write satire." - Decimus Iunius Juvenalis, 1st Century AD
Difficile est, saturam non scribere.
"It is hard NOT to write satire." - Decimus Iunius Juvenalis, 1st Century AD
-
CountRingworm
- Posts: 58
- Joined: Sat Jul 01, 2006 7:54 am
- Location: Des Moines, IA
- Contact:
that helps a lot, thanks!
i used ianH's technique on my first batch of german infantry, but i think i messed up on the blackwash. i need to do some touching up, and then hit it with the drybrushing.
i saw his comment about the helmet color, and yours as well. i was wondering why that needed to be done, but now i can see the reasoning.
-
Mk 1
- E5
- Posts: 2383
- Joined: Fri Dec 24, 2004 3:21 am
- Location: Silicon Valley, CA
HmmmOur own CountRingworm noted:
i used ianH's technique on my first batch of german infantry, but i think i messed up on the blackwash. i need to do some touching up, and then hit it with the drybrushing.
Sounds like you may have missed the sequence. The reason I mentioned IanH's "technique" is that he does the dry-brushing very early in the process. Right after the base-coating. The wash then comes late in the process, after the detailing.
This is a different than what most folks who have posted have described as their sequence for vehicles. Most of us seem to do the wash early, then the detailing, then the dry-brushing.
I tried IanH's sequence for my infantry, and in truth I liked it. Different, but seemed to catch more of the detailing on the figures by default (through the dry-brushing and the wash), so that I then didn't have to paint as much.
Or something like that.
Simple bloody idea. Makes a BIG difference in the appearance of the troops. My troops, at least.i saw his comment about the helmet color, and yours as well. i was wondering why that needed to be done, but now i can see the reasoning.
It was simple enough to do when I "upgraded" my old Soviet infantry. The thing that makes it work so well is that any decent casting will give the helmet a "lip", so that you can paint the helmet and not over-paint the face. Provides great definition.
Soviet helmets tended to be notably darker than uniforms anyways, and it really does give more definition to the face. So my Soviet infantry gets Polly-S "Soviet Khaki" uniforms, which is a tan green-brown, but the helmets are Tamiya "Khaki Drab", a dark gray-green. I like the look.
I thought about it a bit with my Italians. All of my research told me that, at least for regulars, Italian headwear (both helmets for the troops, and hats for the officers) were the same color as the uniforms.
Hmmm. Thought about it a bit. Would it be "a-historical" to use off-colored helmets on my Italians? Oh, perish the thought!
But in fact, even IF they are produced in the same color, helmets are made of different material. They catch light differently. Also colored cloth fades in the weather much more quickly than hard materials like metal. So I think the off-colored (darker) helmets work well enough. I tried to be a little closer to the uniforms with the officers' hats, though. But still a little different.
(Oh, and I had to re-shape the officers' hats. I mean, WHAT was the GHQ modeller thinking, giving an Italian officer a Kepi?!?!
-Mark 1
Difficile est, saturam non scribere.
"It is hard NOT to write satire." - Decimus Iunius Juvenalis, 1st Century AD
Difficile est, saturam non scribere.
"It is hard NOT to write satire." - Decimus Iunius Juvenalis, 1st Century AD
-
CountRingworm
- Posts: 58
- Joined: Sat Jul 01, 2006 7:54 am
- Location: Des Moines, IA
- Contact:
well, i did follow the sequence IanH mentioned with the drybrush first, blackwash later. i think my wash might have been too dilute, because it didn't seem to do anything about bringing out the detail. that's why i was thinking of hitting the infantry with a drybrush again. or i might call it good enough and just do the few touchups (flesh color in places it shouldn't be, for example) and the helmets.
-
vicvolta
- Posts: 39
- Joined: Fri Sep 01, 2006 5:19 am
- Location: Lund, Sweden
- Contact:
I use that technique and it works like a charm for me. However, drybrushing the highlighting makes the model look a bit "dusty" or worn - which I like. (Man I need to get som photos of my infantry) Thusly, I still believe in the "arm-length philosophy", i.e. the 1/285 model should look good from a yard away - not up close since to much detailwork on such small models make them look dark and blurry from a distance. My opinion though... 