Project: Refurbishing Old Micro Armor

This is a general forum for all types of posts related to Military models.

Moderators: dnichols, GHQ, Mk 1

Mk 1
E5
Posts: 2383
Joined: Fri Dec 24, 2004 3:21 am
Location: Silicon Valley, CA

Project: Refurbishing Old Micro Armor

Post by Mk 1 »

Hmmm. Been too quiet around here lately. No one got any pictures to post? OK, I'll put up a few.

This is a project I did a couple weeks ago. At the most recent Con I brought a couple units onto the table that have been in my "Active Forces" box since the late 1970s. And frankly, they were none-too-impressive when they showed up on the board.

So I thought I would refurbish them to bring them a bit closer to my more recent stuff.

Here are my JS-2s and the refurb project.

Image
Let's start the "before-and-after" with some "befores". Can you guess which two are my old models, vs. which one is from my newer JS-2s?

Image
Oy, they is (was) some ugly ducklings! They were spray-painted Testor's Olive Green. And they were spray-painted WAY too much. Most of the detail, which was notably less with these "vintage GHQ" models, was covered over with the paint. Also my rudimentary efforts at adding something to look like AAMGs was rather embarrasing.

Image
This is the product that discussions on this board have taught me to use to strip old micros: Simple Green. It is a household cleaner -- reasonably cheap, and claims to be organic and non-toxic. AND IT WORKS!

Oh, and I also use it for cleaning the kitchen appliances and washing the cars. Jolly good stuff to have around. (Just don't leave it on the appliances or the cars too long, or you will see what happens to the paint!)

Image
So ... I put the models in some dixie cups with the Simple Green, set them all in an old cigar box in the garage, and went off to do other stuff.

Image
Three hours later, and ... OOOPS! Looks like dixie cups were a bad idea. It ate/soaked right through the waxed cardboard, and half the garage was wet with the stuff by the time I got back to check it. Hmmph.

Image
OK, let's try another container. If this tub will hold Casa Sanches Salso Roja, the Simple Green won't have a chance!

Image
Now we're getting someplace. A few hours in the tub, and that paint is all ready to come off.

Image
So, tweezers in hand, out they come, one-by-one.
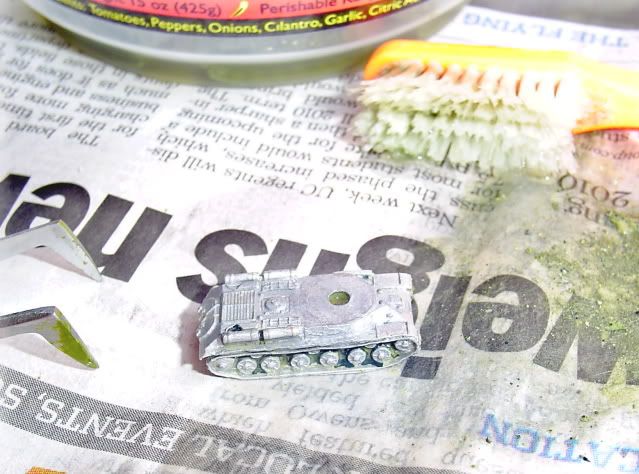
Image
On to some newspaper, and swish-swish with an old toothbrush. There ya go, a stripped-bare JS-2 hull.
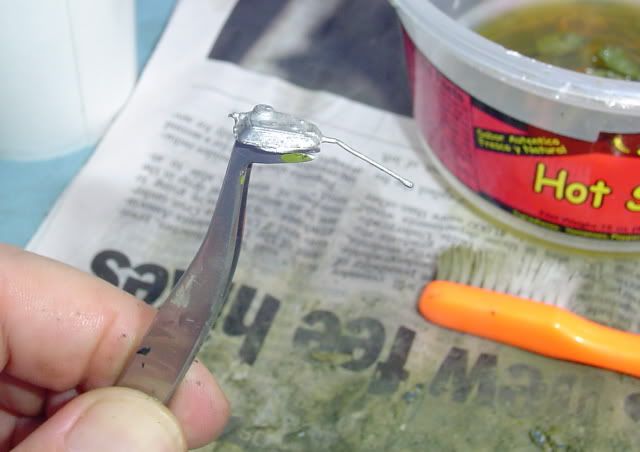
Image
The turrets are a bit more difficult to handle, but they strip off well enough too. You really don't need to put any pressure on the brush, just rub it over the metal, and the paint comes right off.
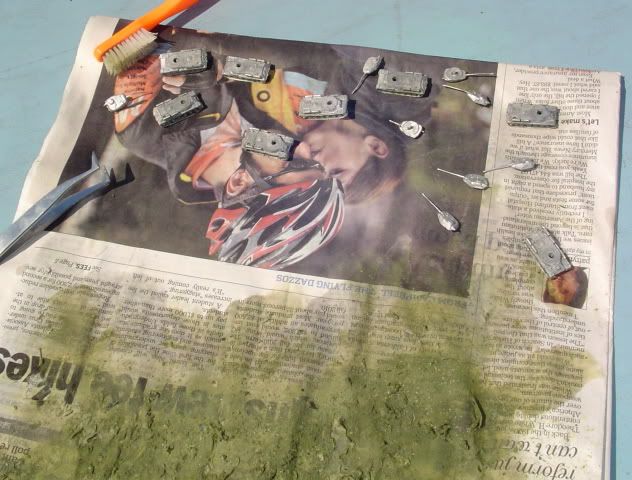
Image
All done stripping. Only one barrel damage, and that was from my fumble-fingers in handling, rather than from brushing.
Image
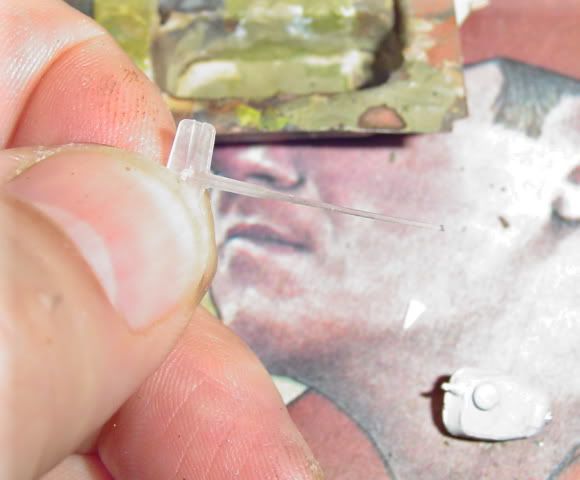
So here is what I use for replacing barrels. It is a plastic tag-holder off of a not-too-recent clothes purchase. I have about 20 of these things saved up now, in various sizes.
Image
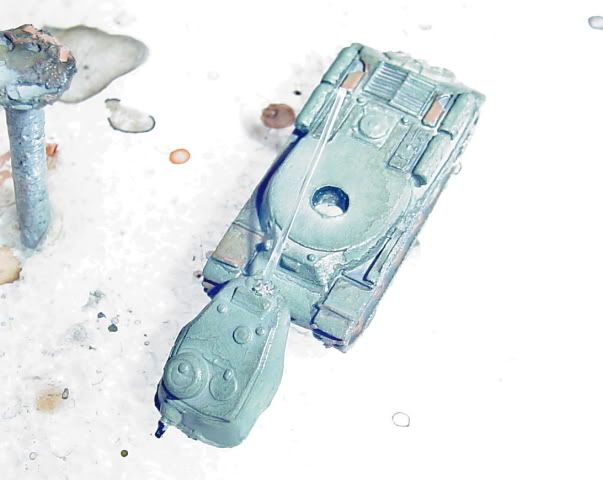
Snip snip, a bit of the thumb-drill, and the barrel is in place.

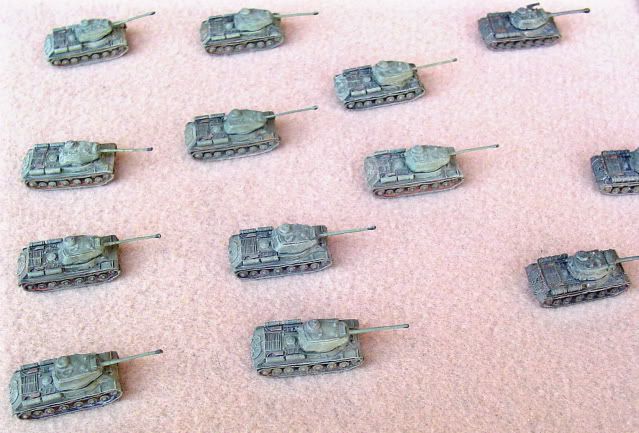
The models were primed, painted with Polly-S Soviet Green, and dark-washed two times. I took a fairly quick approach to detailing, hitting the engine grills with extra dark wash, and hitting the running gear with rust-colored wash. Then a run over them with a dry-brush using Polly-S Sahara Sand, and touch-ups to the gun muzzles and the turret-rear MGs with black.

Image
So here they are, ready to role.

Image
Not exactly my best work, but certainly respectable enough that I won't need to make excuses if I bring them out at the next con. Can you find the tank with the replacement barrel? Its on the left in the picture, second from the bottom.

That's my most recent project. Hope you enjoyed the show.
-Mark 1
Difficile est, saturam non scribere.
"It is hard NOT to write satire." - Decimus Iunius Juvenalis, 1st Century AD

ShortRound70
E5
Posts: 270
Joined: Thu Feb 09, 2006 7:32 am
Location: Baton Rouge, Louisiana

Post by ShortRound70 »

Mk 1:

Nice idea. I have some 30+ year-old GHQ that need a new paint job. I'll have to try this out. Thanks. Not your best work? Couldn't prove it by me. They look great! Weather beaten and war weary, not "Show Room New", way to go!

pmskaar
E5
Posts: 2208
Joined: Sun Apr 17, 2005 5:45 am

Refurbishing Old Micro Armor

Post by pmskaar »

Hi Mark

Thanks for the demo. I have been thinking about refurbishing some of my stuff - I have some old Panthers and some other things that need to be stripped. I will try some Simple Green for this - I have heard from others that it works quite well. I hope it will take off Humbrol Enamels as that is what I use.

Pete - Binpicker, Out!

Mk 1
E5
Posts: 2383
Joined: Fri Dec 24, 2004 3:21 am
Location: Silicon Valley, CA

Post by Mk 1 »

ShortRound70 wrote: I have some 30+ year-old GHQ that need a new paint job. I'll have to try this out.
I have done a few refurbs in recent years. Sometimes I strip, sometimes I don't. It really depends on how much detail is still visible. Some of my old models have already received two or three paintings and re-paintings, as I have adjusted what colors I use. The older castings have less detail to start with, and I really hate to loose what is there -- so if the paint is already so thick it is obscuring the good stuff, off it comes.

Take a peak at the Scratch-builds thread to get a view of some of the other models I recently refurb'd. With my SU-122s I did not strip them, but just quasi-dry-brushed the Poly-S Soviet Green on top of the paint that was already there.
pmskaar wrote: I hope it will take off Humbrol Enamels as that is what I use.
Pete:

I expect it will work quite well.

These particular models had all been primed and painted with enamels. As you can see, a single soaking, a bit of brushing, and I was down to bare metal with no damage to the fine details.
-Mark 1
Difficile est, saturam non scribere.
"It is hard NOT to write satire." - Decimus Iunius Juvenalis, 1st Century AD

WHM
E5
Posts: 176
Joined: Tue Mar 29, 2005 12:42 pm
Location: Central N.J.

Post by WHM »

How did you do the muzzle brake?

In the past I took the coward's way out and bought new turrets.

Mk 1
E5
Posts: 2383
Joined: Fri Dec 24, 2004 3:21 am
Location: Silicon Valley, CA

Post by Mk 1 »

WHM wrote:How did you do the muzzle brake?
Simplicity itself...

I put a small blob of superglue gel on the end of the barrel. After giving it a few minutes to set-up (it dries pretty slowly), I mashed it (gripping top-and-bottom) gently with my tweezers. This provided a nearly-perfect double-baffle side-vent muzzle brake, at least to my level of eyesight at this scale.
In the past I took the coward's way out and bought new turrets.
That's actually not a bad idea. Given how much better the current JS-2 castings are, I would strongly consider that in any other circumstances.

But I have been out of work for 12 months now. I've got enough in my "to-do" and "work-in-process" boxes to keep me busy until long after I've sold the house and mortgaged the kids, so spending more money on my micro armor, no matter how little, is not in the works at the moment.

.
-Mark 1
Difficile est, saturam non scribere.
"It is hard NOT to write satire." - Decimus Iunius Juvenalis, 1st Century AD

javelin98
Posts: 28
Joined: Fri May 26, 2006 1:33 am
Location: Spokane, WA, USA

Post by javelin98 »

Great tutorial! I've been thinking about starting a project like this, using old beat-up microarmor to rehab for sci-fi use. Guess I should get on that.

Firefight
Posts: 51
Joined: Wed Jul 01, 2009 7:25 am
Location: Oklahoma

Post by Firefight »

I tried the SIMPLE GREEN idea on 10 BTR-60's. It worked beautifully. Thanks for the idea.

Mk 1
E5
Posts: 2383
Joined: Fri Dec 24, 2004 3:21 am
Location: Silicon Valley, CA

Post by Mk 1 »

Firefight wrote:I tried the SIMPLE GREEN idea ... It worked beautifully.
One side-effect of using this stuff, that you may have noticed but won't necessarily be obvious to others until they try it ...

My hands (and my tools, like the tweezers) actually came out CLEANER when I was done, than they were before I started! :lol:

No kidding. This is the easiest project you'll ever do, when it comes to the clean-up after you've finished. 'Cause everything is already CLEAN!

(Except the newspaper I placed over my work table, that is...)
Thanks for the idea.
Can't claim credit for the idea. Got it here, from others. My prior approach used Pine Sol. It worked, kind of, but it required a LOT of scrubbing (so much that scratch marks were visible and details were lost on the models) and still didn't get the paint out of the finer indents and grills, etc. Oh, and there were the doping fumes and toxicity to worry about, too.

The Simple Green is simply the best.
-Mark 1
Difficile est, saturam non scribere.
"It is hard NOT to write satire." - Decimus Iunius Juvenalis, 1st Century AD

BattlerBritain
E5
Posts: 628
Joined: Fri Apr 29, 2005 7:00 pm
Location: Somerset, UK

Post by BattlerBritain »

Those JS-2s do need a bit of white paint round the turret though. Just to make them a bit more Ivan-ish :)

I tried that on mine and it really made them look great :)

javelin98
Posts: 28
Joined: Fri May 26, 2006 1:33 am
Location: Spokane, WA, USA

Post by javelin98 »

Another good thing about Simple Green is that it won't damage resin or plastic, so if you are having to strip buildings or fortifications cast in resin, Simple Green is an excellent solution.

RaccoonEmpire
Posts: 45
Joined: Sun Jan 04, 2009 9:22 am
Location: Arlington, Republic of Texas
Contact:

Post by RaccoonEmpire »

WHM wrote:How did you do the muzzle brake?

In the past I took the coward's way out and bought new turrets.

Who sells just turrets? Does GHQ, and if they do how does one order them? :?:
SIC LUCEAT LUX

Panzerleader71
E5
Posts: 353
Joined: Wed Oct 17, 2007 12:16 pm
Location: Ontario, Canada

Post by Panzerleader71 »

RaccoonEmpire wrote:Who sells just turrets? Does GHQ, and if they do how does one order them? :?:
Q. Do you sell spare parts?

A. For most of the Micro Armour® vehicles (those that are sold 5 to a pack) spare hulls are $2.00 each, spare turrets/guns are $1.25 each, and spare MG sprues are $1.75 each, plus shipping and handling. When ordering spare parts, please be sure to include the GHQ stock number of the pack that the parts come from, and give a description of the parts. We do our best to fill spare parts orders correctly, but spare parts orders are not returnable.
The moral high ground: A good place to site your artillery.

Steel Arrows
E5
Posts: 115
Joined: Wed Jun 01, 2005 12:10 pm
Location: Los Angeles, CA

Post by Steel Arrows »

OK! I tried it. Only thing is that it took nearly 10 days for Simple Green to get the the paint and primier to thoroughly bubble up. Had to use a stiff nylon cleaning brush from hardware store. Results were good thou.
----------------

"On The Way!!!!"

av8rmongo
E5
Posts: 1637
Joined: Sat Dec 11, 2004 8:24 pm
Location: Newport, RI
Contact:

Post by av8rmongo »

steel arrows wrote:OK! I tried it. Only thing is that it took nearly 10 days for Simple Green to get the the paint and primier to thoroughly bubble up.
Did you use it straight out of the bottle or diluted? I have found that diluting it 2 parts Simple Green to 1 part water give me the best results. Chemistry majors may be able to explain how that works but I can't. Next time if you have stubborn paint try diluting it a little.

Paul
“It's a beautiful thing, the destruction of words.â€￾
― George Orwell, 1984

People sleep peaceably in their beds at night only because rough men stand ready to do violence on their behalf.
- George Orwell

http://av8rmongo.wordpress.com

Post Reply