Micronaut Only Thread

This is a general forum for all types of posts related to Military models.

Moderators: dnichols, GHQ, Mk 1

Post Reply
zaevor2000
Posts: 84
Joined: Fri Jan 25, 2008 2:33 pm
Location: Dallas, TX

Works in progress

Post by zaevor2000 »

I have recently started back into naval minis.

One of the great things about our hobby is the ability to leave for a while and still have those minis that you can always start back up.

For the last several years I have not had any naval opponents (we've been locked into micro armor).

Now that I have opposition for naval I am starting to collect again.

Thank you very much for all of the members here that share their experience and advice!

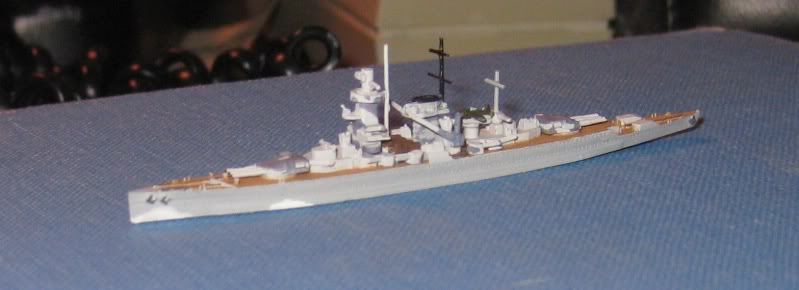
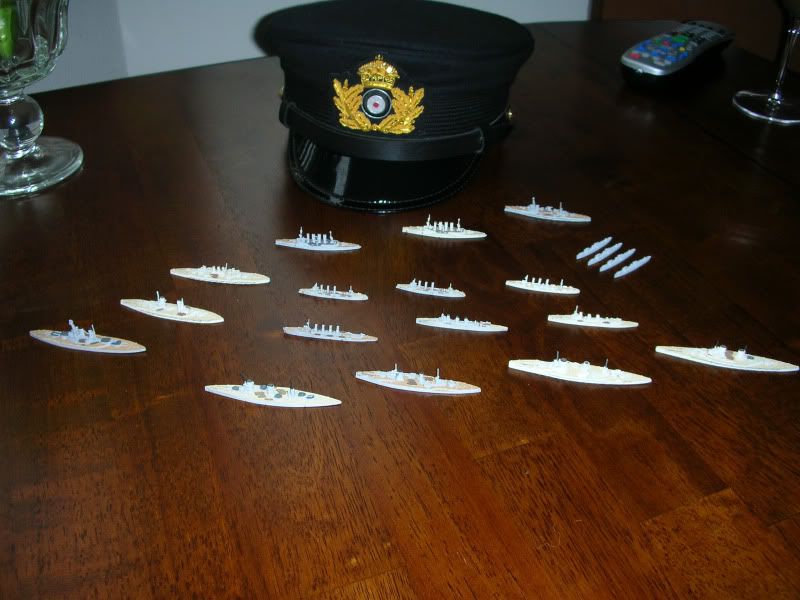
Here are some works in progress... not up to the ultimate standard like cbovill, pietr and others, but my work will improve. Our hobby is great in that you can just repaint your minis to incorporate new techniques.

I am still researching camo patterns. In the meantime I have painted my US and Brits in pre-war...

I hope everyone is doing well!

Frank

Image

Image

Image

fullmetaljacket
E5
Posts: 407
Joined: Sun Mar 20, 2005 2:18 am
Location: Warsaw, Indiana

Post by fullmetaljacket »

The stuff looks very good zaevor may want to try flash or brighten the room up a litle. Other than that the ships look amazing! :D

I have been working on my ships again and will post soon some new pictures also.

I do have a question for all you out there. When painting up 1/2400 world war one era DD do any of you use numbers that you so commonly see on the side of the ships ie... D44? I realize that this was also used in world war two also. My real question is if anyone does use this method where do u get your numbers for the ships. I thought of free handing them but then thought against this method due to the small size of the ships. Any ideas or suggestions will be welcome, or I'm i just trying to do something that is to much work, and most people would not even know the difference?

fullmetalajacket

voltigeur
E5
Posts: 814
Joined: Mon Dec 13, 2004 3:26 am
Location: Dallas Texas

Post by voltigeur »

The stuff looks very good zaevor may want to try flash or brighten the room up a litle.
I agree. I have seen this miniatures in person and the photo's don't do them justice. Zaevor really got all the details out.
I pray for Peace on Earth Good will toward men. Till then one round HE fire for Effect!

zaevor2000
Posts: 84
Joined: Fri Jan 25, 2008 2:33 pm
Location: Dallas, TX

Post by zaevor2000 »

Thank you very much for the kind comments, FullMetalJacket and Voltigeur!

Unfortunately, like Voltigeur said, I am photographically challenged :(((

nery.signorini
Posts: 13
Joined: Sun Nov 18, 2007 4:01 am
Location: São Paulo SP, Brazil
Contact:

Doubts about yours IJN Carries

Post by nery.signorini »

Hi cbovill,

I have being following your posts and watching the details os yours IJN Carries.

I bought recently 5 CVs and i'm very interested in:

A) How did you draw the straight white lines over the entire flight deck?

B) Colors of the flight deck, hull ?

C) The japanese letter in the bow?

Many thanks and congratulations.


Nery
Nery

nery.signorini
Posts: 13
Joined: Sun Nov 18, 2007 4:01 am
Location: São Paulo SP, Brazil
Contact:

Mini-flags

Post by nery.signorini »

Chris


And the little flags...... it's beautiful.

Thanks again.

Nery
Nery

ww2navyguy
E5
Posts: 328
Joined: Sat Jul 30, 2005 8:21 am
Location: Sunny Florida

Post by ww2navyguy »

Just giving this thread a "bump."

fullmetaljacket
E5
Posts: 407
Joined: Sun Mar 20, 2005 2:18 am
Location: Warsaw, Indiana

Post by fullmetaljacket »

Once again nice ships and paiting. Was wondering what are you all using for your bases? Info would be appreicated.

fullmetaljacket

regia-marina
E5
Posts: 231
Joined: Sat Mar 19, 2005 7:07 pm
Location: Medford, Oregon

Post by regia-marina »

Image

I've re-opened my shipyard and finally got the Graf Spee back into service. Plus it was so sad to see this thread with all of it's wonderful pictures of our handiwork on page 3 of the forum. Happy sailing!

regia-marina
E5
Posts: 231
Joined: Sat Mar 19, 2005 7:07 pm
Location: Medford, Oregon

Post by regia-marina »

Image

This is my High Seas Fleet. Buy stock in GHQ now because it's about to get a lot bigger.

regia-marina
E5
Posts: 231
Joined: Sat Mar 19, 2005 7:07 pm
Location: Medford, Oregon

Post by regia-marina »

Has anyone modified a Derfflinger so it has it's late war appearance? Same for the Hindenburg. I have some ideas but if someone has already done it with success I'd love to hear about it. Thanks!

av8rmongo
E5
Posts: 1637
Joined: Sat Dec 11, 2004 8:24 pm
Location: Newport, RI
Contact:

Post by av8rmongo »

My irrational need to have a Roll-On/Roll-Off Maritime Pre-Position Ship has finally gotten the better of me...

[Doctor's notes: That was the last diary entry before the patient lost all sense of reality the following pages from the diary revealed just how far off the deep end he went.]


I have plans for the 1st LT John Bobo MPS ship. But they're 1:350 and of course I need them at 1:2400. The friendly folks at the copy shop stepped it down to the right scale in a jiffy.

Image

Now I have a cast resin "blank" milled down to the proper thickness for the hull.

Image

Next steps are to rough cut to approximate length and width for final shaping. Luckily this ship is basically a big rectangle not many complex curves to shape. Once the hull is shaped properly I will make a silicone mold of that and start on the island. The cranes I think I can use the cranes from the Curtiss seaplane tender. The aft helo pad will probably be a deck edge elevator from the Wasp LHD. Hmm... guess I better check my bits box to see what I have.

More to follow...

Paul
“It's a beautiful thing, the destruction of words.â€￾
― George Orwell, 1984

People sleep peaceably in their beds at night only because rough men stand ready to do violence on their behalf.
- George Orwell

http://av8rmongo.wordpress.com

av8rmongo
E5
Posts: 1637
Joined: Sat Dec 11, 2004 8:24 pm
Location: Newport, RI
Contact:

Post by av8rmongo »

The resin "blank" has now been milled down to the proper hull dimensions. My freehand technique on the bow left me a little dis-satisfied but its in the ballpark. I think I'll mill down the main deck a bit to give it some gunwales (there is a huge degree of difficulty in this with my primitive equipment though, not sure its worth the risk.)


(This time on a background with more contrast)
Image

Image

Image


Tomorrow I work on the superstructure and await the arrival of the silicone mold material.

Paul
“It's a beautiful thing, the destruction of words.â€￾
― George Orwell, 1984

People sleep peaceably in their beds at night only because rough men stand ready to do violence on their behalf.
- George Orwell

http://av8rmongo.wordpress.com

tstockton
E5
Posts: 715
Joined: Sat Apr 16, 2005 10:55 pm
Location: Indiana
Contact:

Post by tstockton »

Paul,

This is very interesting! As someone who dabbles at kit-bashing and scratch building in model railroad's 1:87 scale, I'm looking forward to see "how you do it" in 1:2400 scale.

At some point in your build, would you take a few moments and show us tools and techniques? I am but a grasshopper in the world of scratch building...

Thanks!

Regards,
Tom
"Well, I've been to one World's Fair, a picnic, and a rodeo, and that's the stupidest thing I ever heard come over a set of earphones. You sure you got today's codes?"

-- Major T. J. "King" Kong in "Dr. Strangelove"

av8rmongo
E5
Posts: 1637
Joined: Sat Dec 11, 2004 8:24 pm
Location: Newport, RI
Contact:

Post by av8rmongo »

Tom,

You asked about tools and techniques. Let me start with a quick tour of the workshop (for those of you who just want to see the ship update skip to the end). Let me start my saying that we're renting a house that is probably too small so this garage workshop is literally surrounded by a 4ft wall of boxes of stuff I haven't found a place for yet.

The workbench is simple and cluttered with all kinds of stuff. The two tool boxes on the left are hobby paints, one for vehicles one for ships. Moving around every 2-3 yrs with the Navy has made me containerize everything. Below this workbench are the 10k-12k micro armor vehicles in panzerkeepers.

Image

Here's my poor man's milling machine. Its a dremmel style tool on a drill press stand with a moveable stage clamp. It allows me to set a drill depth and then move the subject around to mill out the material to make recesses. Up thread you can see the foc'sle of the ship where I used this technique. This press is not really designed to do this and the table isn't level in any axis so its hard to get good results - which is the main reason I chickened out of milling down the main deck that I talked about yesterday. Someday I'll find a true milling machine I can afford. Until then this is what I've got.

Image

The next tool I use quite a bit is my combination belt/disc sander. It has done great service in "rough cutting" plastic blanks for ships or whatever. It also gets heavy use removing flash and overflow from my resin casts.

Image


Here is my little bag of tricks. I have knives, drills, snippers clippers, etchers, pryers and pokers that can do just about anything I need for detailing or sculpting.

Image

One other tool that I'll show right now and talk about in the construction update is the chopper below. If you work with styrene plastics for scratchbuilding I thing this is a must have. You can set up the jig and make repetitive cuts and as long as you keed a fresh razor blade in it they will come out perfect everytime. Its a huge time saver.

Image

Okay, enough of the tour for now here's the update.

Image

First thing I needed to do was to start the superstructure. Since I'm going to be resin casting the model I have decided to do the super structure in two pieces to make demolding it easier. The first piece makes up the section from the main deck up to the bridge/bridge wings. This is an easy section since its just a big rectangular block. I use the remnants of the plastic blank from yesterday and I cut out a piece of the proper shape.

Image

This section is too high in profile so about one third will have to be taken off the bottom. When that's done it will be fine sanded and portholes will be drilled in to the surface using a pin vise and drill bit.

Setting that aside for the time being I decided to make the cargo hatches on the main deck. First I gave the entire ship a once over with 220 grit sandpaper to remove the marks from the 80 grit used in the belt sander to rough shape it. Once complete I used the chopper pictured above to cut styrene strips for the cargo hold covers. Since I didn't have strips of the correct size to match the drawings the chopper was the perfect tool. The hatches come in two different sizes so I could measure it set the jig up make my cuts for length and then reset the jig for the proper hatch width and cut the pieces lengthwise.

After the hatches were cut to the proper size I measure the placement of the drawing and then transferred it to the ship deck. Then it was a simple matter of gluing each hatch in the correct position. I say simple but getting the exact position was difficult. even using gel CA glue didn't offer any "work time" once the hatch touched the deck it was stuck. The result? Well the hatches are slightly off when placed next to the drawing but otherwise I don't think you would notice. One the hatches were in place I used an exacto blade to slightly bevel the edges of the hatches to make them look more natural.

Image

You can see the piece of superstructure to the left with the black marker for the part that needs to be removed to lower the profile.

That's it for now more to follow...

Paul
“It's a beautiful thing, the destruction of words.â€￾
― George Orwell, 1984

People sleep peaceably in their beds at night only because rough men stand ready to do violence on their behalf.
- George Orwell

http://av8rmongo.wordpress.com

Post Reply