Thanks again one and all. I may as well strike while the iron is hot and hit people up with another conundrum that's been exercising my too-meager abilities.
Does anyone have advice on a good, workable way to reliably produce the circular recognition markings atop the turrets of Imperial German capital vessels?
So far I've been leaving them out, sure in the knowledge that a proper rendering was well beyond me. But it's time to bite the bullet. And it's driving me nuts. I've tried freehand, stencils, cut out masking tape, masking fluids, home made stamps, all manner of things bought and extemporised.
Some of the reoccurring problems are: as they're full white against the dark turret top (much darker than the general base coat and the remainder of the turret) these circles are highly intolerant of even the slightest error or inconsistency. The turret tops are never entirely flat, with the alterations of plane going in two directions, up with raised details, and also sloping down on the sides. And any solution would need to be scaled, given a great size variation between vessels and their marked areas.
Some potential solutions that have been suggested and tried, but in the end are harder to implement that attempting to do the job freehand! For example, if I was good enough to mask those circles I wouldn't need to mask those circles.
I found a way to almost complete the outer circle by using a ** CENSORED ** miniature hole-punch I found at a $2 shop. I found a way to use it's smallest circle to stencil the outer line. But sadly, due to the turret-top slopes, I almost always got bleed coming in under the pieces of punched-out paper. And nothing could be made (to a machined perfection) to accommodate the smaller centre hole. This is the hassle about the recognition symbol being more than a simple circle, but a shape that's more accurately a band, or hoop.
Has anyone out there found a way to tackle this problem? Even knowing that folks have had to give up and simply go freehand would be a help. This feeling that I'm missing something obvious is driving me mad.
Any assistance would be greatly appreciated.
Cheers.
Micronaut Only Thread
Moderators: dnichols, GHQ, Mk 1
-
Unfathomable
- Posts: 71
- Joined: Thu Aug 09, 2012 12:17 pm
- Location: Beyond the Horizon
-
av8rmongo
- E5
- Posts: 1637
- Joined: Sat Dec 11, 2004 8:24 pm
- Location: Newport, RI
- Contact:
Do you have any ability to use MS Powerpoint or some other application and create your own decals?
“It's a beautiful thing, the destruction of words.â€
― George Orwell, 1984
People sleep peaceably in their beds at night only because rough men stand ready to do violence on their behalf.
- George Orwell
http://av8rmongo.wordpress.com
― George Orwell, 1984
People sleep peaceably in their beds at night only because rough men stand ready to do violence on their behalf.
- George Orwell
http://av8rmongo.wordpress.com
-
Unfathomable
- Posts: 71
- Joined: Thu Aug 09, 2012 12:17 pm
- Location: Beyond the Horizon
No, Av8ermongo. At the moment I don't have a printer even, though in time that can be remedied. Or I could take stuff to a printing shop.
Maybe it's the only way to go, though I don't know any graphics programmes. Quite a learning curve ahead in that case.
I take it that's what you do - make an image and then turn it into a decal?
Maybe it's the only way to go, though I don't know any graphics programmes. Quite a learning curve ahead in that case.
I take it that's what you do - make an image and then turn it into a decal?
On balance, Jellicoe was probably right.
-
av8rmongo
- E5
- Posts: 1637
- Joined: Sat Dec 11, 2004 8:24 pm
- Location: Newport, RI
- Contact:
Yes, here's one example:

Can't see it too clearly from this shot but the USCG Stripes and logo were downloaded from their site, scaled to fit and then printed on white decal paper.
If you need white markings I would use white decal paper. Set up your decal with the shape of the turret roof which you will print in the proper turret deck color. On top of that shape overlay a circle of the proper size and width. If you color that circle white in the application it will essentially negate the color of the base layer below it and even though the printer doesn't print white the white decal paper beneath will then show through.
If there are raised details on the turret roof a small slit or X on the decal with a sharp X-Acto blade will allow the raised detail to protrude through the decal. A bit of micro-sol or similar decal softening solution will then assure a smooth fit across the entire decal.
“It's a beautiful thing, the destruction of words.â€
― George Orwell, 1984
People sleep peaceably in their beds at night only because rough men stand ready to do violence on their behalf.
- George Orwell
http://av8rmongo.wordpress.com
― George Orwell, 1984
People sleep peaceably in their beds at night only because rough men stand ready to do violence on their behalf.
- George Orwell
http://av8rmongo.wordpress.com
-
Unfathomable
- Posts: 71
- Joined: Thu Aug 09, 2012 12:17 pm
- Location: Beyond the Horizon
av8rmongo, sorry about the large pause there. I fell into the work-hole. (Yes, it's supposed to sound nasty).
Thanks for that.
Don't know if in the end I'll have the patience for a re-sizing with most models, which is what will need to be done, or if even a softening solution will deal with obstructions atop the turrets given their large size, but I've bought white decal paper and am learning the necessary computer programmes in order to try.
The advice is much appreciated. Will let you know how I go.
-D
On balance, Jellicoe was probably right.
-
tstockton
- E5
- Posts: 715
- Joined: Sat Apr 16, 2005 10:55 pm
- Location: Indiana
- Contact:
Unfathomable,
For marking the air recognition markings to the top of a German World War I battleship or battlecruiser -- here's something you might consider trying...
Assuming you have MS Excel, open up a blank spreadsheet. Using the font Arial, select the B (for BOLD) in the second box to the left of the word Arial. Type a capital O in the first cell, then a space; then another O and then a space; then a third O and a space, then a fourth O and then press return. Go back and reselect that cell. At the top, press Format and the select Cells. Select Font, then move down and a little to the left to where it says Color; below the word Color you will see a box that says Automatic, and a little arrow pointing down next to Automatic. Press down on that arrow, then select the color white.
Now go to the tab that says Color and select it, then choose the very dark gray in the upper right-hand corner. (DON'T use the black, it will appear too dark! Think "scale color"...) Then select OK at the bottom You should now have a cell with a very dark gray background and four white "O"s in it. If you only need four, than print that on white decal paper.
Let the ink dry for a while -- I'd wait at least a few hours, maybe overnight. After spraying a fixative on the black area (sealing the decal -- use two or three light coats and let dry between coats) ,use a very sharp knife and carefully cut out one of the "O"s, and trim the black area so that it fits on the turret top. Then apply the decal to the top of the turret. Repeat for the other three turrets.
If the turret top is finished in a matte surface paint, don't forget to apply a little gloss finish to give the turret top the best possible surface to apply the decal to. Soak the decal in some lukewarm water until the black box with the white circle separates from the carrier sheet; then apply the decal to the turret top. Repeat for the other three turrets. After letting the decals dry for a day or so, lightly spray the turret tops with Dullcote or some other matte finish -- once again, use two or three light coats and let dry thoroughly before applying another coat.
Ta-da!! You've just applied the air recognition mark to the tops of your turrets!
If the "O"s are too big or too small, adjust the font size before you print them...
Hope this helps!
Regards,
Tom Stockton
(edited to fix misspellings )
)
For marking the air recognition markings to the top of a German World War I battleship or battlecruiser -- here's something you might consider trying...
Assuming you have MS Excel, open up a blank spreadsheet. Using the font Arial, select the B (for BOLD) in the second box to the left of the word Arial. Type a capital O in the first cell, then a space; then another O and then a space; then a third O and a space, then a fourth O and then press return. Go back and reselect that cell. At the top, press Format and the select Cells. Select Font, then move down and a little to the left to where it says Color; below the word Color you will see a box that says Automatic, and a little arrow pointing down next to Automatic. Press down on that arrow, then select the color white.
Now go to the tab that says Color and select it, then choose the very dark gray in the upper right-hand corner. (DON'T use the black, it will appear too dark! Think "scale color"...) Then select OK at the bottom You should now have a cell with a very dark gray background and four white "O"s in it. If you only need four, than print that on white decal paper.
Let the ink dry for a while -- I'd wait at least a few hours, maybe overnight. After spraying a fixative on the black area (sealing the decal -- use two or three light coats and let dry between coats) ,use a very sharp knife and carefully cut out one of the "O"s, and trim the black area so that it fits on the turret top. Then apply the decal to the top of the turret. Repeat for the other three turrets.
If the turret top is finished in a matte surface paint, don't forget to apply a little gloss finish to give the turret top the best possible surface to apply the decal to. Soak the decal in some lukewarm water until the black box with the white circle separates from the carrier sheet; then apply the decal to the turret top. Repeat for the other three turrets. After letting the decals dry for a day or so, lightly spray the turret tops with Dullcote or some other matte finish -- once again, use two or three light coats and let dry thoroughly before applying another coat.
Ta-da!! You've just applied the air recognition mark to the tops of your turrets!
If the "O"s are too big or too small, adjust the font size before you print them...
Hope this helps!
Regards,
Tom Stockton
(edited to fix misspellings
"Well, I've been to one World's Fair, a picnic, and a rodeo, and that's the stupidest thing I ever heard come over a set of earphones. You sure you got today's codes?"
-- Major T. J. "King" Kong in "Dr. Strangelove"
-- Major T. J. "King" Kong in "Dr. Strangelove"
-
Unfathomable
- Posts: 71
- Joined: Thu Aug 09, 2012 12:17 pm
- Location: Beyond the Horizon
-
WWIICentral
- E5
- Posts: 169
- Joined: Sat Sep 03, 2011 6:59 am
- Contact:
Hey Guys,
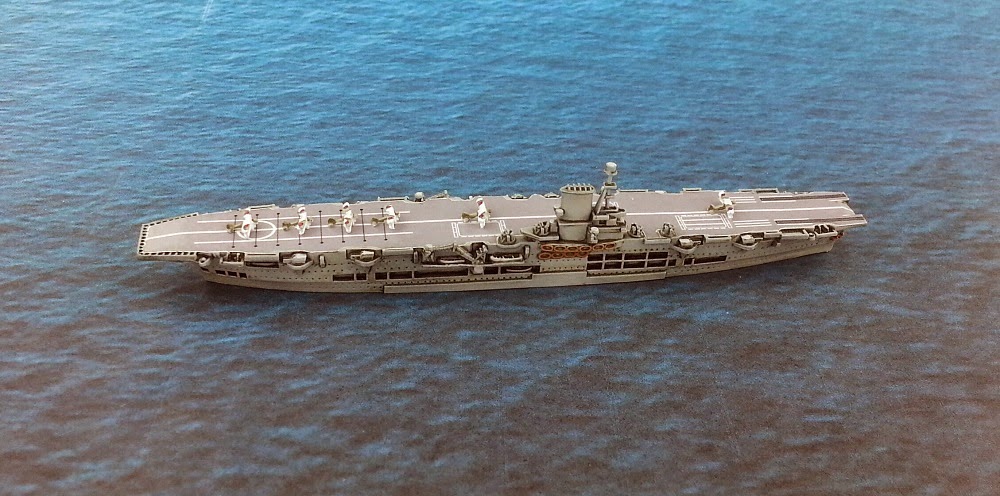
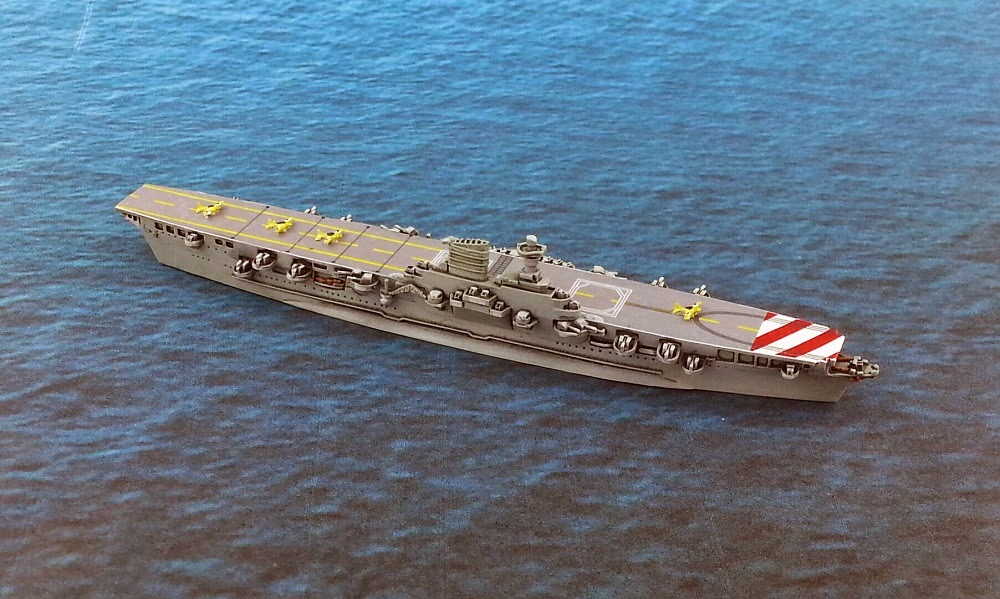
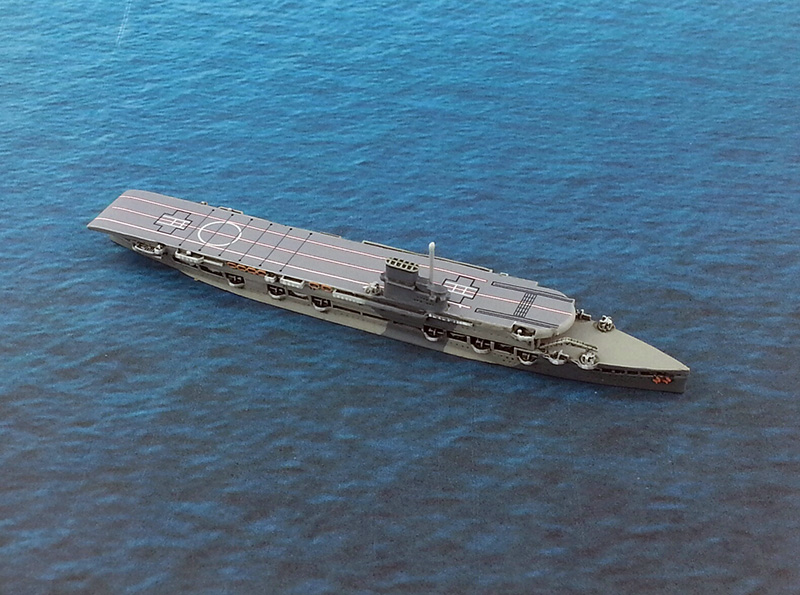
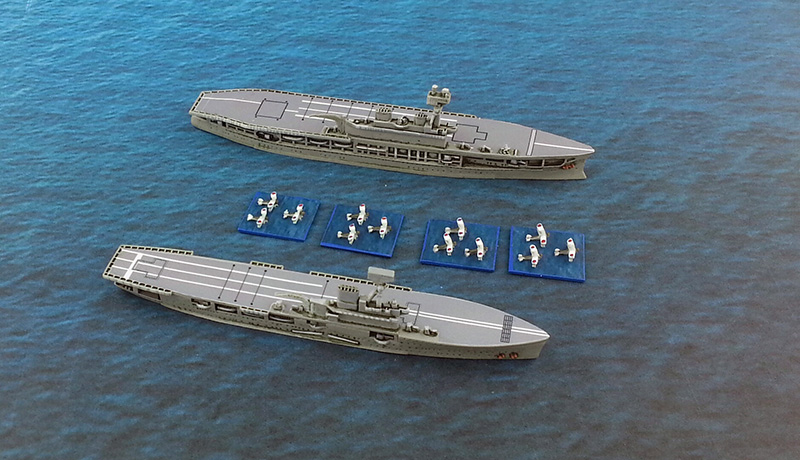
Wanted to share a couple recently completed Carriers... it's been awhile since I've painted anything so it was a nice chance to relax
More photos on my Site
Feedback appreciated!
Tanner
 [/url]
Wanted to share a couple recently completed Carriers... it's been awhile since I've painted anything so it was a nice chance to relax
More photos on my Site
Feedback appreciated!
Tanner
[/url]-
tstockton
- E5
- Posts: 715
- Joined: Sat Apr 16, 2005 10:55 pm
- Location: Indiana
- Contact:
Tanner,
There you go again, painting up 1:700 scale models and passing them off as 1:2400 scale... we're on to your tricks, pal!
Holy cow -- look at the detail on those GHQ models!
Holy cow -- look at those SUPERB paint jobs!!
Holy cow, indeed!!!
Thanks for sharing your works with us, Tanner!!
Regards,
Tom Stockton
"Well, I've been to one World's Fair, a picnic, and a rodeo, and that's the stupidest thing I ever heard come over a set of earphones. You sure you got today's codes?"
-- Major T. J. "King" Kong in "Dr. Strangelove"
-- Major T. J. "King" Kong in "Dr. Strangelove"
-
paul
- E5
- Posts: 570
- Joined: Sun Dec 12, 2004 9:06 am
- Location: Orlando Area
Excellent job
Fantastic painting job and photos!!!
-
Unfathomable
- Posts: 71
- Joined: Thu Aug 09, 2012 12:17 pm
- Location: Beyond the Horizon
And to think I'd almost summoned the courage to post pictures of my own models … and then this disaster happens.
Think it's time to quietly delete those files.
I swear it's in the pin wash. I know I've hassled you for information on how you do it before now, and you've been kind enough to answer. But it's a bit like William Turner saying, "I just use paint and a brush, It's easy". My results are not within lightyears of those. Please post more and more.
Meanwhile I'm getting my bat. And ball. And going home.
On balance, Jellicoe was probably right.
-
ExGGFG
- Posts: 33
- Joined: Thu Feb 07, 2013 6:20 am
Ha! That was great.Unfathomable wrote: it's a bit like William Turner saying, "I just use paint and a brush, It's easy".
J.M.W. Turner is one of my favourite artists.
@WWII Central - wow, those are gorgeous! Nice work sir, as usual.
Always good to see fresh stuff in this thread too. I need to get busy on more ships myself, this is good inspiration.
-
av8rmongo
- E5
- Posts: 1637
- Joined: Sat Dec 11, 2004 8:24 pm
- Location: Newport, RI
- Contact:
Invincible Class Update
I'm thinking about starting a project to kitbash the Invincible class to their final deck configurations i.e. delete the Sea Dart, extend the deck, and increase the ski ramp. Does anyone have deck plans for these ships? The deck plans I've found online sell for over $100 which is waaaaaay more than I want to spend on this project.
Also, does anyone know where I can get 1/2400 scale Goalkeeper CIWS mounts?
Thanks!
Also, does anyone know where I can get 1/2400 scale Goalkeeper CIWS mounts?
Thanks!
“It's a beautiful thing, the destruction of words.â€
― George Orwell, 1984
People sleep peaceably in their beds at night only because rough men stand ready to do violence on their behalf.
- George Orwell
http://av8rmongo.wordpress.com
― George Orwell, 1984
People sleep peaceably in their beds at night only because rough men stand ready to do violence on their behalf.
- George Orwell
http://av8rmongo.wordpress.com
-
WWIICentral
- E5
- Posts: 169
- Joined: Sat Sep 03, 2011 6:59 am
- Contact:
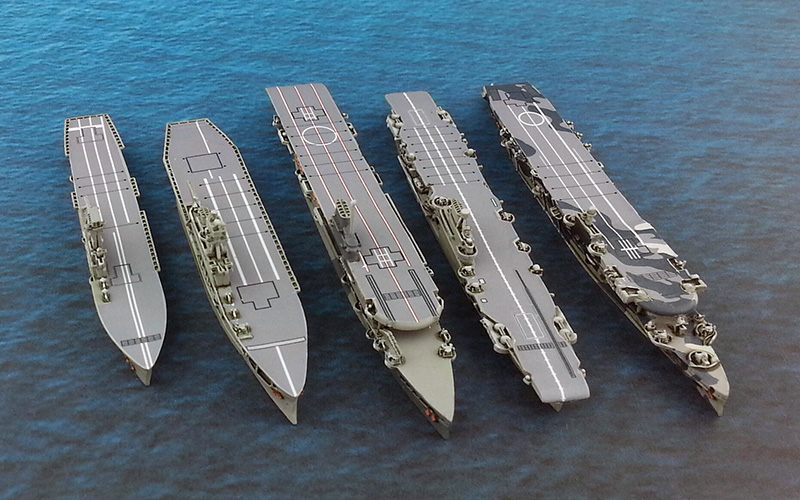
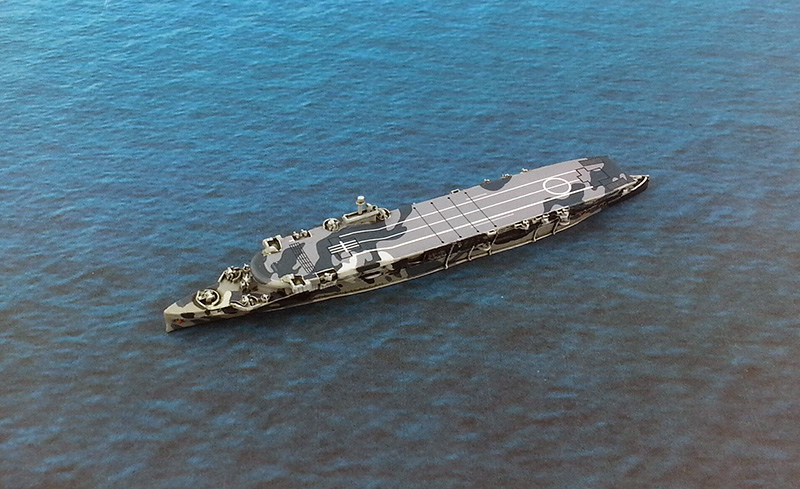
Howdy Everyone. I wanted to share some recently completed Royal Navy Carriers.
Let me know what you think.
There are more photos on WWIICentral
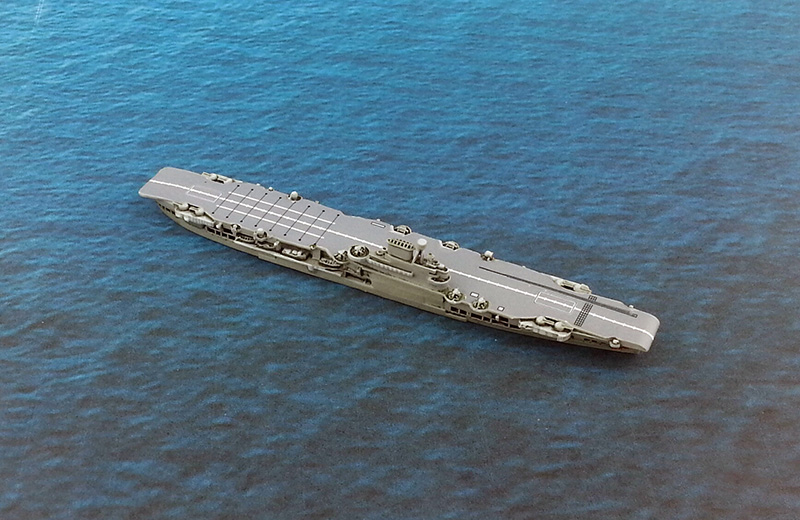
Let me know what you think.
There are more photos on WWIICentral