6mil that is some excellent stuff!! The basing looks really good, that brick wall is cool!!
How did you make ammo box and rounds for the AT gun? I think I may try to add those to my pieces. Really adds to the piece!!
Thanks again for sharing.
Show us yer stuff!
Moderators: dnichols, GHQ, Mk 1
-
Extra Crispy
- E5
- Posts: 992
- Joined: Fri Jul 28, 2006 7:56 pm
- Location: Edgewater, NJ
- Contact:
-
panzergator
- E5
- Posts: 3476
- Joined: Thu Oct 08, 2015 3:44 am
-
Mech
- Posts: 12
- Joined: Thu Sep 04, 2014 4:29 am
Hey guys!
I've started buying some ghq about 1 and a half year ago, but only recently i felt my skills got reasonable enough to show some of my models
I'd appreciate some imput, tips are always welcome!
So, to start with, i'd like to share a bit of my evolution (or at least i think it's an evolution)
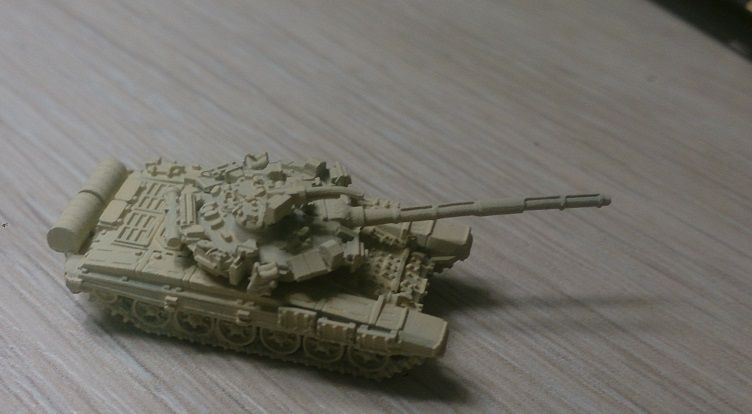
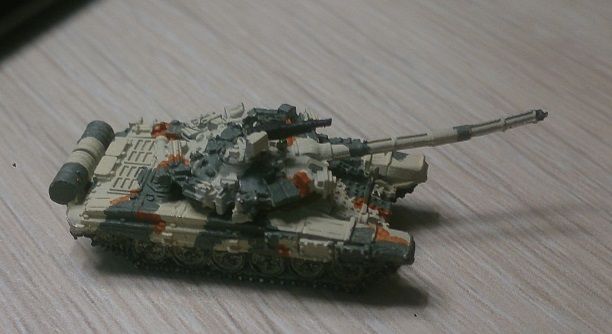
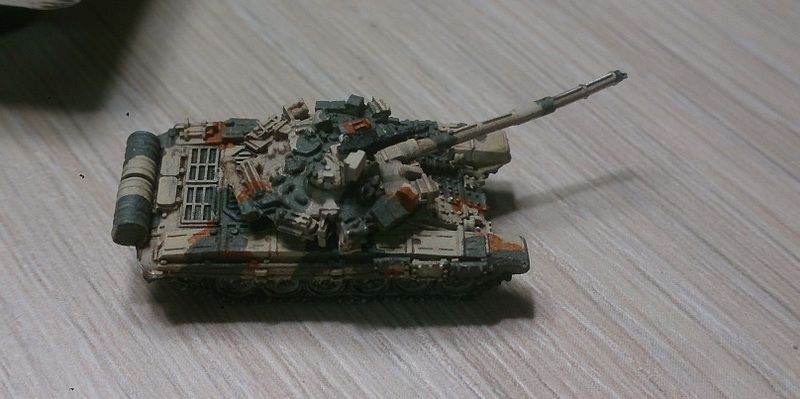
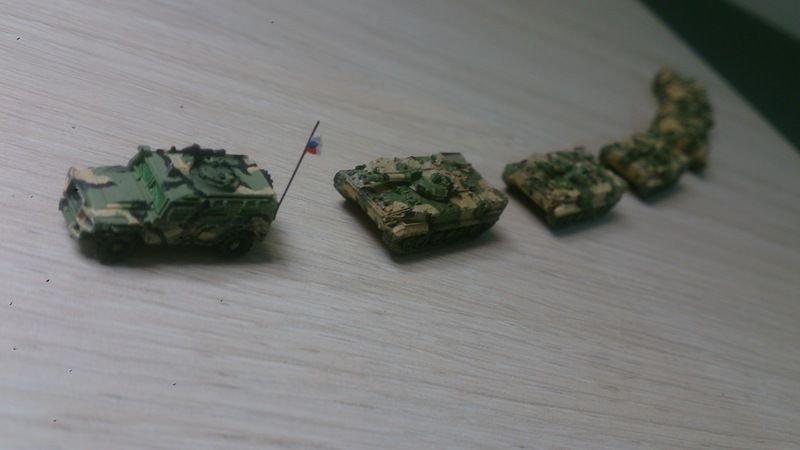
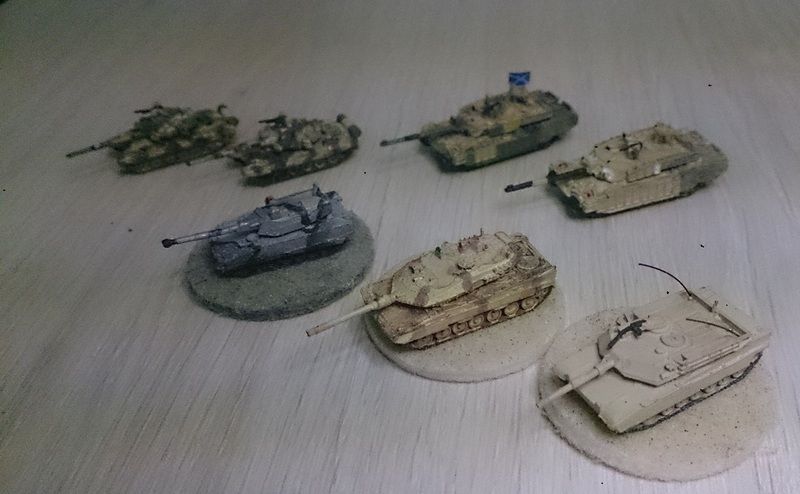
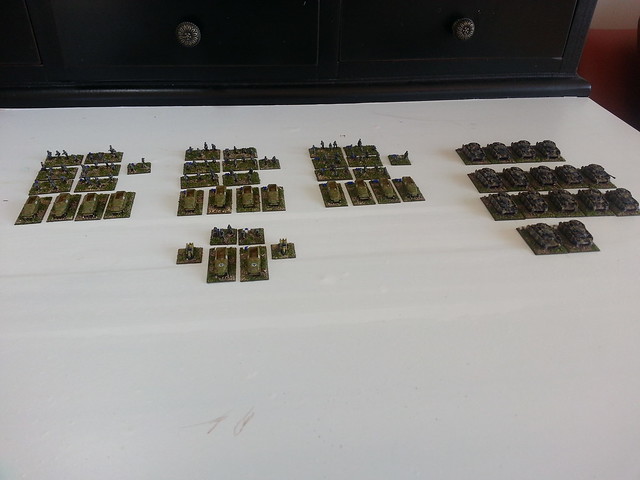
These are my tanks, in chronological order:
1- Abrams
2- Leo 2
3- CV90-105
4- Chally 2
5- T90
I've started buying some ghq about 1 and a half year ago, but only recently i felt my skills got reasonable enough to show some of my models
I'd appreciate some imput, tips are always welcome!
So, to start with, i'd like to share a bit of my evolution (or at least i think it's an evolution)
These are my tanks, in chronological order:
1- Abrams
2- Leo 2
3- CV90-105
4- Chally 2
5- T90
-
Mech
- Posts: 12
- Joined: Thu Sep 04, 2014 4:29 am
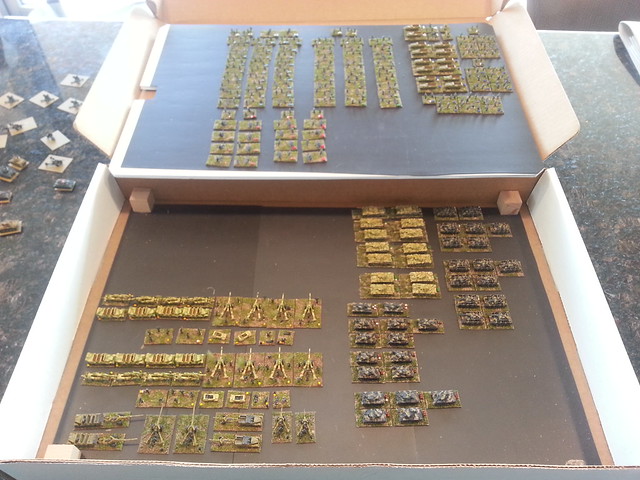
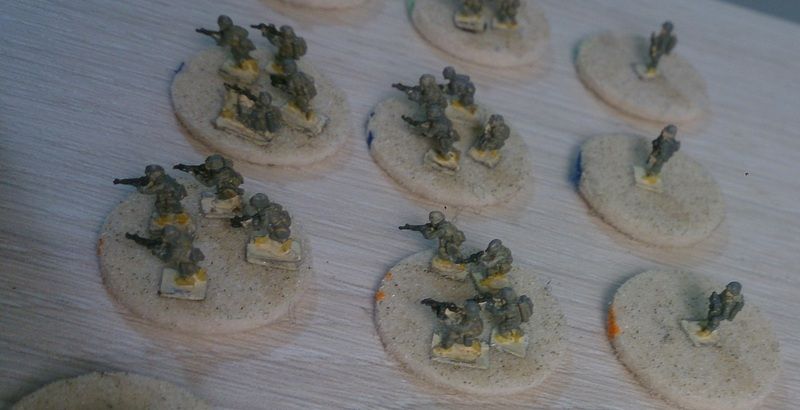
And the last post in this batch, i'd like to share my american infantry
My original idea was playing some afghanistan/iraq battles, so i went for desert camo
I painted them all as marines
After digging in the world of miniature wargaming, reading several rule-sets, i decided to organize them. So i got myself a platoon of marines
I decided to count the number of spare models i had, it was enough for another platoon, as a company would need 3 platoons, i decided to go for an army platoon, so my spare marines "changed uniforms" into army fatigues
Also, as support, some snipers, forward observers and some delta guys black hank down-style
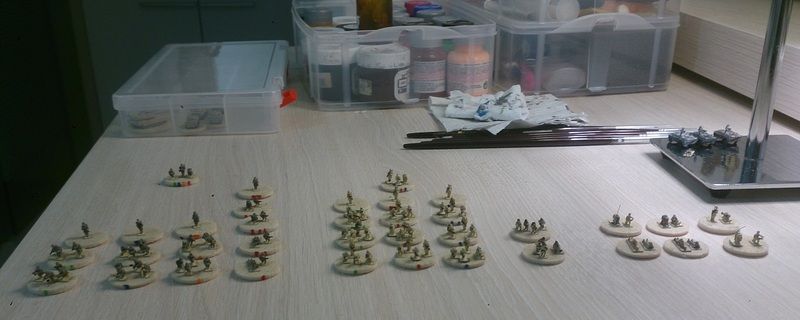
All my US troops

The marine platoon

Close up on the marines

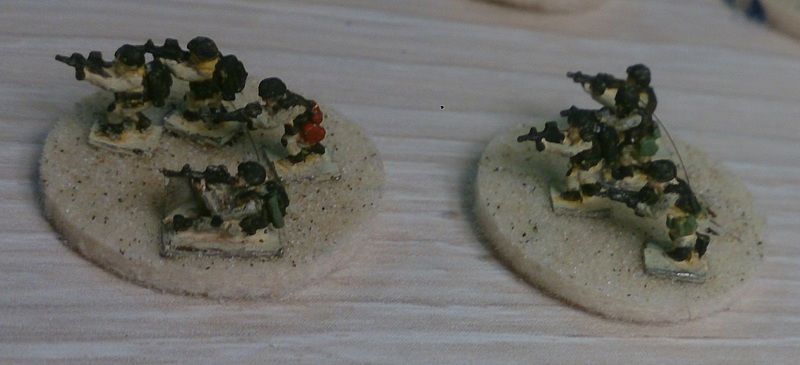
The rangers
Close on the rangers, former marines
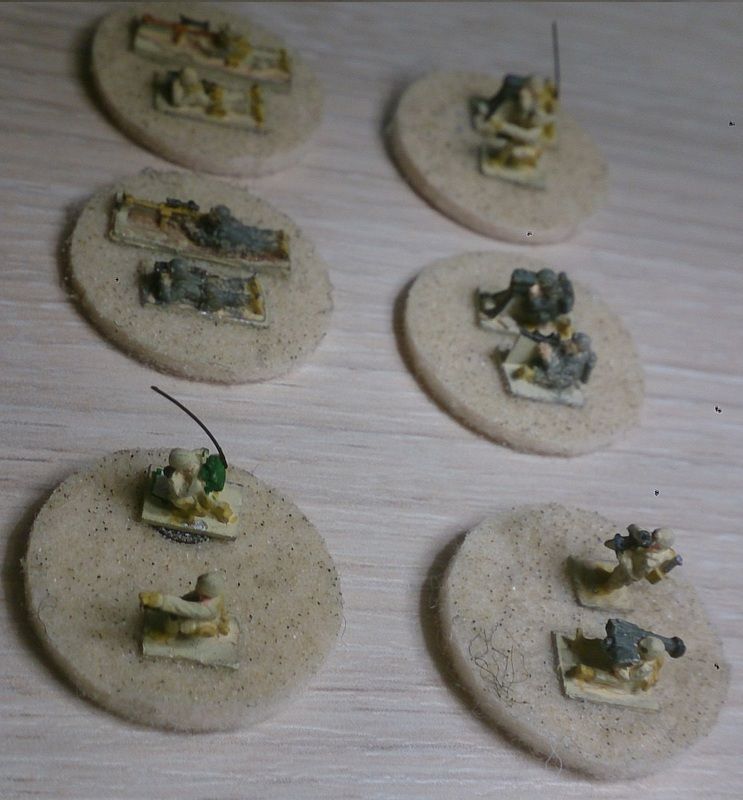
Some support
And the Delta guys
My original idea was playing some afghanistan/iraq battles, so i went for desert camo
I painted them all as marines
After digging in the world of miniature wargaming, reading several rule-sets, i decided to organize them. So i got myself a platoon of marines
I decided to count the number of spare models i had, it was enough for another platoon, as a company would need 3 platoons, i decided to go for an army platoon, so my spare marines "changed uniforms" into army fatigues
Also, as support, some snipers, forward observers and some delta guys black hank down-style
All my US troops
The marine platoon
Close up on the marines
The rangers
Close on the rangers, former marines
Some support
And the Delta guys
-
7.62
- E5
- Posts: 1883
- Joined: Tue Feb 10, 2009 10:52 am
Mech,
Welcome. You are painting knee pads on infantry and putting antennas on kit.
You've got me beat.
Just keep going until you get the look you are happy with.
There are many real masters on here, I gave up attempting to get close to that standard a long time ago.
Now I go for the squint test from about two feet and I'm happy with that.
The great benefit of the photos on the forum is that it often shows details on models that I would have completely missed if others had not posted.
Also for the inspiration factor it can not be beat.
Keep em coming,
Mick.
-
6mmwargaming
- E5
- Posts: 347
- Joined: Sun Mar 11, 2007 9:30 am
- Location: New Zealand
- Contact:
Nice work Mech. You did a great job picking out the details on the infantry,
Don't worry about trying to match some of the guys here, as long as you are happy with the results - there are some amazing artists here.
Also blowing up a 6mm tanks to 4 times its size on a screen can be depressing as you notice all the flaws that aren't apparent on a tabletop. Thats why I dont post many closeups
General tip for painting 6mm vehicles - use lighter colours than larger scale models otherwise they can look to dark and especially if you use washes, as they will darker the model.
Cheers
Kieran
-
Extra Crispy
- E5
- Posts: 992
- Joined: Fri Jul 28, 2006 7:56 pm
- Location: Edgewater, NJ
- Contact:
-
Extra Crispy
- E5
- Posts: 992
- Joined: Fri Jul 28, 2006 7:56 pm
- Location: Edgewater, NJ
- Contact:
-
pmskaar
- E5
- Posts: 2208
- Joined: Sun Apr 17, 2005 5:45 am
Show Us Your Stuff
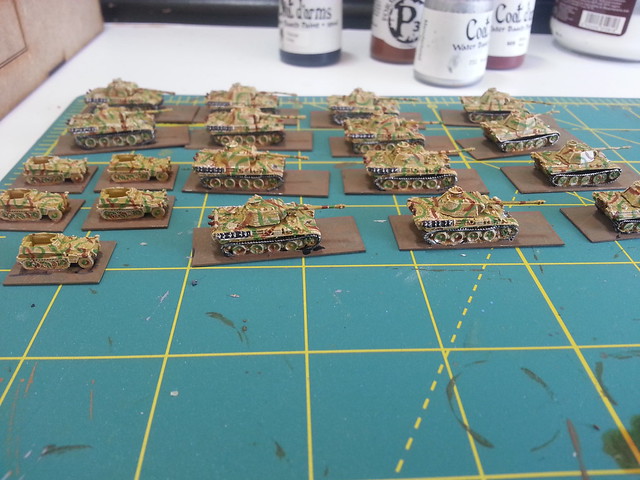
I like to base coat my pieces using an airbrush but have been happy for hand brushing my camo patterns on. I used to airbrush the 2 or 3 color scheme on my German World War II vehicles but decided to do it by hand instead in the last few years.
The main reason for my doing this is control. I feel I have a more precise application location when using a brush.
I have developed a technique that works for me. I know most people on the forum like using acrylic paints but I am an old school enamels guy and use Humbrol paints for my work. Here are some examples of my hand brushed camo from the GHQ catalog.
1. N560 Pz IIIL
2. N561 Pz IIIN
3. G558 Sdkfz 11/Flak 38
4. G37 1.5T Daimler-Steyr
5. G86 Opel Blitz Variants - Late War cargo version
6. G71 Raupenschlepper
7. N544 VBCI - This shows the French version of NATO tricolor camouflage.
I have other examples in the catalog but these are a few of them and the camo is all hand painted.
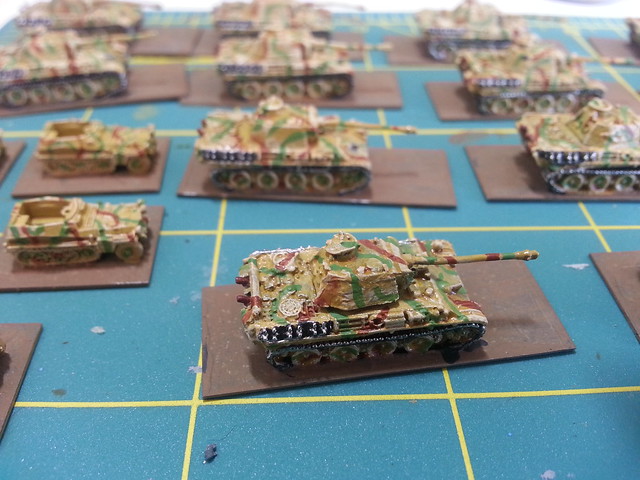
By the way Extra Crispy, I enjoy seeing your posts. Nice work on the Panthers!
Pete
The main reason for my doing this is control. I feel I have a more precise application location when using a brush.
I have developed a technique that works for me. I know most people on the forum like using acrylic paints but I am an old school enamels guy and use Humbrol paints for my work. Here are some examples of my hand brushed camo from the GHQ catalog.
1. N560 Pz IIIL
2. N561 Pz IIIN
3. G558 Sdkfz 11/Flak 38
4. G37 1.5T Daimler-Steyr
5. G86 Opel Blitz Variants - Late War cargo version
6. G71 Raupenschlepper
7. N544 VBCI - This shows the French version of NATO tricolor camouflage.
I have other examples in the catalog but these are a few of them and the camo is all hand painted.
By the way Extra Crispy, I enjoy seeing your posts. Nice work on the Panthers!
Pete
-
dougeagle
- E5
- Posts: 726
- Joined: Thu Mar 23, 2006 10:07 am
- Location: Northern Alberta
Re: Show Us Your Stuff
Nice work Pete. Very nicepmskaar wrote:I like to base coat my pieces using an airbrush but have been happy for hand brushing my camo patterns on. I used to airbrush the 2 or 3 color scheme on my German World War II vehicles but decided to do it by hand instead in the last few years.
The main reason for my doing this is control. I feel I have a more precise application location when using a brush.
I have developed a technique that works for me. I know most people on the forum like using acrylic paints but I am an old school enamels guy and use Humbrol paints for my work. Here are some examples of my hand brushed camo from the GHQ catalog.
1. N560 Pz IIIL
2. N561 Pz IIIN
3. G558 Sdkfz 11/Flak 38
4. G37 1.5T Daimler-Steyr
5. G86 Opel Blitz Variants - Late War cargo version
6. G71 Raupenschlepper
7. N544 VBCI - This shows the French version of NATO tricolor camouflage.
I have other examples in the catalog but these are a few of them and the camo is all hand painted.
By the way Extra Crispy, I enjoy seeing your posts. Nice work on the Panthers!
Pete
Doug
A goal is not always meant to be reached, it often serves simply as something to aim at.
Bruce Lee
A goal is not always meant to be reached, it often serves simply as something to aim at.
Bruce Lee
-
pmskaar
- E5
- Posts: 2208
- Joined: Sun Apr 17, 2005 5:45 am
Show Us Your Stuff
Thanks very much Doug! I'm glad you liked my examples.
Thanks to you very much also Cama! Your work is also very impressive!
I am not knocking anyone's choice of equipment, techniques, or choice of paints. I have found that my method works for me very well and wanted to show that hand brushing can be done with decent results.
Now back to your regularly scheduled programming.
Pete
-
Extra Crispy
- E5
- Posts: 992
- Joined: Fri Jul 28, 2006 7:56 pm
- Location: Edgewater, NJ
- Contact: