Show us yer stuff!

This is a general forum for all types of posts related to Military models.

Moderators: dnichols, GHQ, Mk 1

Post Reply
PolishGI
E5
Posts: 833
Joined: Wed Jun 19, 2013 2:57 am
Location: SW USA

Post by PolishGI »

Image


Image


Image


Image


Image


Image


More pics in my thread…
Last edited by PolishGI on Sun Jul 09, 2017 11:23 pm, edited 1 time in total.
Image Charlie don't surf!
"Don't do things by half."
GHQ BUILD THREAD

Mk 1
E5
Posts: 2383
Joined: Fri Dec 24, 2004 3:21 am
Location: Silicon Valley, CA

Post by Mk 1 »

Some very nice looking stuff here! Always a delight to open the thread and find so many visual treasures awaiting my inspection!

BattlerBritain - I hear you on the washes. I am a full-fledged wash advocate, but each time I do a wash I am seized by a moment of panic. There is a model I've taken so much care to paint up just perfectly, and now I've just painted over the whole thing in dark dark brown / almost black, and WHAT HAVE I DONE???

But I use a technique I learned from Troy Ritter ... first I cover the whole model (the WHOLE model) in my wash. Then I let it sit for a short while (enough time to cover another whole model, or maybe even two), and then I go back and "beat it up" with a brush. I stroke it and blot it, and press the brush dry, and do it again. It is almost as if I am dry-brushing with nothing on the brush. Except that the brush is, inevitably, a little wet.

My behavior is as if I was trying to "un-paint" a model I have just realized I over-painted.

The effect is to take off the great majority of the wash. But in particular to take it off from the large flat surfaces and the raised surfaces. The wash tends to stay in the recesses. It's weird. And a bit nerve-wracking. But it seems to work pretty well, and I like the results a lot.

Then I go on to dry-brush.

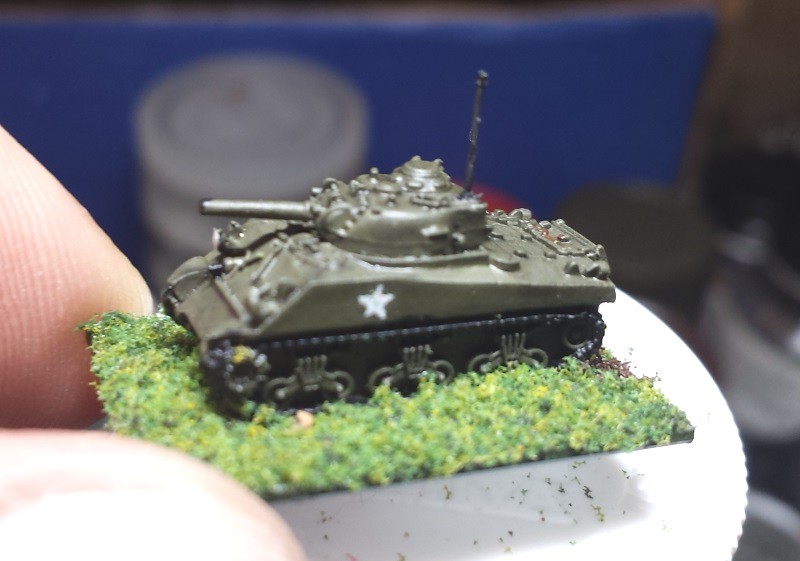
Some of the detailing I do before this process. Like national insignia or other markings, rolled tarps, or painting tracks, etc. I want these things to look like they are covered in all the same dirt as the vehicle in general. Some of the detailing I do after, like tools or gun muzzles. I want hard edges visible on these items, to make them stand out.

Anyway, it's a technique that I quite like. But if you do decide to try it, I suggest you try it on one or two less-than-critical vehicles before going whole-hog on your latest, most perfect and desired treasure. 'Cuz you might need to to it 2 or 3 times before you get the hang of it.

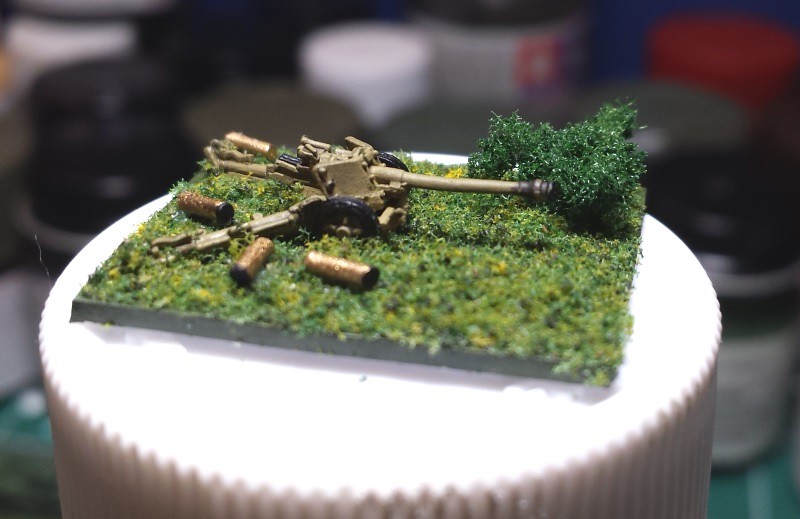
PolishGI - For the guns vs. crews ... I have wrestled with the issue of separate basing, and come to the conclusion that the best way to do it is to base the crews, not the guns.

I tried basing the guns, and putting the crews in odd-shaped basing to fit around the gun. Really awkward and hard to do, and not a very satisfactory result when you're done. I also tried mounting the guns with some part of the trail (or in the case of an 88 maybe one leg of the cruciform) not glued down, and then put the crew on a very thin card for a base, so that the card could be slid under the un-attached trail leg of the gun to make an almost tongue-in-groove fit for the crew on the gun's base. It worked, but the crew base looks really cheesy compared to what I do with my infantry stands (no texture, no ground cover, just a brown or green painted card).

What I do now is a set of gun crew bases, with the crew figures placed carefully enough that the gun can be placed on top of the stand when needed. The guns are then stored loose. When placed on the stand the crew will hold them in place well enough (at least so far ... can't say I've tested the approach with random newbies at a convention yet). I get full flexibility to game with crews separated from guns. So guns can be destroyed and their crews become un-trained infantry, or crews can be shot down but the gun remains, or the crew can retreat leaving the gun behind, whatever. There is also a very substantial side-benefit that I don't need to provide crews for ALL my guns. To wit, with my Romanian force I have three different types of AT guns that might be used depending on the formation type and year. So I have 37mm Bofors AT guns (from the GHQ Polish line) for 1941/42 armored division infantry. I have 47mm Boehler guns (from the GHQ Italian line) for early and mid-war infantry formations. And I have 75mm Pak 97/38s (from another vendor) for late-war infantry formations. But I have had to produce only 1 battery of AT gun crews, as I don't expect more than one battery of AT guns in any given game. So also I have two batteries of artillery gun crews, which can serve either two batteries of 75mm guns, or one battery of 75s and one battery of 100mm howitzers, as I see fit.

Seeing your work, I am now tempted to go back and put a few empty brass casings on the gun crew stands ... :wink:

-Mark
(aka: Mk 1)
-Mark 1
Difficile est, saturam non scribere.
"It is hard NOT to write satire." - Decimus Iunius Juvenalis, 1st Century AD

BattlerBritain
E5
Posts: 628
Joined: Fri Apr 29, 2005 7:00 pm
Location: Somerset, UK

Post by BattlerBritain »

Cheers Mk1, I'm getting the hang of it :)

It's getting better with practice.....

Extra Crispy
E5
Posts: 992
Joined: Fri Jul 28, 2006 7:56 pm
Location: Edgewater, NJ
Contact:

Post by Extra Crispy »

Finished these up tonight. 6mm buildings for Normandy with a Russian barn in for good measure. They just need dull coat. I'll post better pictures tomorrow when the light is better.

Image

Image

Image
Mark Severin
Owner, Scale Creep Miniatures
Author DeepFriedHappyMice.com

Ragnar65
E5
Posts: 140
Joined: Sun Jul 24, 2011 6:08 pm

Turret pinning

Post by Ragnar65 »

@ExtraCrispy. could you please explain your method for pinning the turrets? I´ve seen some sort of colored beads on the underside of the tanks.Looks interesting...

PolishGI
E5
Posts: 833
Joined: Wed Jun 19, 2013 2:57 am
Location: SW USA

Post by PolishGI »

About two thirds of this British infantry run are done.

Image


Image


Image
Last edited by PolishGI on Sun Jul 09, 2017 11:17 pm, edited 1 time in total.
Image Charlie don't surf!
"Don't do things by half."
GHQ BUILD THREAD

Extra Crispy
E5
Posts: 992
Joined: Fri Jul 28, 2006 7:56 pm
Location: Edgewater, NJ
Contact:

Post by Extra Crispy »

@Ragnar:

Step 1: Buy a pack of "Map Pins" like this:

Image

Step 2: With a pin vise, drill a hole in the underside of the turret. There is usually a post that fits into a hole in the hull. Drill the hole in that post. If the post is too narrow, snip it off and drill just in to the hull. Be careful not to go all the way through!

Step 3: With trial and error, trim your map pin so it is long enough to fit in to the hole you drilled but not too long to keep the turret from sitting down in the hull properly.

Step 4: Put the pin through the bottom of the hull and put a small dab of glue on the end of the pin. Push the pin in to the hole you drilled. Push HARD. Your goal is for the metal of the pin to "grab" the turret, and hold it in place along with the glue.

Step 5: Depending on the glue you use, let dry for a while, then before it has fully dried, turn the turrets. In case a little glue has oozed over the join this spin will break it up so you don't end up with a glued turret!

I started doing this prior to painting but it makes the tank hard to handle while painting. The turret flops all over. So now I do it after painting and sealing.
Mark Severin
Owner, Scale Creep Miniatures
Author DeepFriedHappyMice.com

YOOON
Posts: 12
Joined: Mon Aug 22, 2016 6:58 pm
Location: Seoul, Korea

Post by YOOON »

Image
Image
Image
FURY... converted from M4A3E8... Just for fun :D !

RedLeif
E5
Posts: 784
Joined: Sat May 21, 2011 3:11 am
Location: Boise, ID
Contact:

Post by RedLeif »

WOW! great detailing, thanks for sharing

Extra Crispy
E5
Posts: 992
Joined: Fri Jul 28, 2006 7:56 pm
Location: Edgewater, NJ
Contact:

Post by Extra Crispy »

Where did you get all the stowage - helmets and the like. Scratch built? Converted?
Mark Severin
Owner, Scale Creep Miniatures
Author DeepFriedHappyMice.com

SKeeM
E5
Posts: 171
Joined: Fri Sep 16, 2005 2:24 am
Location: Bronx N,Y.
Contact:

Post by SKeeM »

WoW! That model of Fury is so ridicules! Best Job I Ever Had!
Image

YOOON
Posts: 12
Joined: Mon Aug 22, 2016 6:58 pm
Location: Seoul, Korea

Post by YOOON »

Image

Thank you everyone, please refer to the attached photo, I feel this photo is better because my poor language skill..

YOOON
Posts: 12
Joined: Mon Aug 22, 2016 6:58 pm
Location: Seoul, Korea

Post by YOOON »

Extra Crispy wrote:Where did you get all the stowage - helmets and the like. Scratch built? Converted?
Image

Thank you everyone, please refer to the attached photo, I feel this photo is better because of my poor language skill..

BurtWolf
E5
Posts: 1083
Joined: Sun Feb 03, 2013 11:48 pm
Location: Rochester, NY

Post by BurtWolf »

Really beautiful work! Thank you for the details on the stowage, it looks great as well. I hope some day GHQ produces those stowage items because they really make the vehicle look excellent!

PolishGI
E5
Posts: 833
Joined: Wed Jun 19, 2013 2:57 am
Location: SW USA

Post by PolishGI »

Wow, great detail!

Well done! And thank you for the parts legend!
Image Charlie don't surf!
"Don't do things by half."
GHQ BUILD THREAD

Post Reply