Just a quick game. This is the fist play test for the rules set that I have been working on for the last 3 years... (Although there was a complete 'back to the drawing board' moment about 2 years back).
Having studied Conflict Simulation at a masters level, this is the third board game/wargame/'manual simulation' that I have created and first in the miniatures wargaming genre. Working title is 'Intervention'. Stripped down rules used: no artillery, no air strikes, no hiding, no objectives (other than clear the area of enemy) etc.
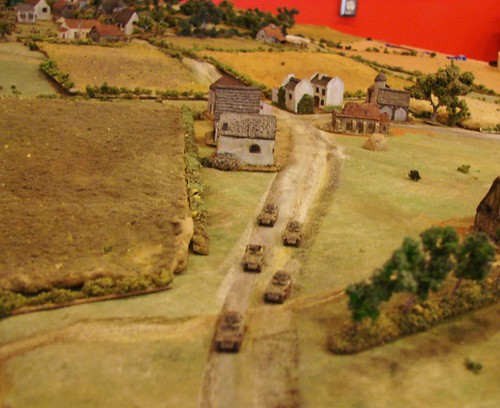
Miniatures are GHQ, terrain is Gamecraft. (Apologies to Allen for the failure to do the buildings justice. Also, despite initially being slightly sceptical about them, the felt roads worked really well on the Terrainmat)
Anyway.....
Scenario:
Blue Team
Mission: Neutralise all enemy in the vicinity of the Kashmara Gas Storage Facility.
1 x Command group
2 x Infantry Sections with HMG
1 x Infantry Section with ATGW
1 x HW section armed with 3 .50cals
All are mounted in BTR80s.
Red Team
Mission: Defend Kashmara Gas Storage Facility. Repel Blue Assault.
1 x T72
2 x BMP2
2 x Infantry Section
1 x Support team (Each with an RPG)
1 x Sniper Team
Summary: Red team are outnumbered but pack significantly better fire power.
AO:
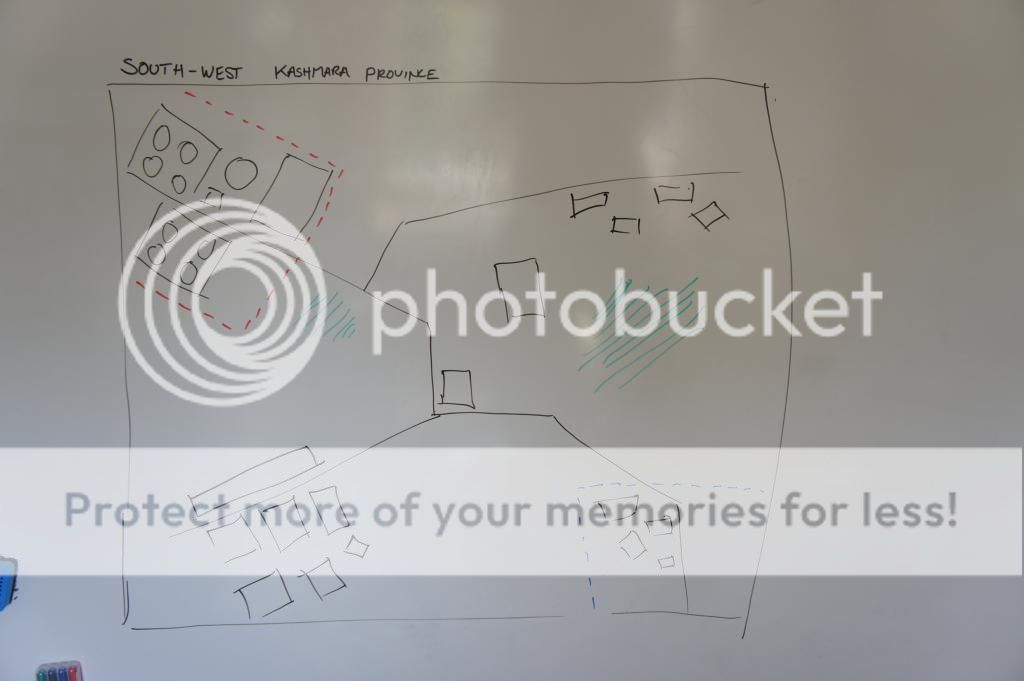 Map translated onto the 4'6 x4'6 table:
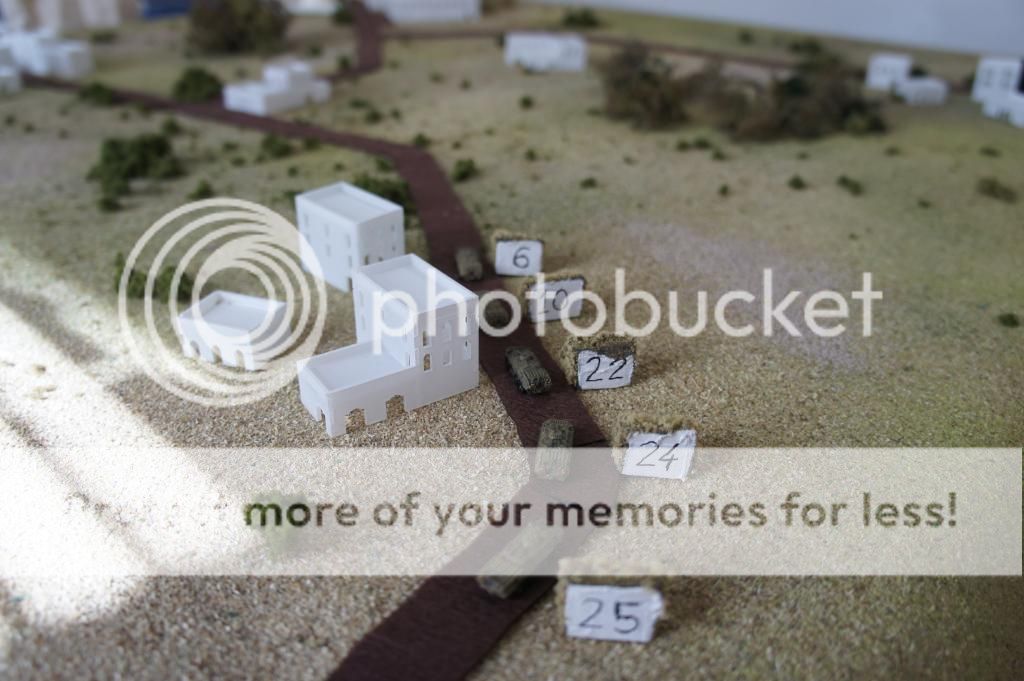
 Situation at the Beginning of the first turn:
Blue Team
Red Ream
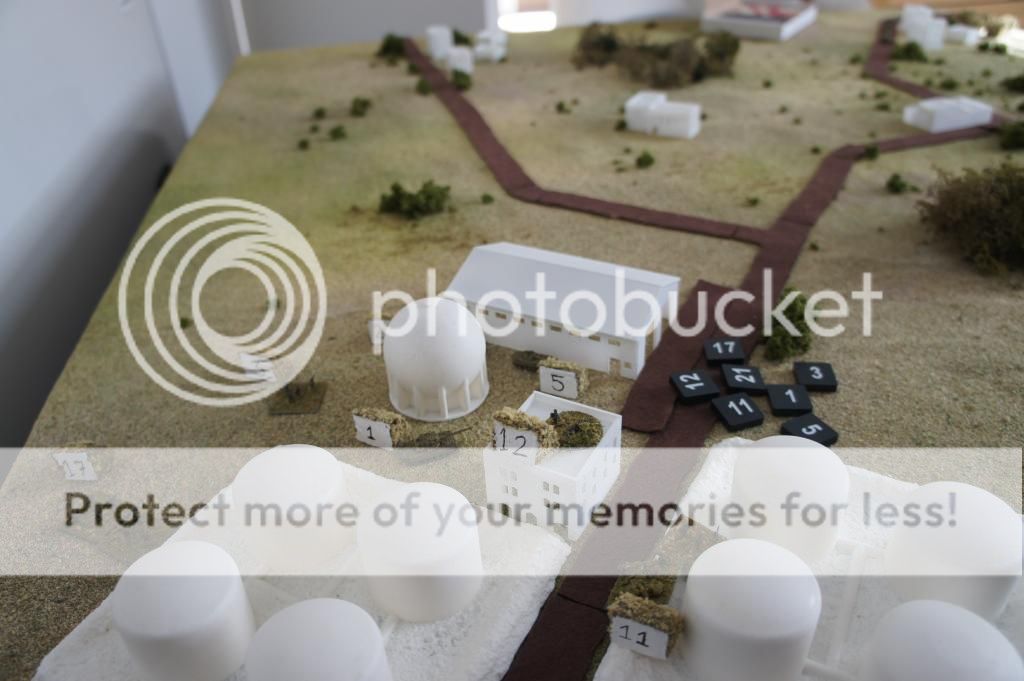
(The numbers next to the units are the activation markers (the owning player can see the numbers, the opponent sees a curved flocked face). The square black counters are drawn from a felt bag and the corresponding scenic markers are placed next to the unit.)
Turn 1:
Red team did comparatively well and the majority of their units activated before many of Blue's. The T72 moved first onto the road and promptly destroyed the lead BTR80. The first BMP2 then moved to engage the second BTR80 but caused no damage. The second BTR80 (containing the command squad) desperately needed cover and broke left, heading at speed towards the south west urban area.
Red's infantry advanced and the second BMP2 engaged and destroyed the third BTR80 killing all of those inside. Importantly this vehicle contained the ATGW. Blue team now had no way of damaging the T72.
At this point I thought it was almost all over for blue team.
The remaining two BTR80s dismounted their soldiers and broke north and west respectively, taking cover behind vegetation. The newly dismounted soldiers took up positions in the nearby buildings.
Turn 2
The T72 knocks out the infantry section that had occupied a building. The machine gun section in the building behind responds in kind and knocks out one of red team's advancing infantry units.
Both of Red's BMP2s take hits in the flank from two of the BTR80s 14.5mm guns resulting in the crew becoming shaken and stunned.
The blue commander dismounts his section from his BTR and occupies a nearby building. Unfortunately they did not go unnoticed and Red's sniper managed to pick out the commander and kill him. Somehow the command unit passed their morale test and held firm.
The RPG teams fired and missed.
The BMP2 with crew shaken engages the machine gun section and causes a casualty.
Turn 3
Blue team does well in their activation order and the majority of their units act early. After surviving two RPG rounds from the remaining infantry squad, the command BTR tank shocks its assailant causing 4 casualties and forcing them into a rout.
Having now flanked both the BMP2s the BTRs open up and penetrate their side armour causing one to explode and the other to lose a crewman and retreat. The exploding BMP also kills the RPG teams that were standing a bit too close.
The T72 engages the tank shocking BTR but misses. The command group, now minus its commander, responds to the sniper and opens up with everything they have... and spectacularly cause no hits from 16 dice.
In response the sniper also misses.
End of Game: (due to running out of game time)
Blue Team has: 3 BTR80 remaining, 1 command group, 1 machine gun section
Red Team has: 1 Sniper, 1 T72
Result: Probably a draw. Although Red team was in a significantly worse state, blue team lacked the ability to damage the T72.
Post Incident / Lessons Learned:
Quite a few rules tweaks and clarification needed, but result was roughly what could be expected, with some good moments of drama.
Combat is very dangerous - Cover/Blocking line of sight is your friend.
Vehicles should not be automatically classed as stationary in turn 1 - they make for easy targets. Oops.