Show us yer stuff!

This is a general forum for all types of posts related to Military models.

Moderators: dnichols, GHQ, Mk 1

Post Reply
jb
E5
Posts: 2160
Joined: Fri Mar 11, 2005 7:13 am
Location: Antananarivo

Post by jb »

Here are some Syrian T-72s....I'm waiting to get a better camera
Image
Image
Image
John

Vorster
Posts: 69
Joined: Thu Jul 21, 2005 4:35 pm

Post by Vorster »

Hi Guys

I know these pictures are technically pics of work in progress but I work so slow that I decided to show some of the stuff I have done all ready. The first batch is of two models with MIG Pigments over the wash and drybrush. Takes away some of the effects so I have stopped doing it. The second set is of a model after it has recieved a wash and still needs some cleaning.

Image
Image

Image
Image

If you are wondering the hexes are homemade. I cut them on a home made cutter and color them with some water paint and flock with a fine colored saw dust.

Hetzen
E5
Posts: 107
Joined: Sun Dec 19, 2004 8:25 am

Post by Hetzen »

Looking good. I'd be interested to hear about your jig.

Just a little tip, when you apply your wash, once covered, use your brush and a piece of kitchen roll to soak up excess fluid, ie dry your brush on the paper and use the bristles of the brush to suck up puddles.

Vorster
Posts: 69
Joined: Thu Jul 21, 2005 4:35 pm

Post by Vorster »

I remove the excess after the wash has dried with a drop of clean turpentine and a clean brush. I lightly coat the excess with turpentine then suck it up with either a paper towel or another clean brush.

Thanks for the tip I will try it tonight on te turrets.

Hetzen
E5
Posts: 107
Joined: Sun Dec 19, 2004 8:25 am

Post by Hetzen »

I thought it was about time to show some of my own labours. Still a learning curve for me. Anyway, this is what I got upto over the weekend.

Image

Image

Image

Mk 1
E5
Posts: 2383
Joined: Fri Dec 24, 2004 3:21 am
Location: Silicon Valley, CA

Post by Mk 1 »

Hetzen wrote:I thought it was about time to show some of my own labours. ... Anyway, this is what I got upto over the weekend.
Bravo! Dem's some mighty fine lookin' Krauts. Look good enough to shoot.

Building and terrain ain't too shabby neither. And I LOVE all the detail you've put on the infantry stands.

Mmmm-mmm GOOD.

Encore! :P
-Mark 1
Difficile est, saturam non scribere.
"It is hard NOT to write satire." - Decimus Iunius Juvenalis, 1st Century AD

HMSDiomede
E5
Posts: 490
Joined: Sat Apr 30, 2005 3:11 am
Location: Bowling Green, KY

Post by HMSDiomede »

Really nice "landscaping" work on the infantry bases! :D

David

Hetzen
E5
Posts: 107
Joined: Sun Dec 19, 2004 8:25 am

Post by Hetzen »

Thanks guys, I thought I'd take a few pics of the production process if anyone's interested.

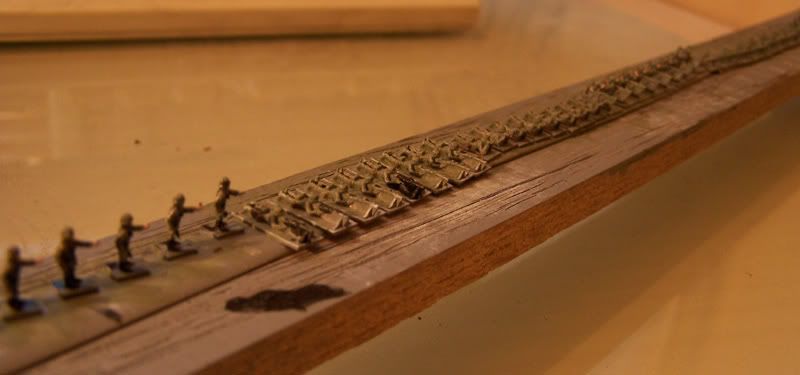
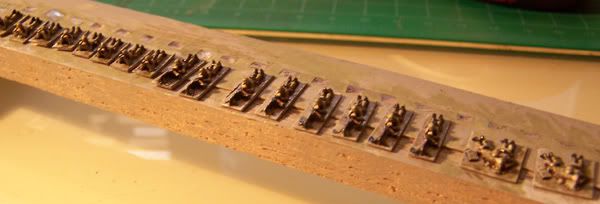
I started off by rolling up lengths of sticky tape along a piece of wood, so I could stick the infantry models on. I tried using nails, but got so fed up waiting a couple of minutes for each model while the glue set. This way seemed to work, I'd only suggest leaving more room between the models to get a paint brush in.

Image

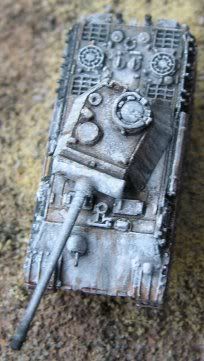
I used grey car primer to undercoat, then used a rough pure white dry brush to lift out the raised details. I re-discovered this from the GHQ catalogue on painting, but used grey instead of black to try and help lighten the figures. Stuff I've done before has usually come out too dark.

Image

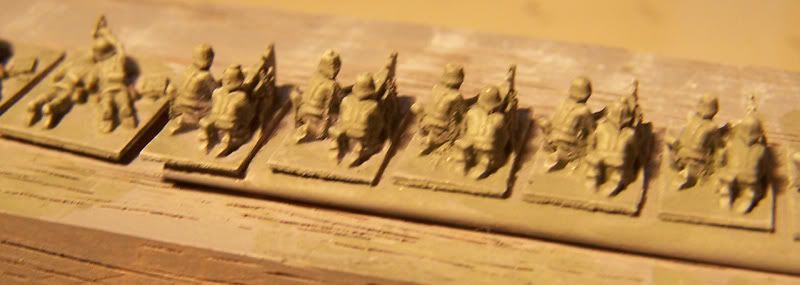
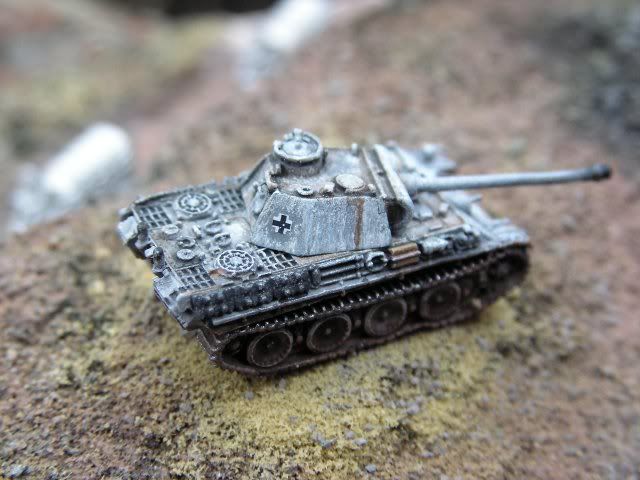
I applied a watered down and lightened mix of Vallejo Field Grau. As you can see, the shading still shows through.

Image

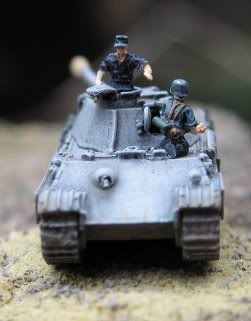
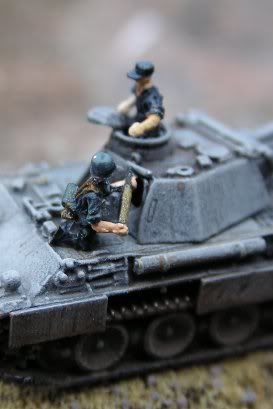
I 'blobbed' on the detail with a fine brush, then applying a black/brown ink to 5/10 part future wax wash (depending on how dark I want it, in this case it was pretty heavy). The way it clings to details hides any of my shakey painting sins. (Another little tip, which is probably very obvious, try and support your painting hand and the model with your other hand, using any hard surface as well. This really helps to steady up any DT's from the night before)

Image

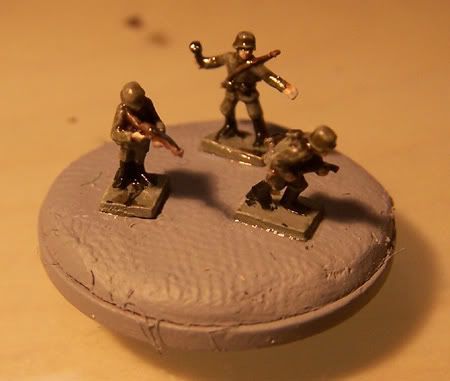
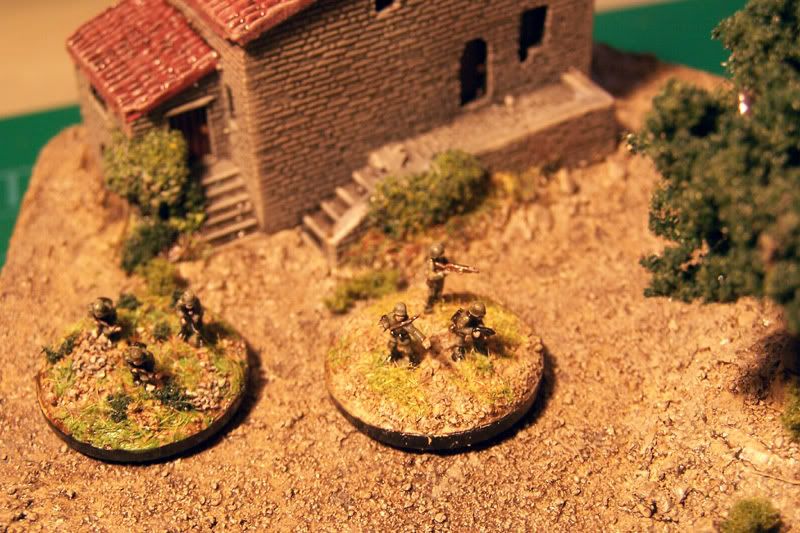
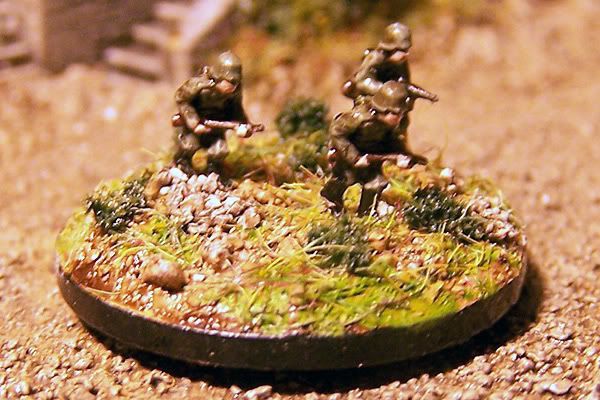
Stick onto primed base, then use an emulsion and sand mix for texture. Wash the base, then dry brush to hi-light. Lastly flock and dull coat.

Job done with very little fuss.

Image
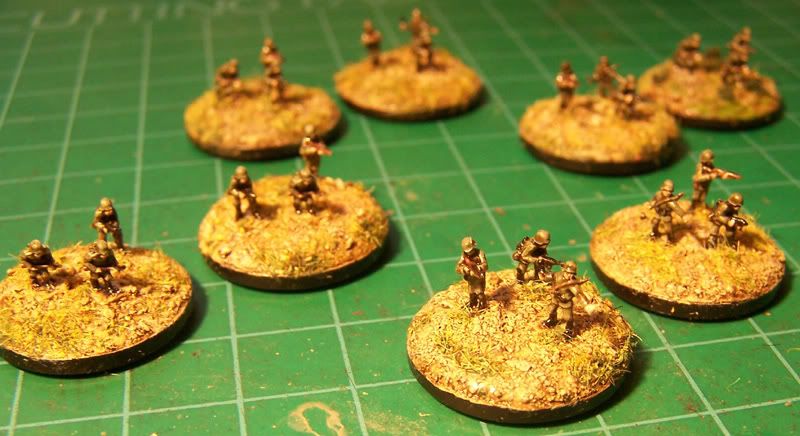
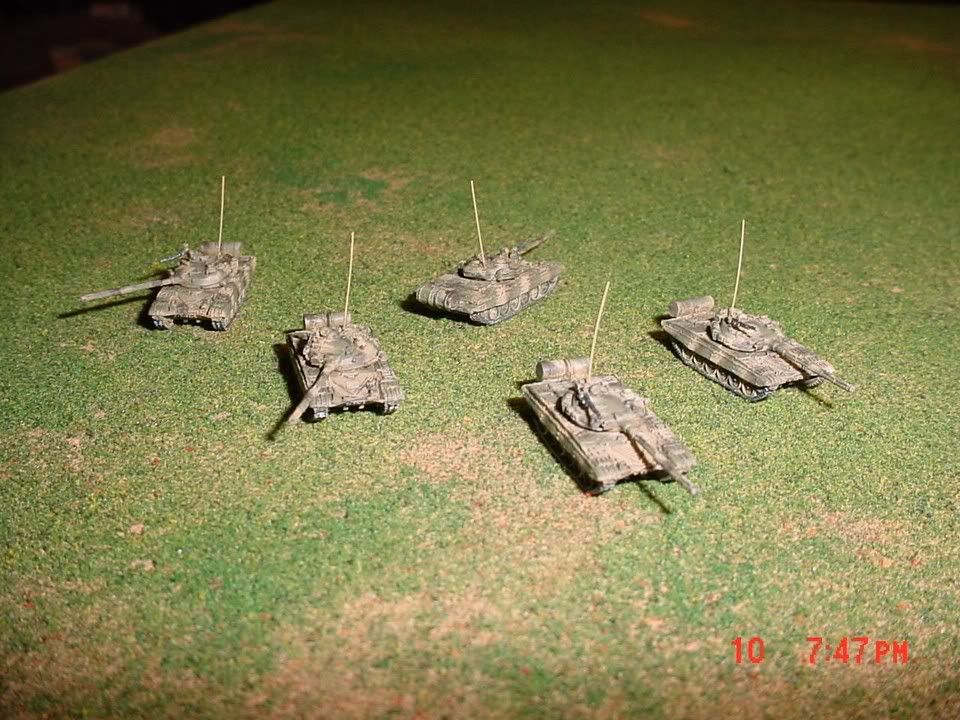
Platoon waiting for 4 lmg and comand stands.

miffster
Posts: 55
Joined: Sun Jul 17, 2005 7:00 pm
Location: Chesterfield, UK

Post by miffster »

My latest offerings. Thanks to days off with a bad back!!

Image

Image

Image

Image

Image

As you can see I am also having some problems with the cross decals (ref the german tac markings thread). The first couple wouldn't stick, and this was the best of what was left. Given the colour scheme it doesn't stand out to badly, but I may get round to spotting it in some time.

The winter whitewash camo was an experiment with dabbing white artists ink over a finished panzer grey base (dry brushed, washed and weathered) using a bit of the grey sponge that comes free with GHQ models (free stuff is good :D ) to try to simulate the effects of a long winters campaigning. The idea being that the grey stands out where the whitewash has, well, washed down during inclement weather. I think it would work ok on a larger model, but it is really tricky to be very selective where you put the ink because of the size. I chose ink because it is usually water soluble, so I could wash it off the areas that I wanted to, but for some reason, possibly age, this pot set like stone. The area behind the cross had to be soaked in Tamiya thinners and rubbed with a cotton bud to clean it off. I should have masked it with a blob of blu-tack or copydex glue. But I forgot. :roll:

All in all it photographs really badly!! :( But doesn't look too bad in the lead. It appears that the pigment has "balled" up. I guess the carrier soaked away into the sponge and left it too dry. Oh well. Back to the drawing board.

Regards

Matt

tstockton
E5
Posts: 715
Joined: Sat Apr 16, 2005 10:55 pm
Location: Indiana
Contact:

Post by tstockton »

All in all it photographs really badly!! Sad But doesn't look too bad in the lead. It appears that the pigment has "balled" up. I guess the carrier soaked away into the sponge and left it too dry. Oh well. Back to the drawing board.
Matt,

Dang, I wish my best efforts looked so bad! If these "don't look too bad", I'm not sure my heart would survive your better efforts!! :lol:

I think anything less than an OUTSTANDING! would be an understatment! I think I can speak for many of us in requesting that you post more of your works!

Regards,
Tom Stockton
"Well, I've been to one World's Fair, a picnic, and a rodeo, and that's the stupidest thing I ever heard come over a set of earphones. You sure you got today's codes?"

-- Major T. J. "King" Kong in "Dr. Strangelove"

pushbike
E5
Posts: 128
Joined: Sun Mar 13, 2005 5:20 am
Location: United Kingdom

Post by pushbike »

Top Job miffster!

Your Panzers are superb,
They could be 1/35 even!

Love the crewmen, which figures did you use?

Hetzen

Love the infantry,

I've put mine off for ages and have been using squad leader counters in the mean time!

Great stuff, more pictures please,

Chris.

Mk 1
E5
Posts: 2383
Joined: Fri Dec 24, 2004 3:21 am
Location: Silicon Valley, CA

Post by Mk 1 »

tstockton wrote:Dang, I wish my best efforts looked so bad!
Tom, are you telling us that you DON'T paint-in reflecto sunglasses on YOUR panzer crew TCs? 8)

Oy, they is indeed some mighty fine looking Panthers, ain't they? Just gets me itching to re-paint all my my M1944 AT guns and crews.
-Mark 1
Difficile est, saturam non scribere.
"It is hard NOT to write satire." - Decimus Iunius Juvenalis, 1st Century AD

miffster
Posts: 55
Joined: Sun Jul 17, 2005 7:00 pm
Location: Chesterfield, UK

Post by miffster »

Thanks for the kind comments.

The "commander" figure is from the Afrika Korps artillery set, and the loading figure is the loader figure from the German artillery crew set. The commander was just chopped off at the ankle, painted and then glued in place using acrylic matte medium.

I drilled the hatch out all the way through to make sure he'd fit. It doesn't show on the photos but drilled the hatch on the back of the turret out, and up from the bottom of the turret to give the impression of the thickness of the turret wall. I was hoping to get elements of another figure inside to be receiving the round.

To make the loader I just filed down the based untile it was thin enough to peel away from the boots, and then gently bent his feet up to make him look like he is kneeling. I put a sort of slant in to his hips to simulate the weight of the round in his hands. It doesn't show too well on the photos, but he leans towards the camera very slightly in the second picture. Its a small thing, but makes him look much more lifelike. The only thing I should have done with him is put the heels back onto his boots, but I have to go back to work tomorrow and was in a rush to get these finished! He was also stuck in place using matte medium.

I love this stuff. It dries completely matte, no matter how much you cut it - with water or isopropanol. I'm not sure that it would be strong enough for the gamers among you. As I have said before I make for static dsplay, so strength is secondary to looks to me. It allowsyou to paint seperate elements in their entirety and then stick them anywhere you like to other finished pieces with no chance of glossing up or the nasty oxidised white that comes from cyano ruining any finishes.

I really like the artillery sets as potential figures for conversions. Not having the weapons in their hands really opens up the scope. They are great for the diorama builder looking for infantry " at their ease". Just mooching, chatting, smoking etc. These two panzers are the nucleus for a re-arming diorama and these figures allow for chaps just going about their business. Most of the figures on each sprue are even laid out something like the Da Vinci (?) man ready to be animated. I love 'em.

I do have one question regarding all the tools, and especially the fire extinguisher. What colours are they?? I think I have found the wooden jacking block on the white wash panther (haven't painted it on the grey yet) and I have left the rest panzer grey. Is this right? I have many photos of panthers in action, plans and even a few colour plates, but nothing really definitive. All comments gratefully received!!

Regards, and thanks again for the encouragement

Matt

jb
E5
Posts: 2160
Joined: Fri Mar 11, 2005 7:13 am
Location: Antananarivo

Post by jb »

Miffster,JOLLY GOOD SHOW,SA!
I can hardly wait to see more of your work!
John

pushbike
E5
Posts: 128
Joined: Sun Mar 13, 2005 5:20 am
Location: United Kingdom

Post by pushbike »

Hey Guys
Hope I am not boring you too much with this stuff,
But you know new camera new models ETC,


JSIIs with Airial regocniction marks on crop hex:

Image

Post Reply